One-Time Notification
One-Time Notification (OTN) provides business the flexibility to broadcast any contents to the users as long as it is complied with the community standards and the users have opted-in to receive the broadcast message.
Expected Outcome
User triggers the OTN flow [First Outcome].
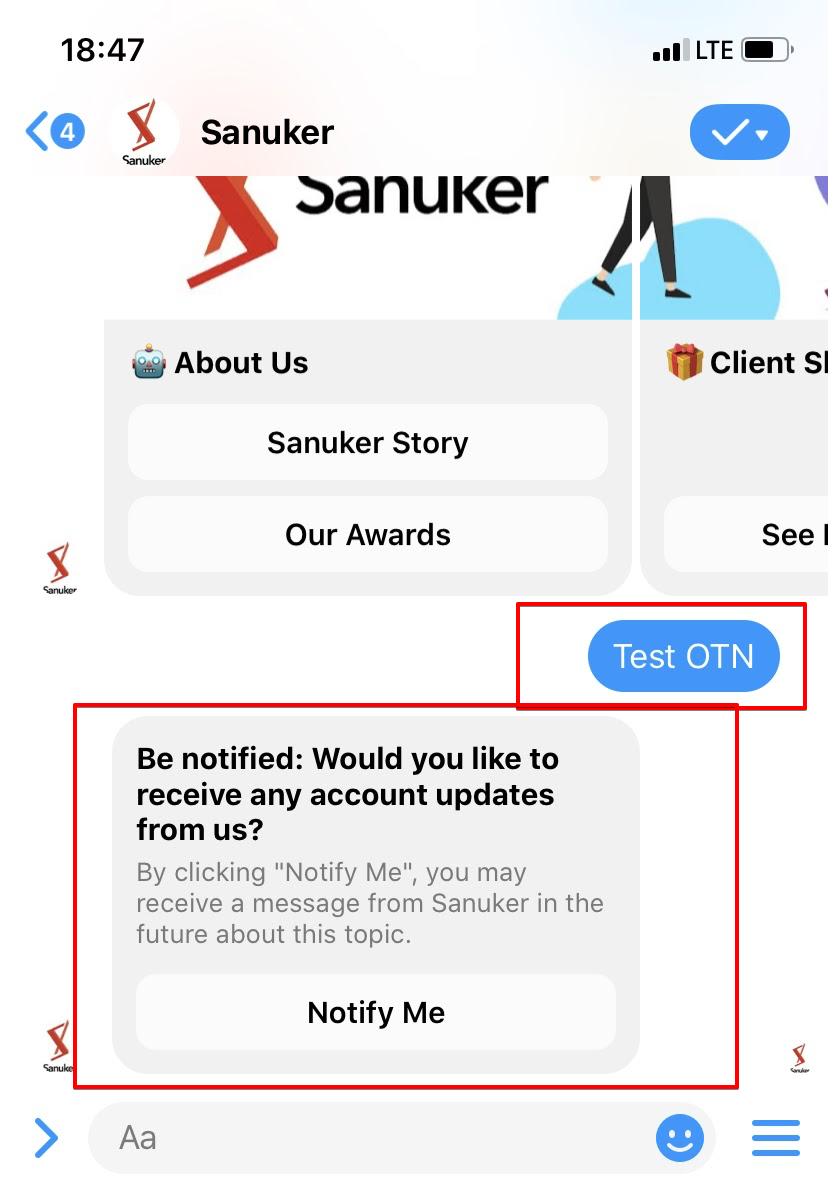
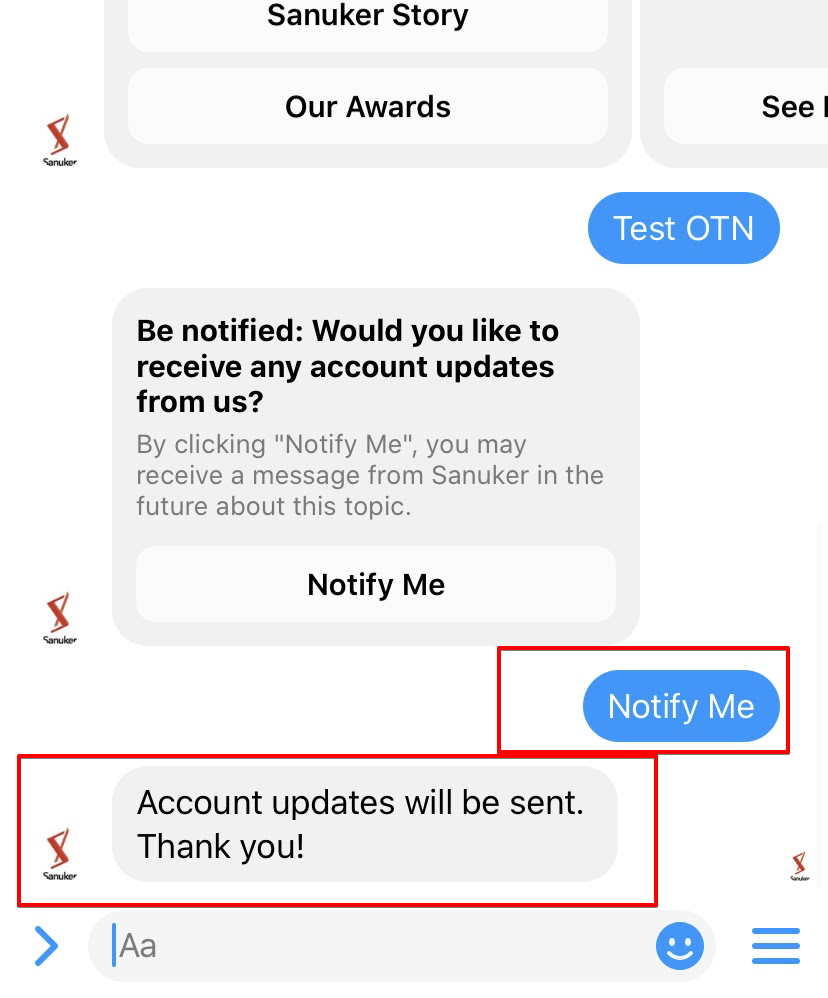
User agrees to receive account updates via one-time notification [Second Outcome].
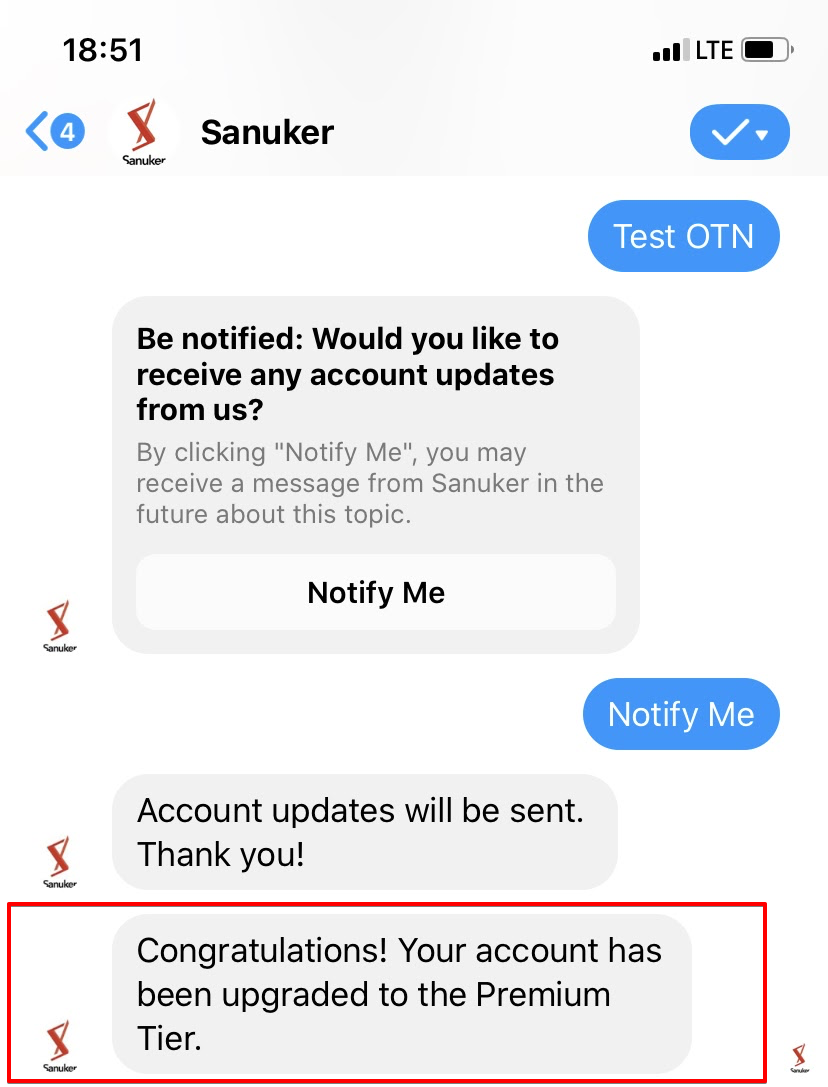
A few days later, an account update is sent to the user [Third Outcome].
Apply for OTN on Facebook Page
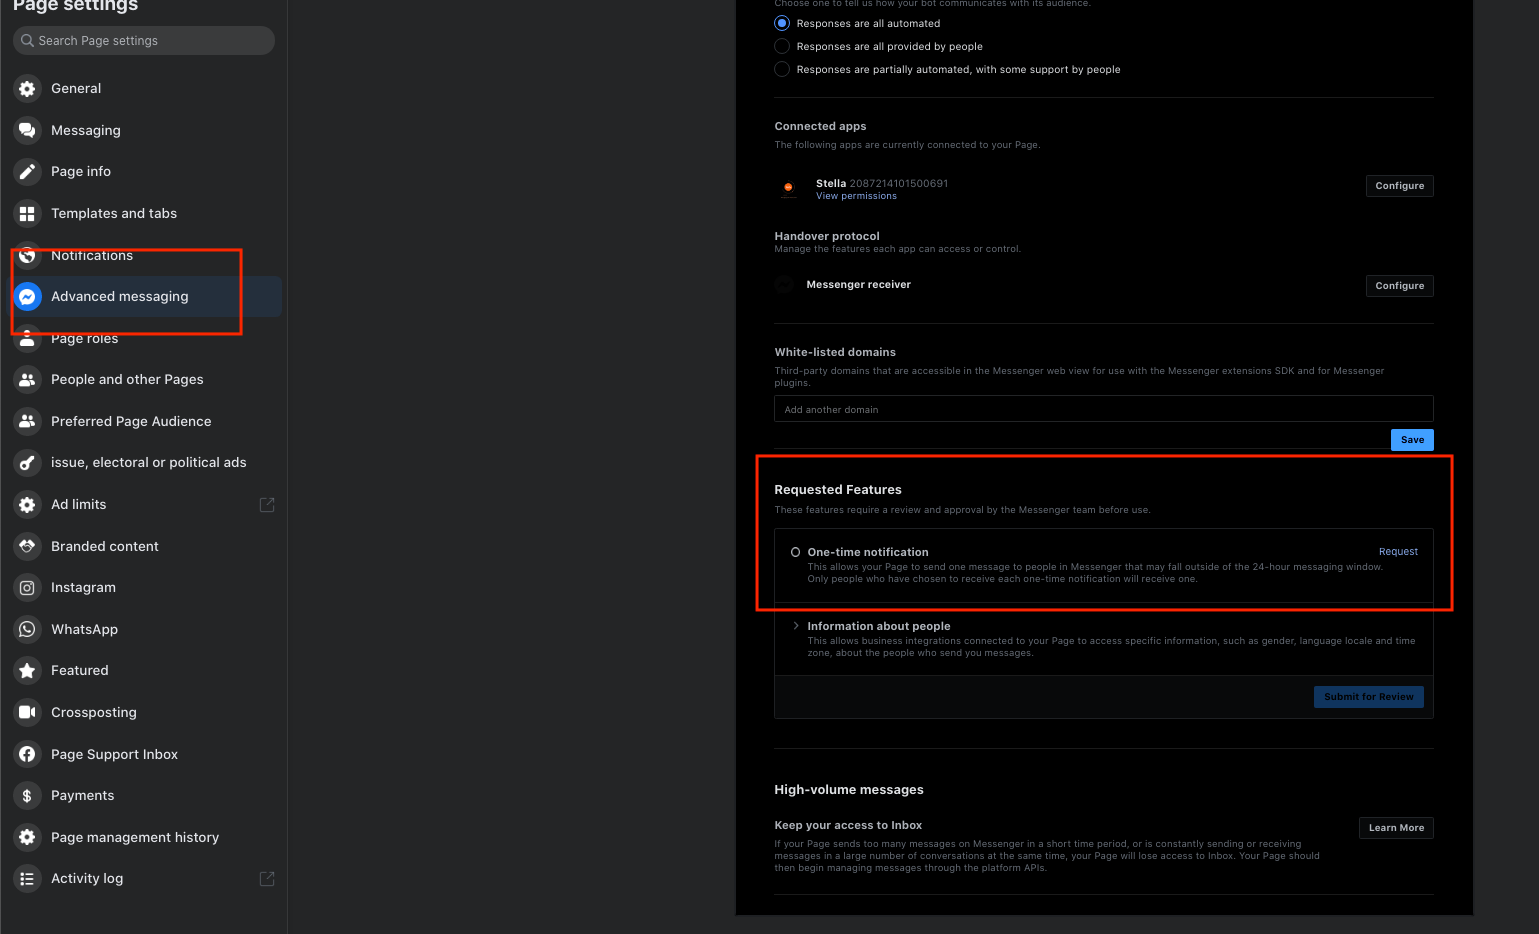
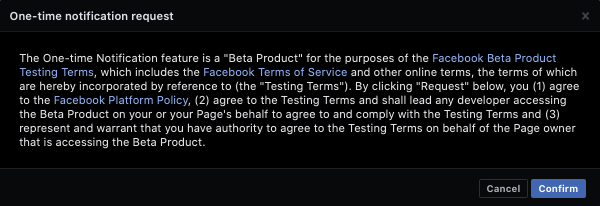
Before building the flow in WOZTELL, businesses are required to apply for this feature in their Facebook page:
- Open your Facebook Page Settings and head to "Advanced messaging".
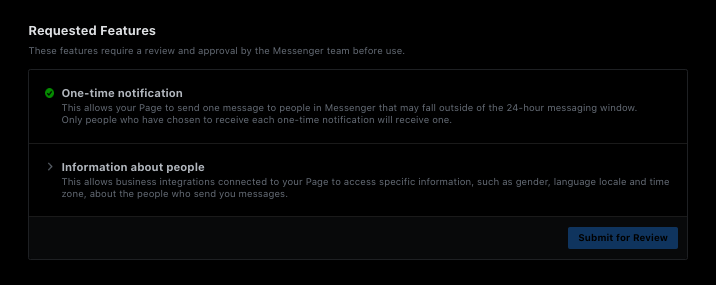
- Scroll down to locate "Requested Features".
- "Request" for "One-time notification".
- Select "Confirm" for the request.
- You should see a green tick next to "One-time notification".
Sample Chatbot Structure
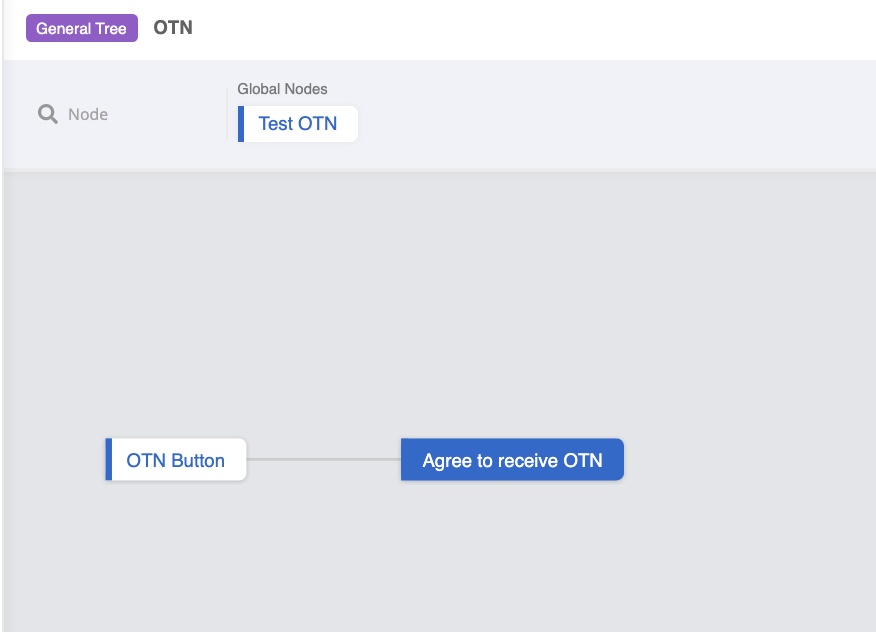
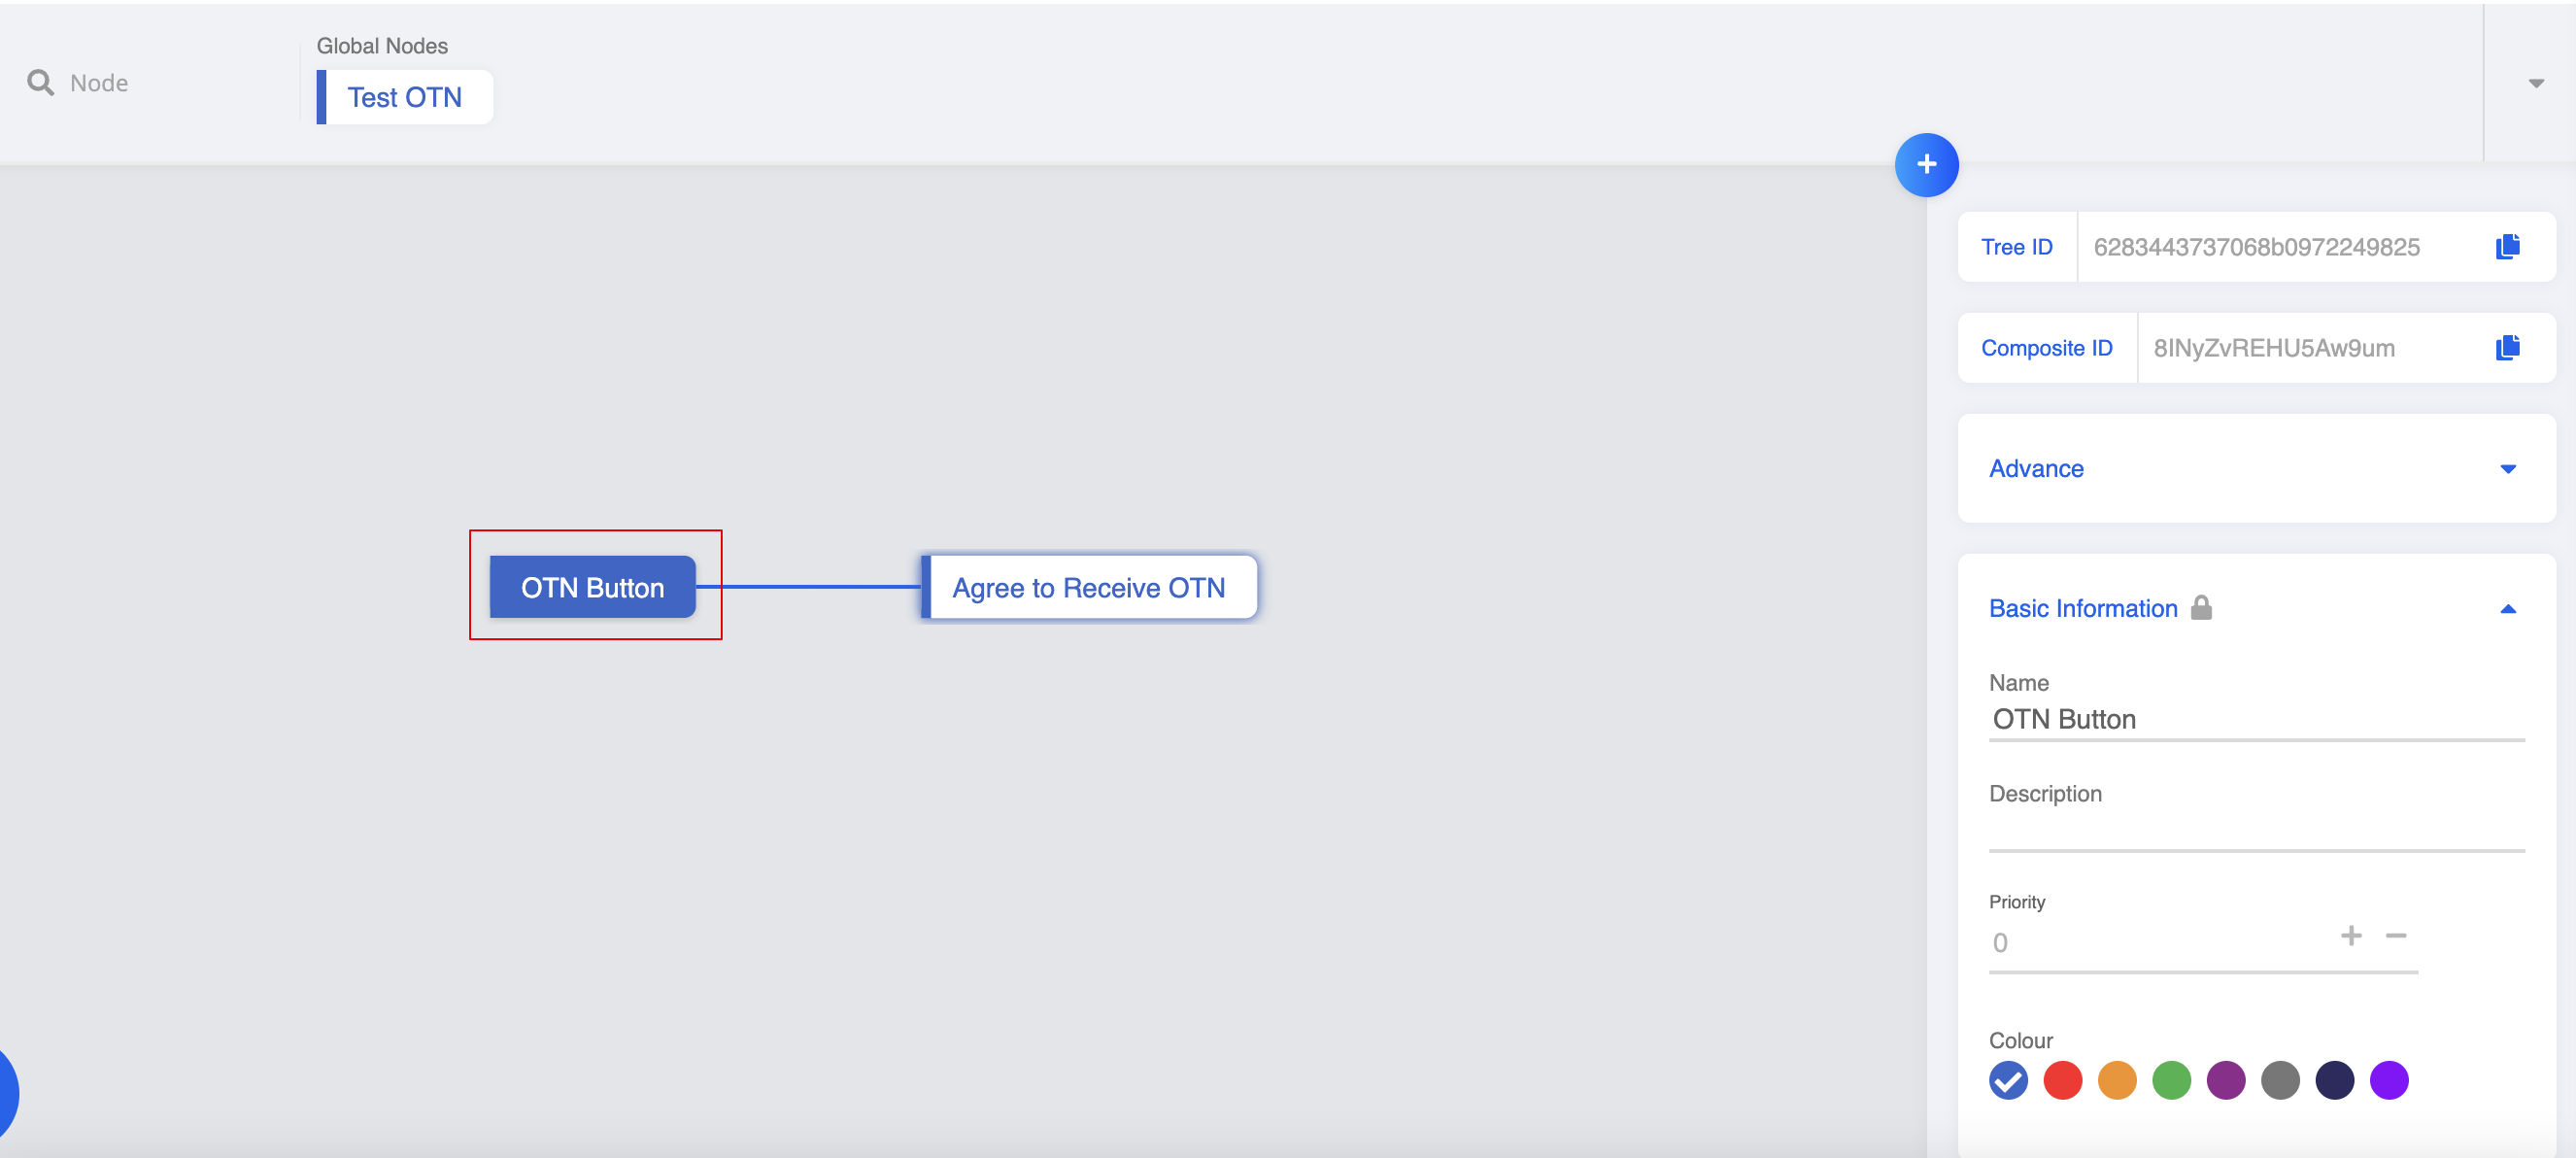
OTN Button
Now, we can start building the OTN flow in WOZTELL:
Create a chatbot in bot builder.
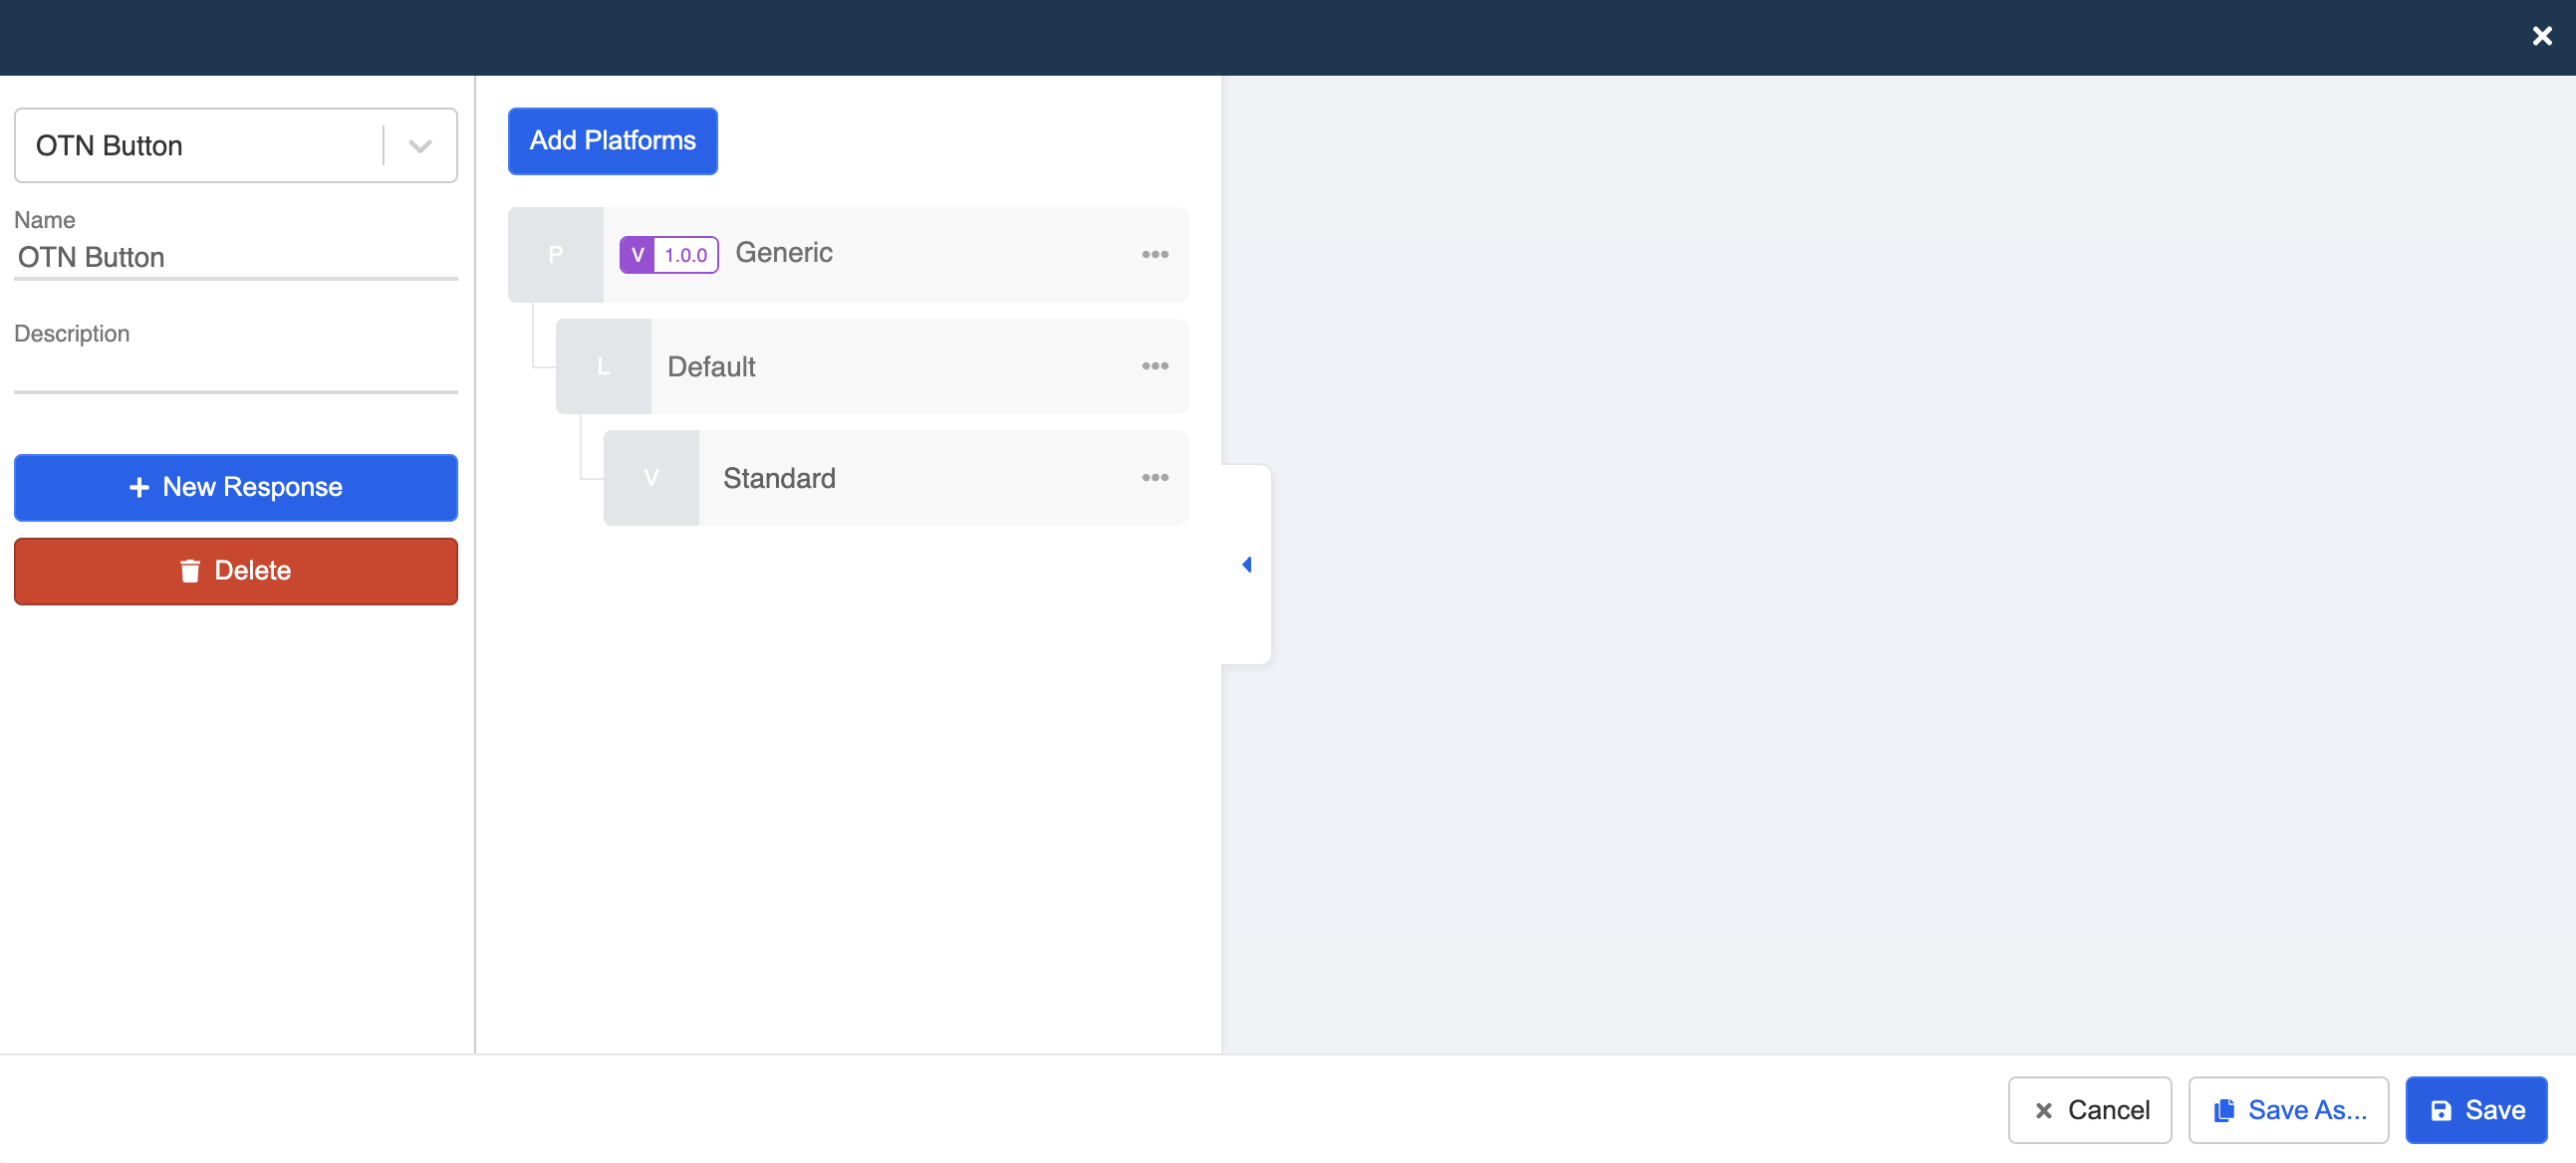
Create a General Node and name it as "OTN Button".
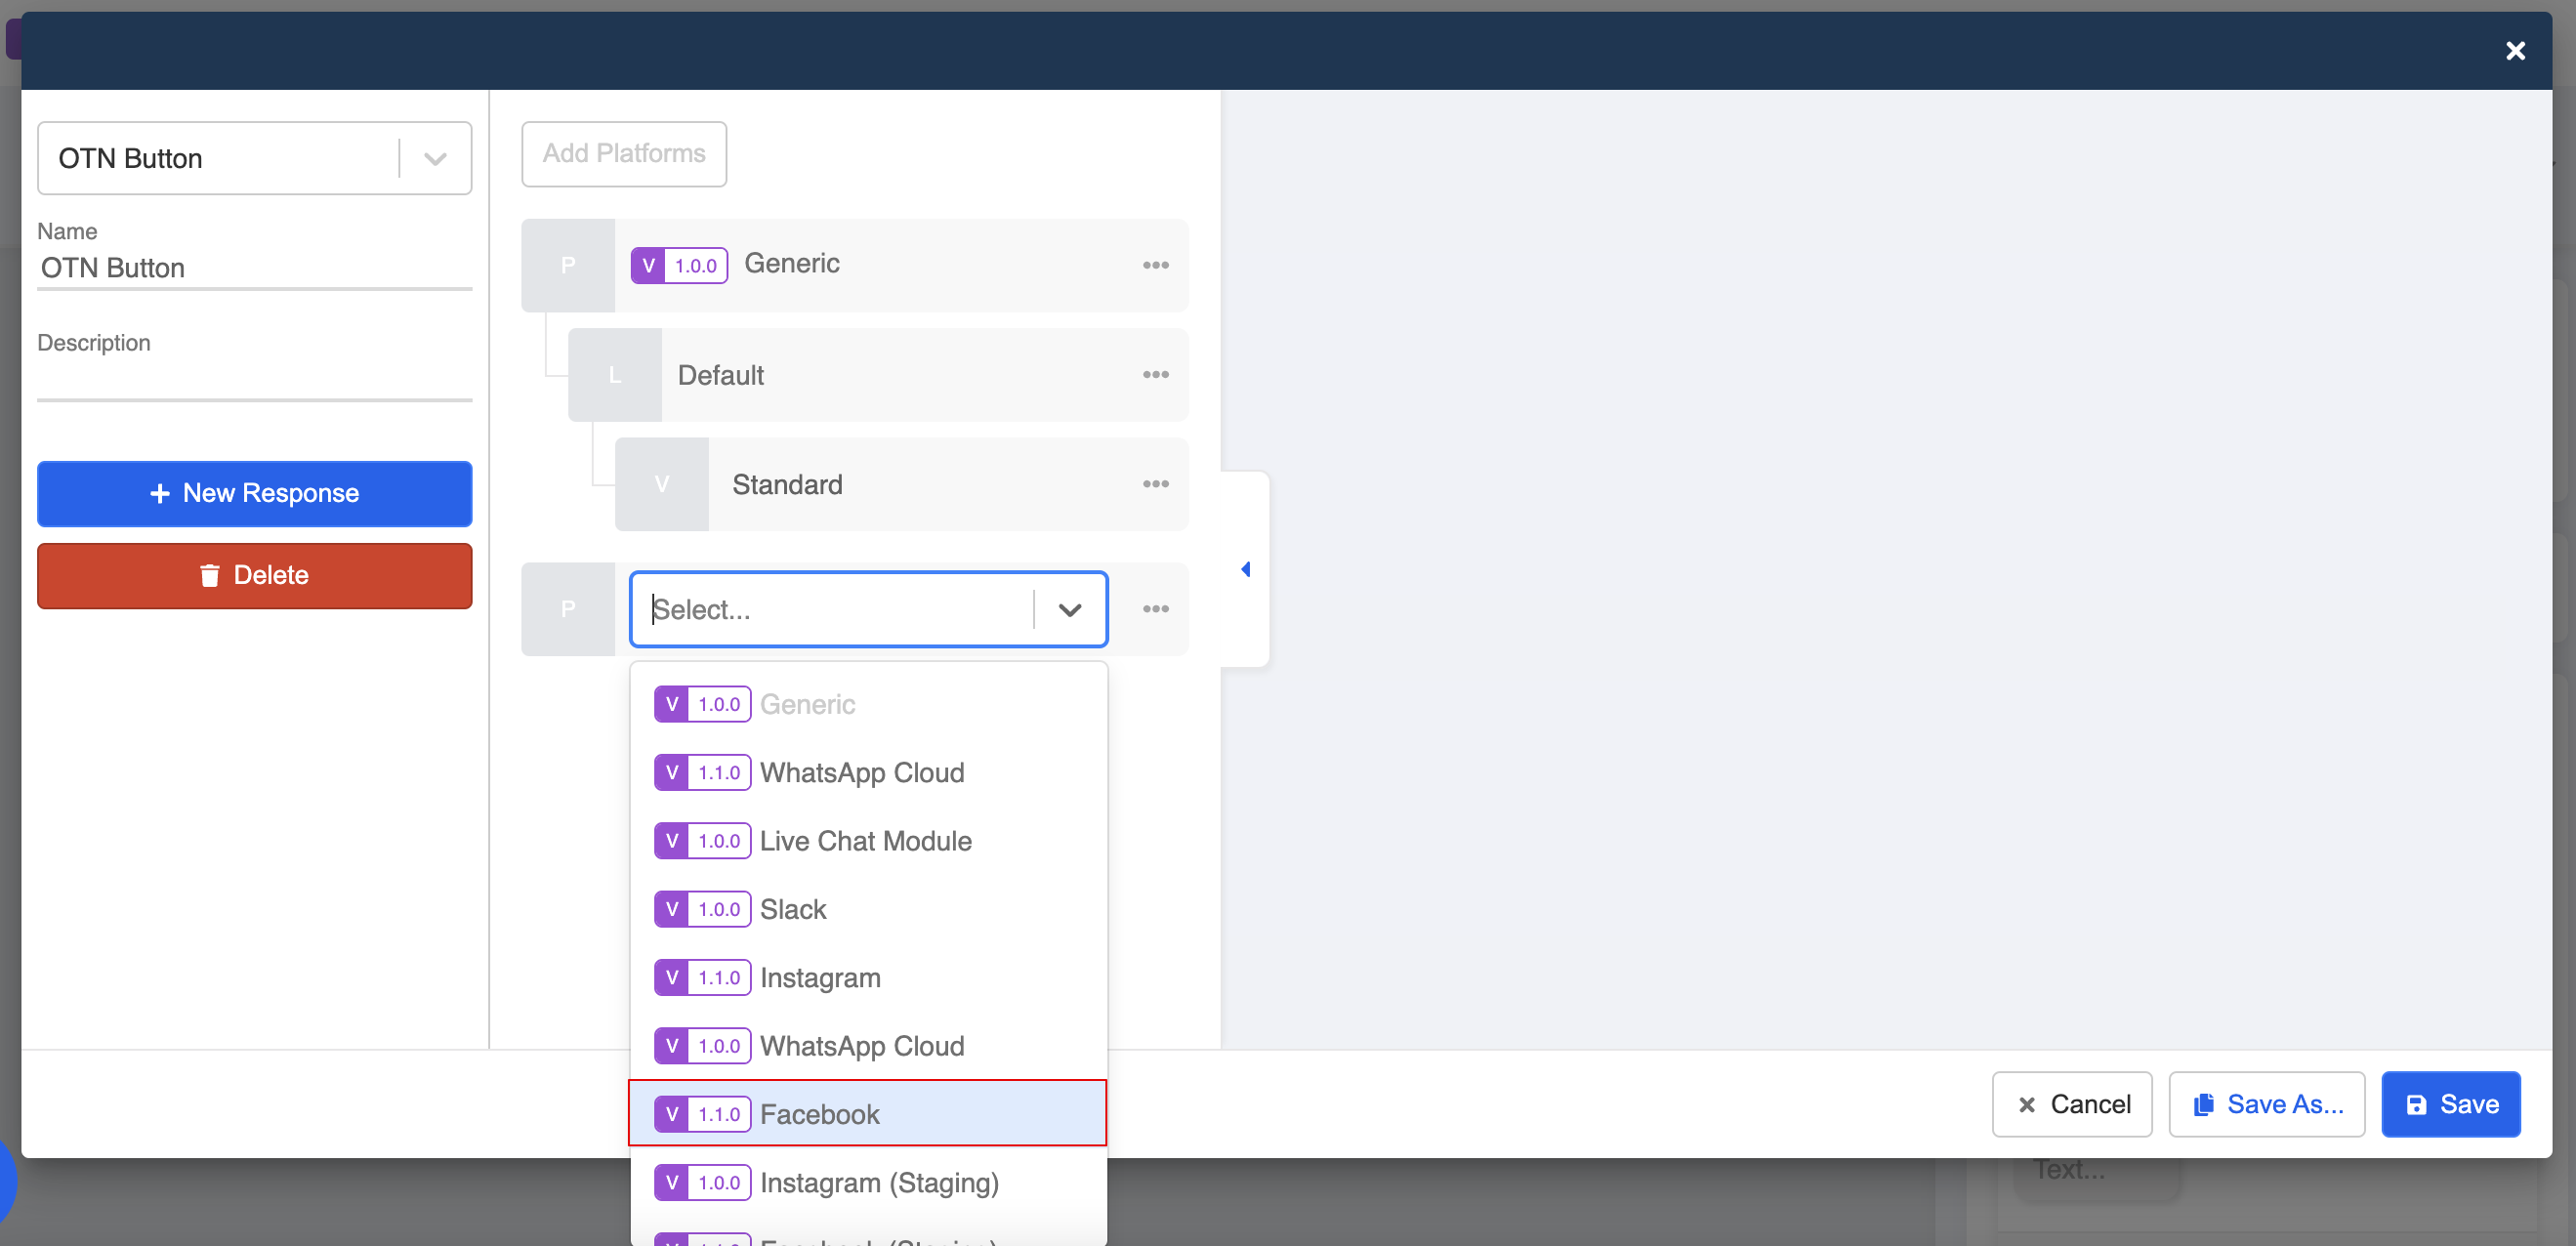
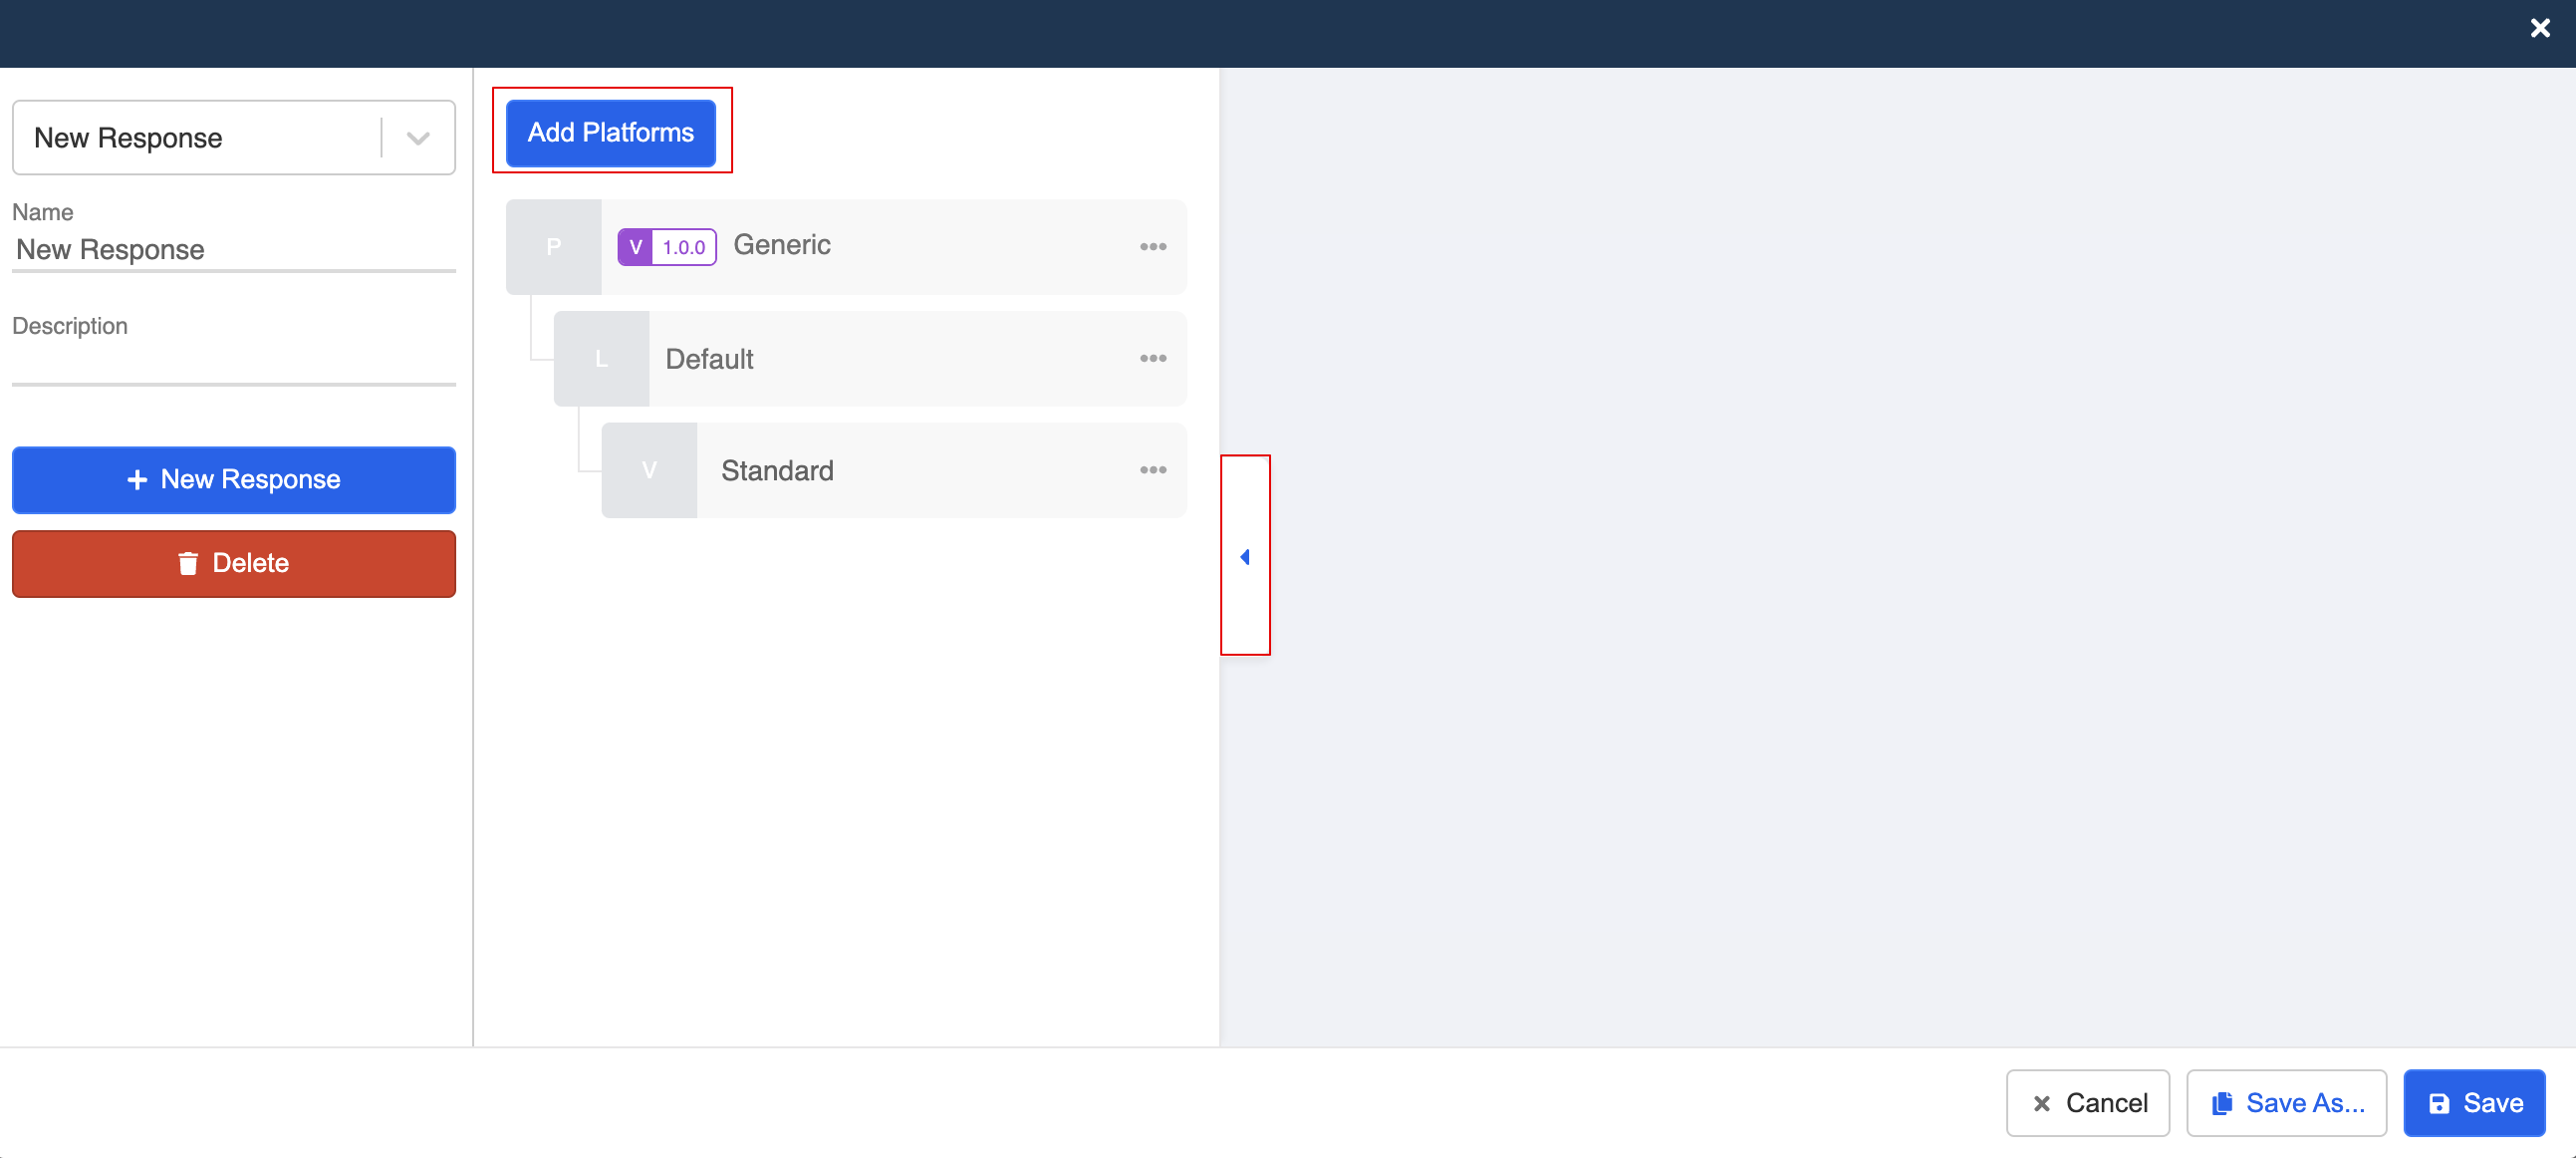
- Create a new response for setting up the OTN Button. Open the platform tab and select "Add Platform".
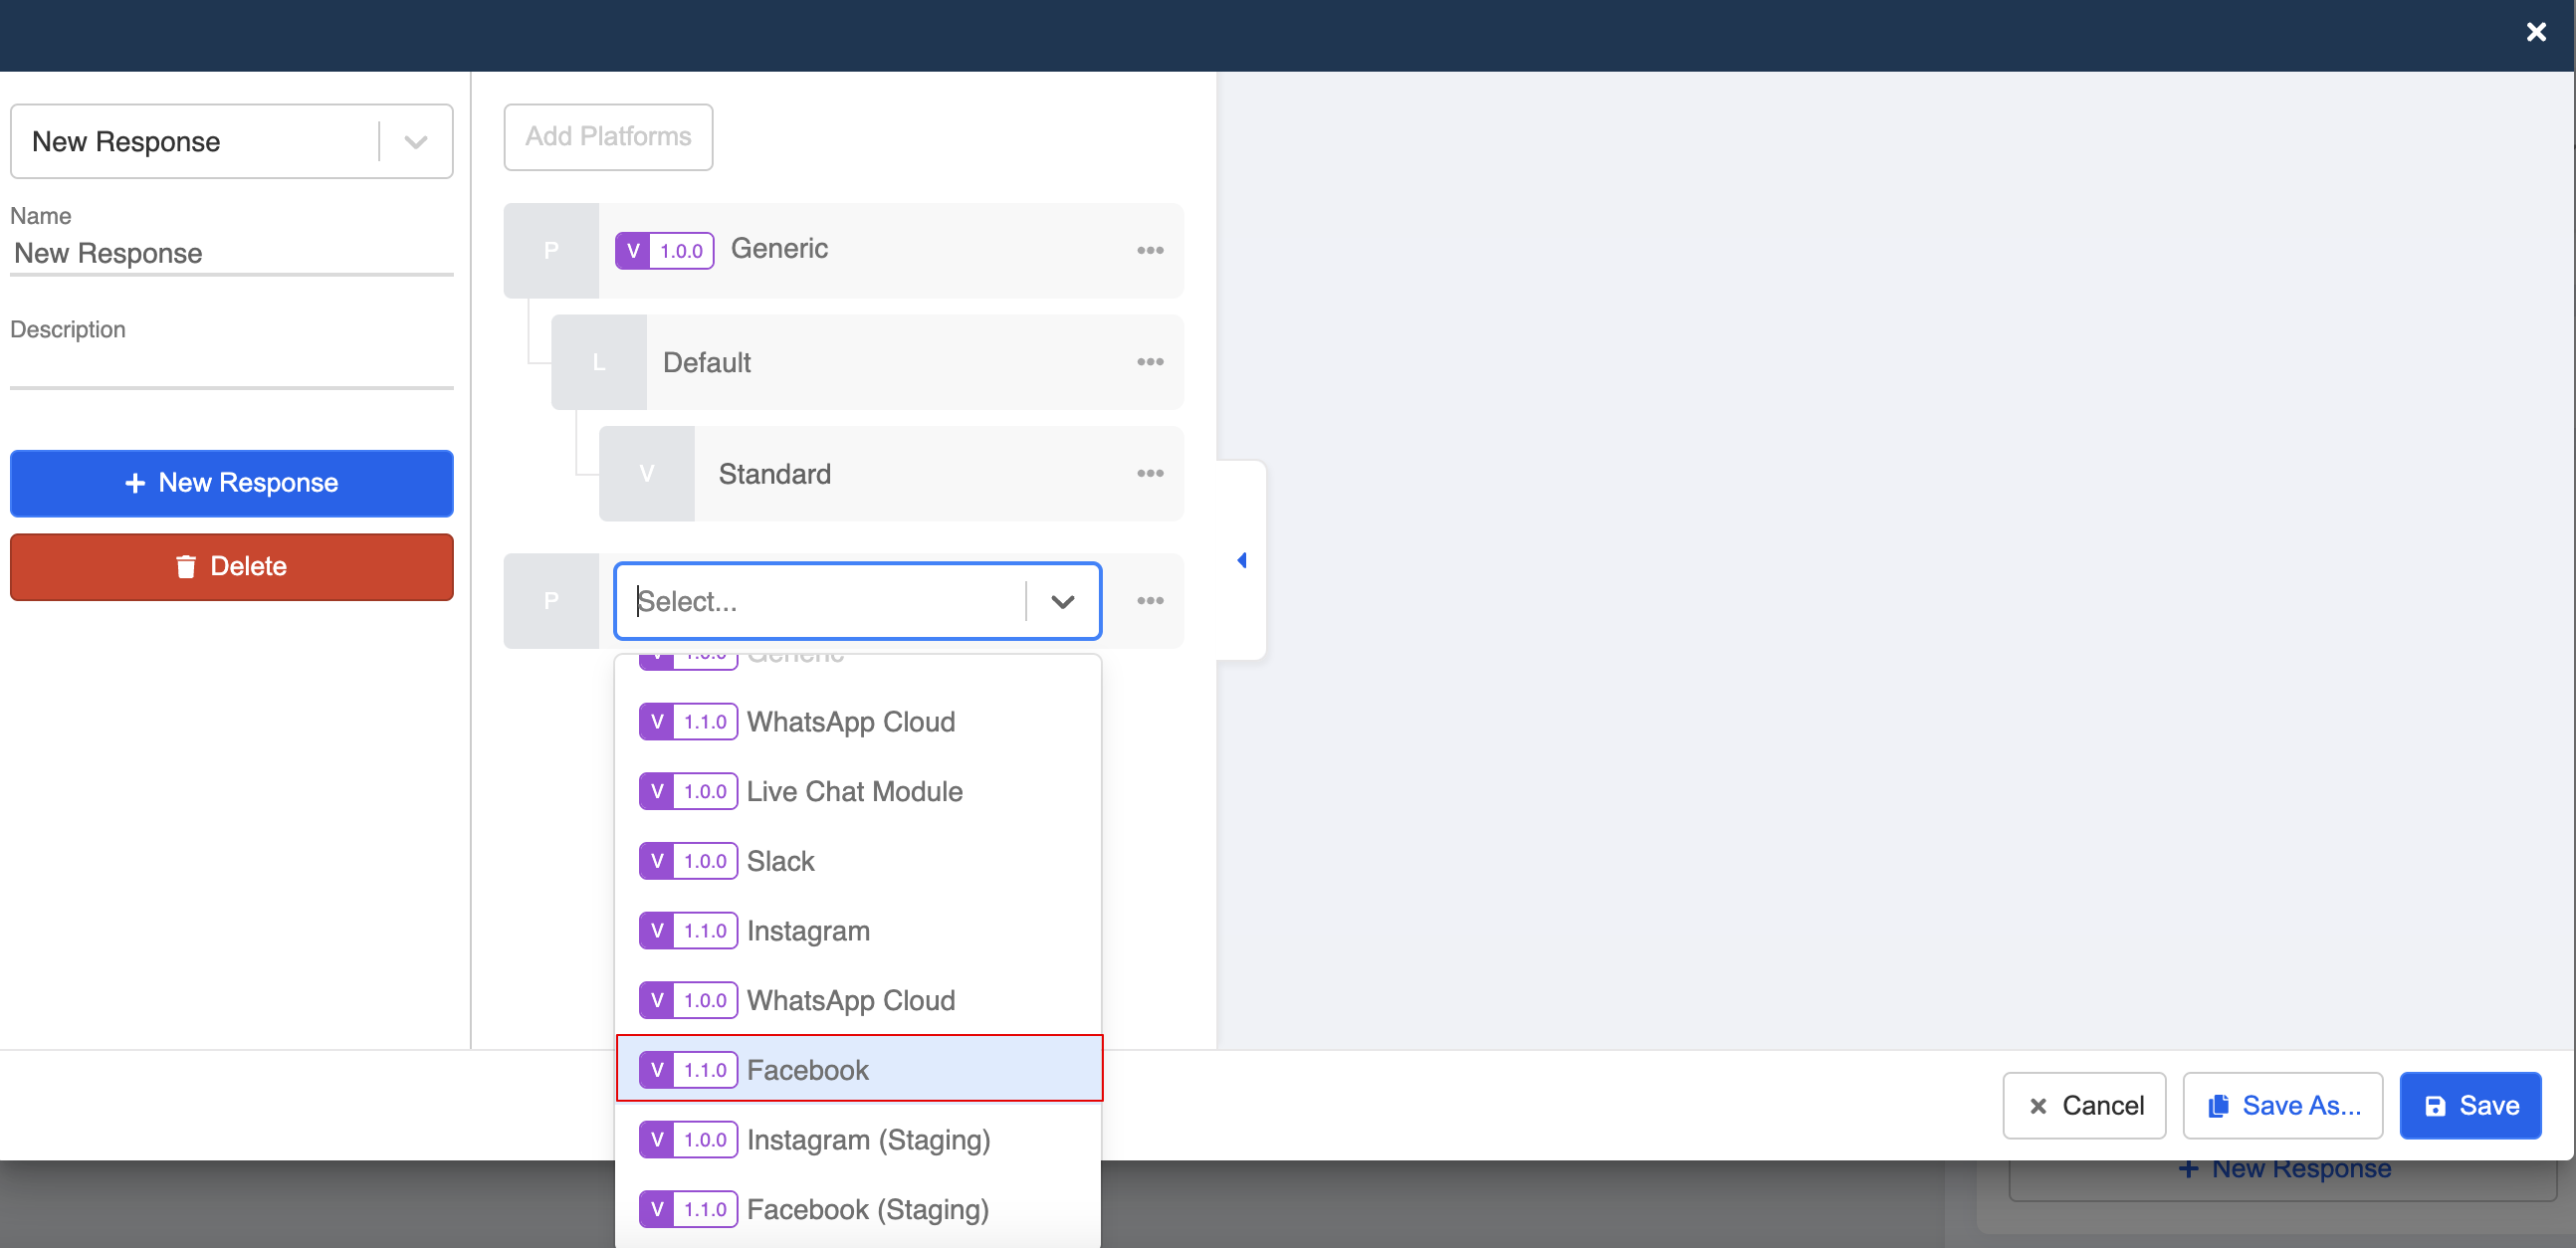
- Select "Facebook" as the platform.
tip
OTN is supported in Integration Version v1.1.0
- Select "One-time Notification" as the response type.
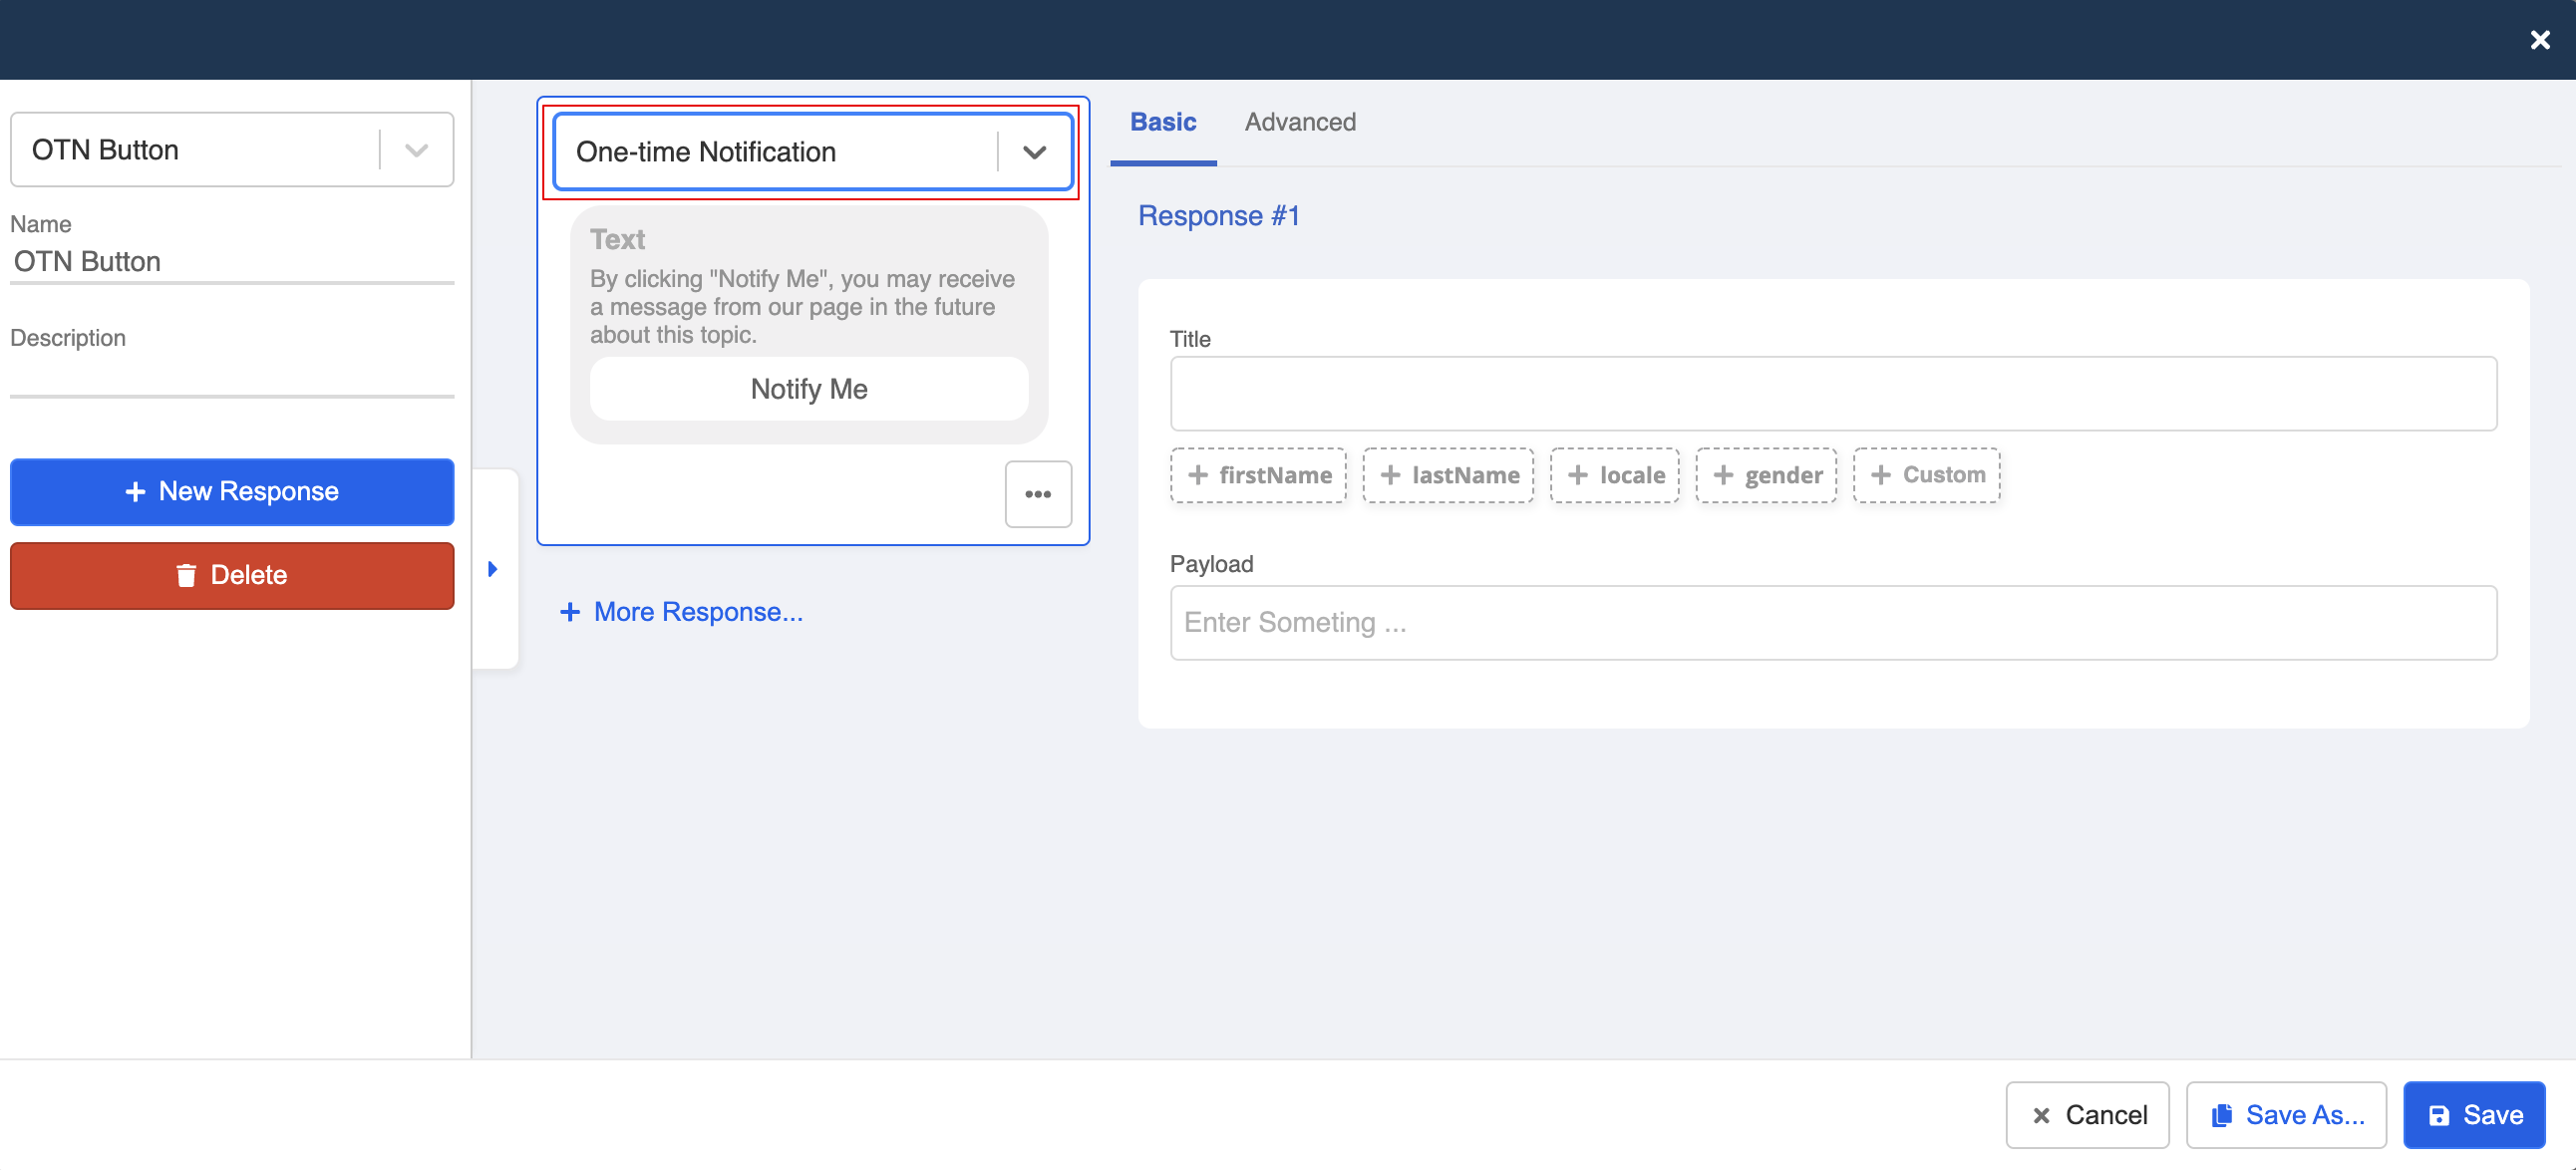
- Enter the text and a case-sensitive payload for the OTN button.
tip
Please note that title field has a character limit of 65 characters.
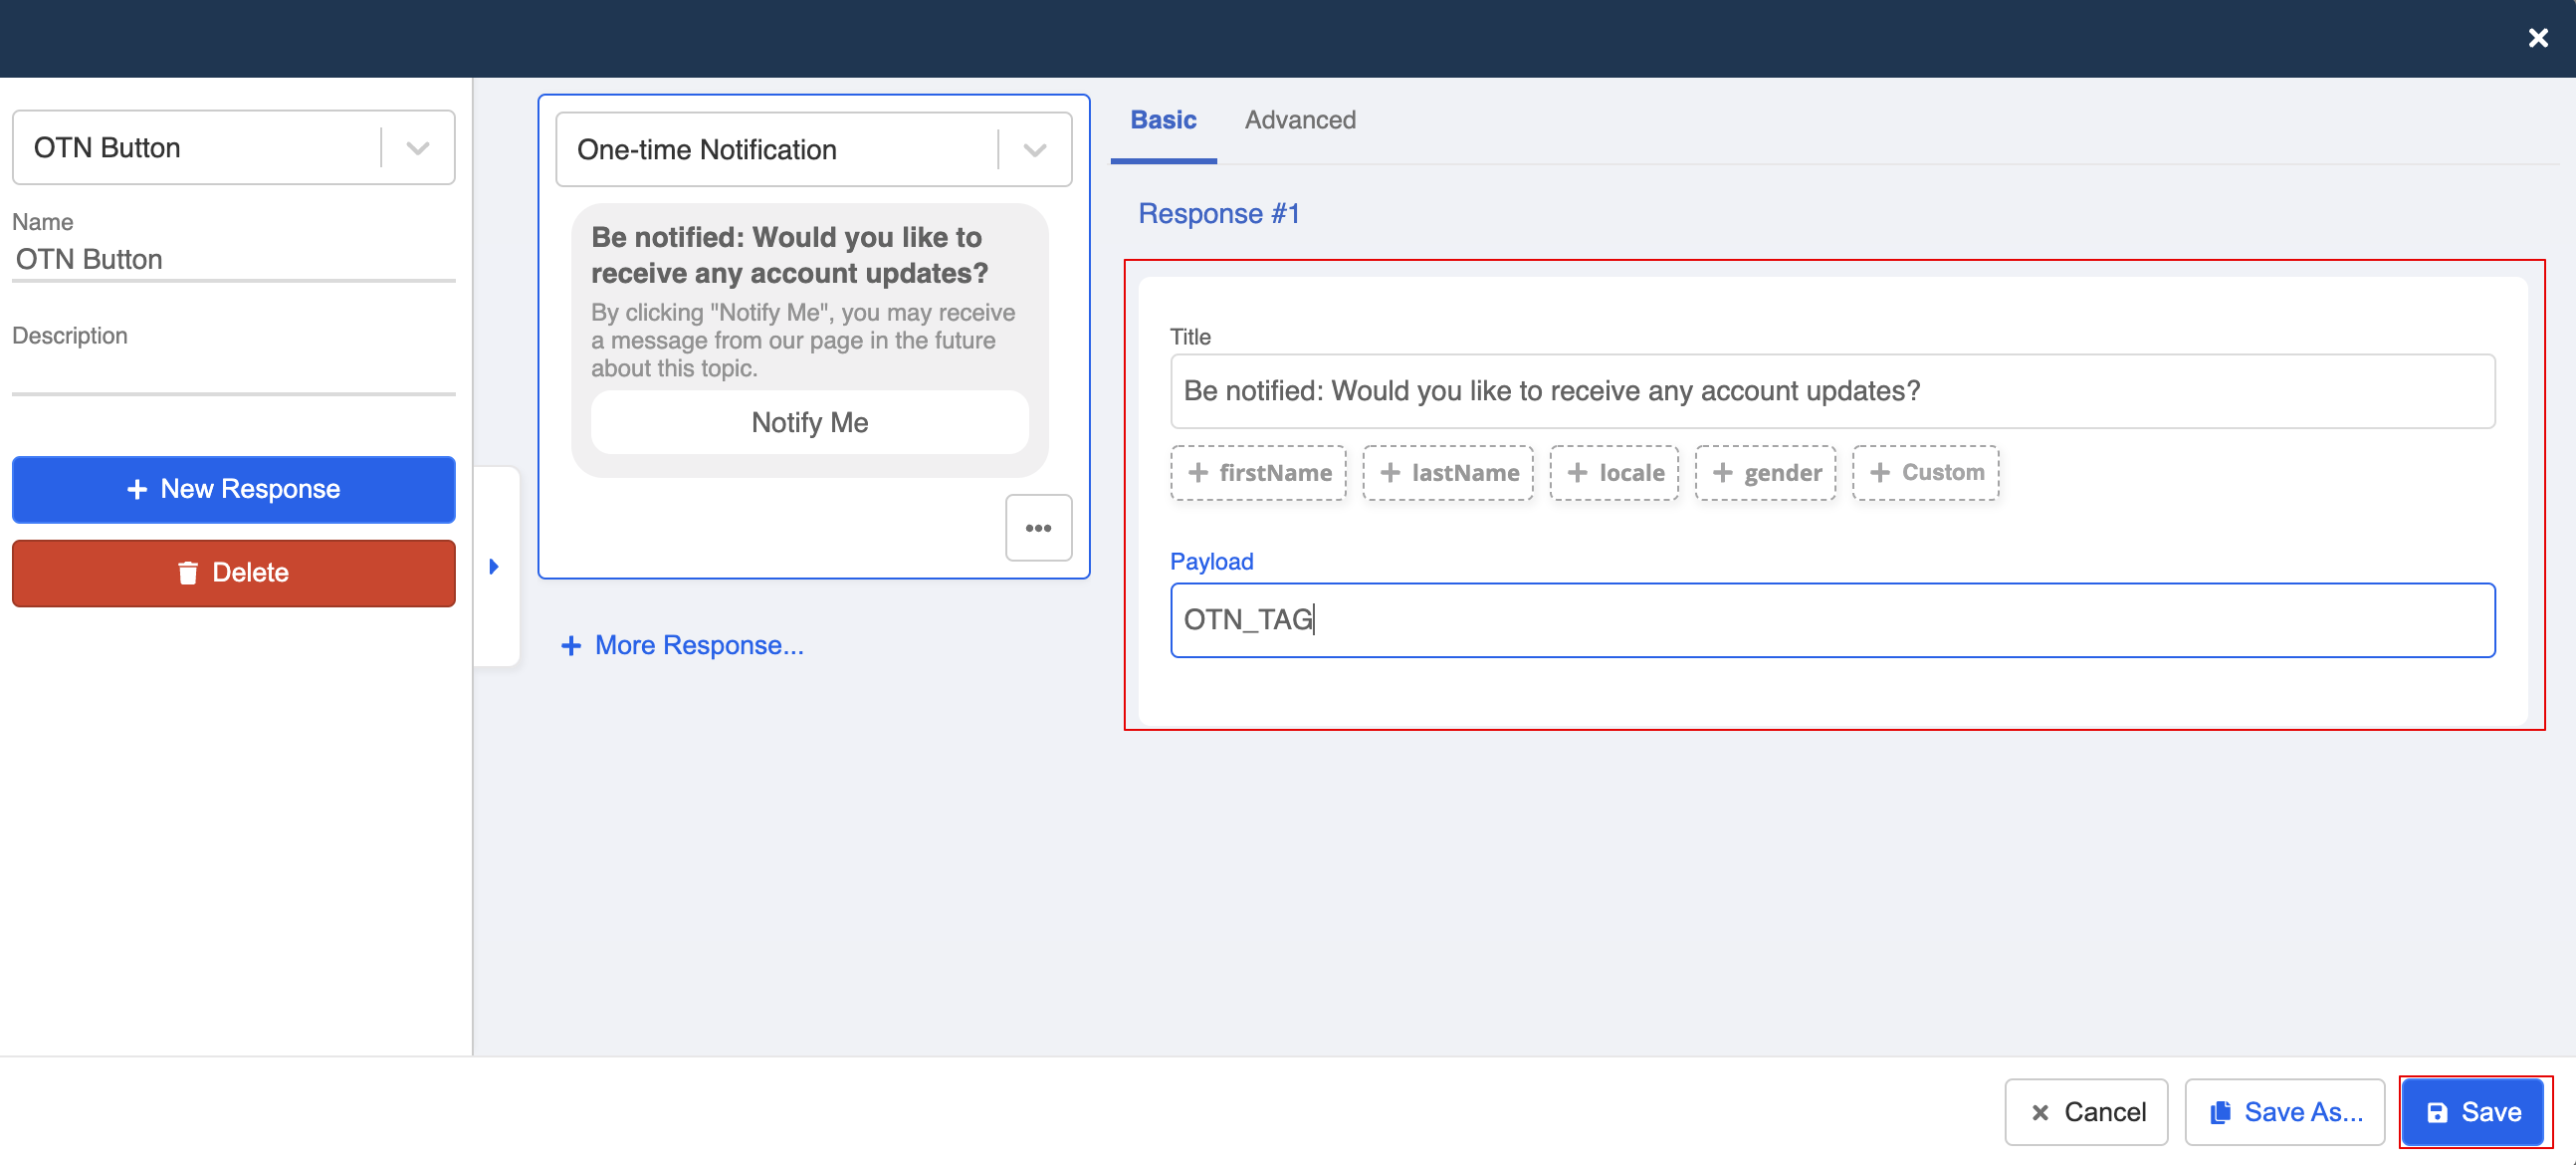
- Save the response and the General Node.
Agree to Receive OTN
- Select the "OTN Button" General Node. Then, create another General Node and name it as "Agree to Receive OTN".
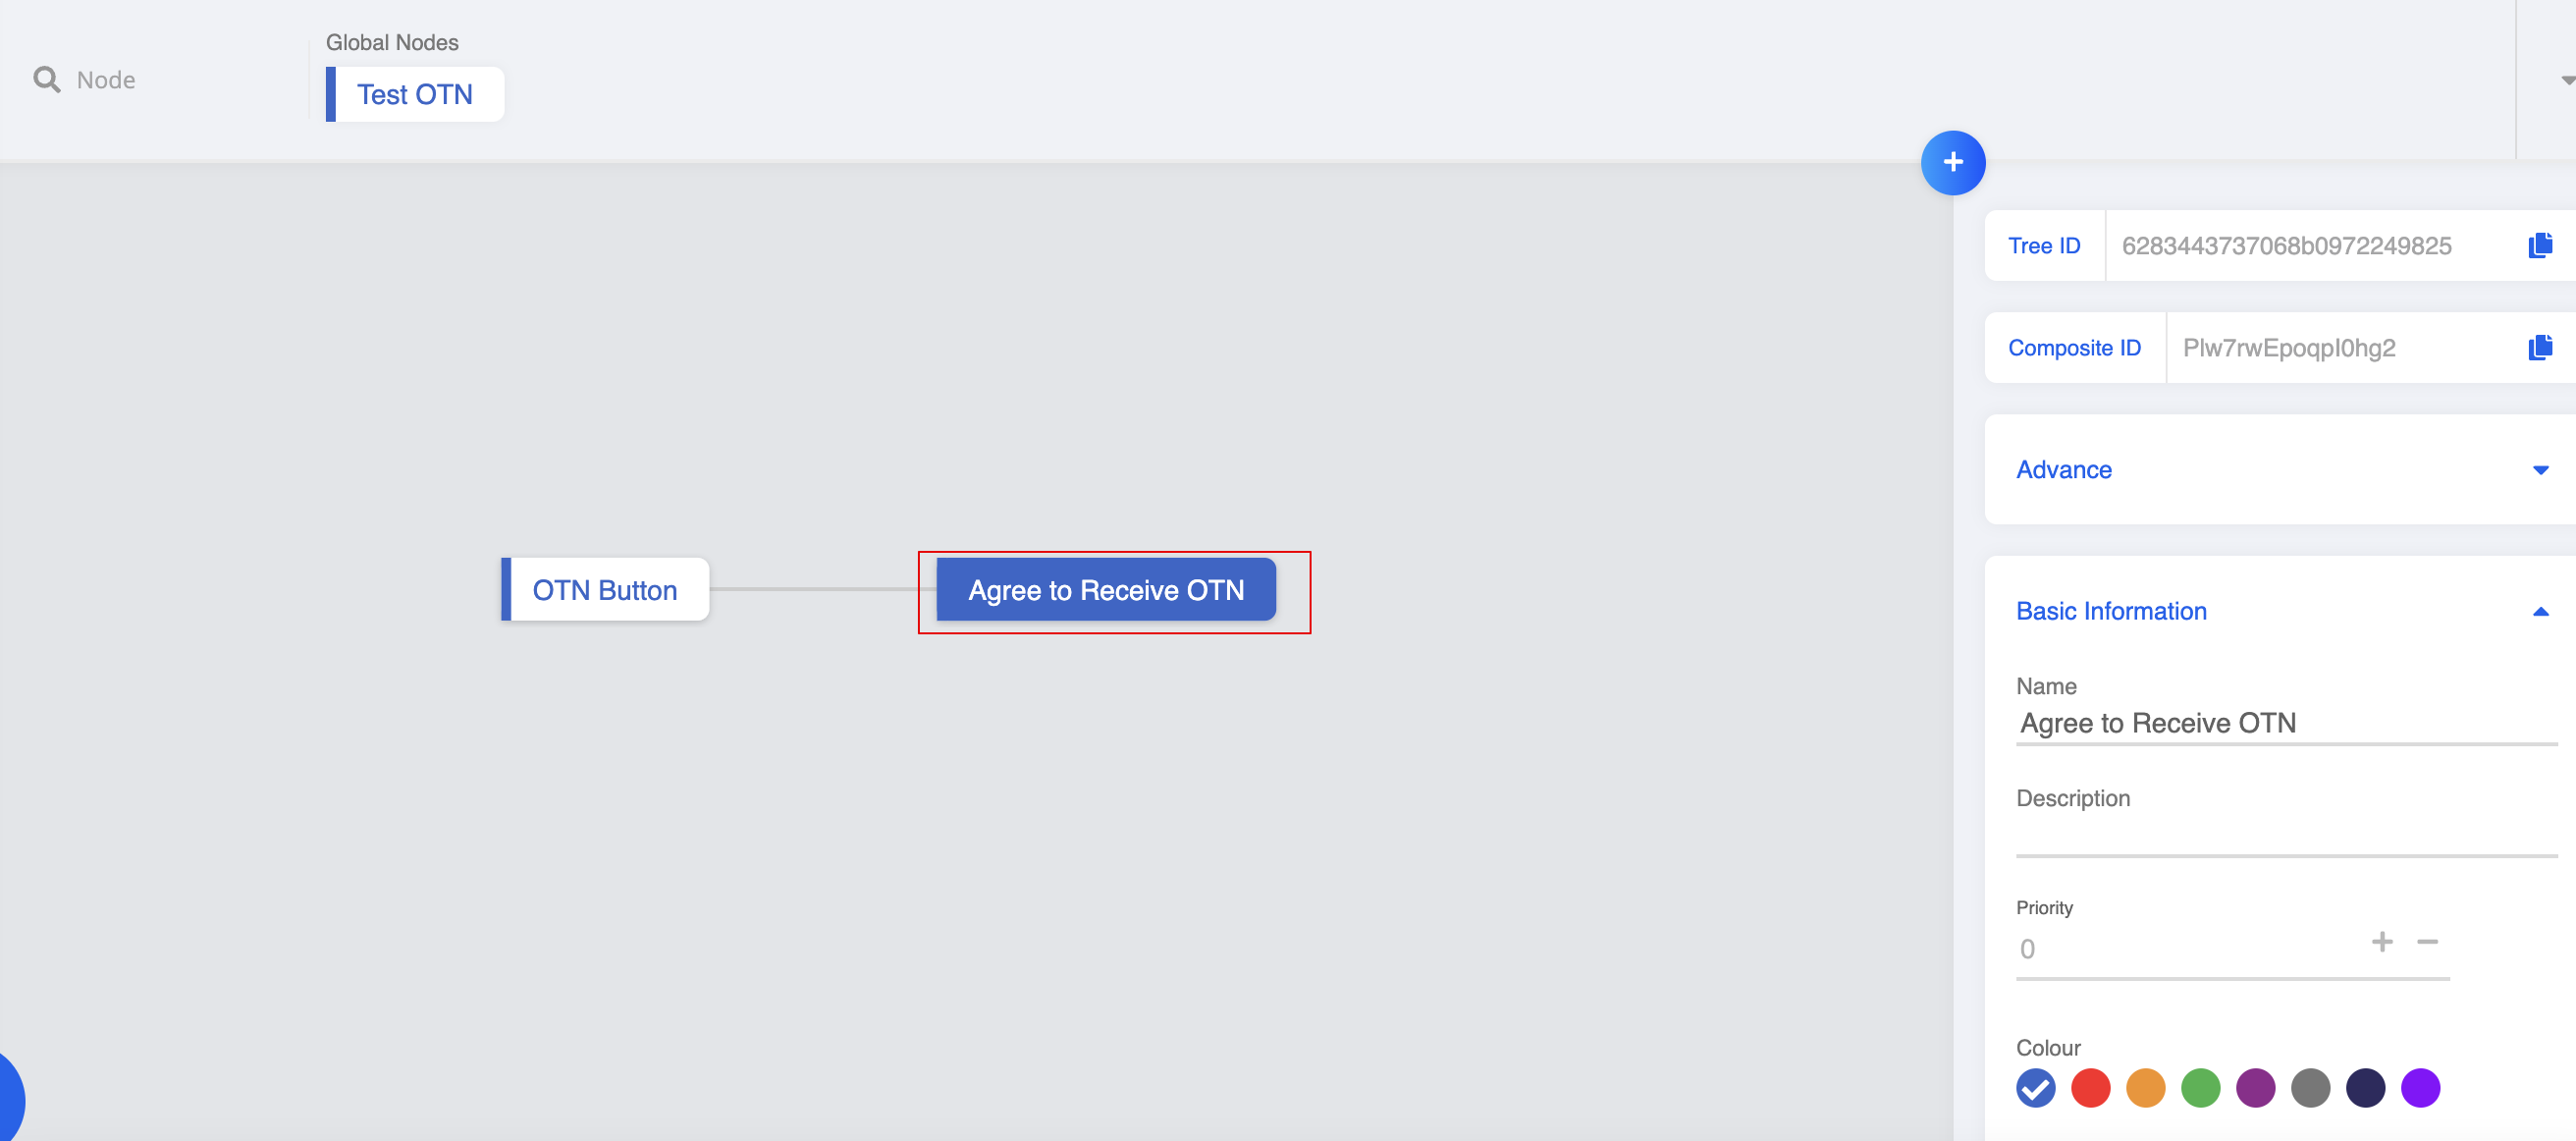
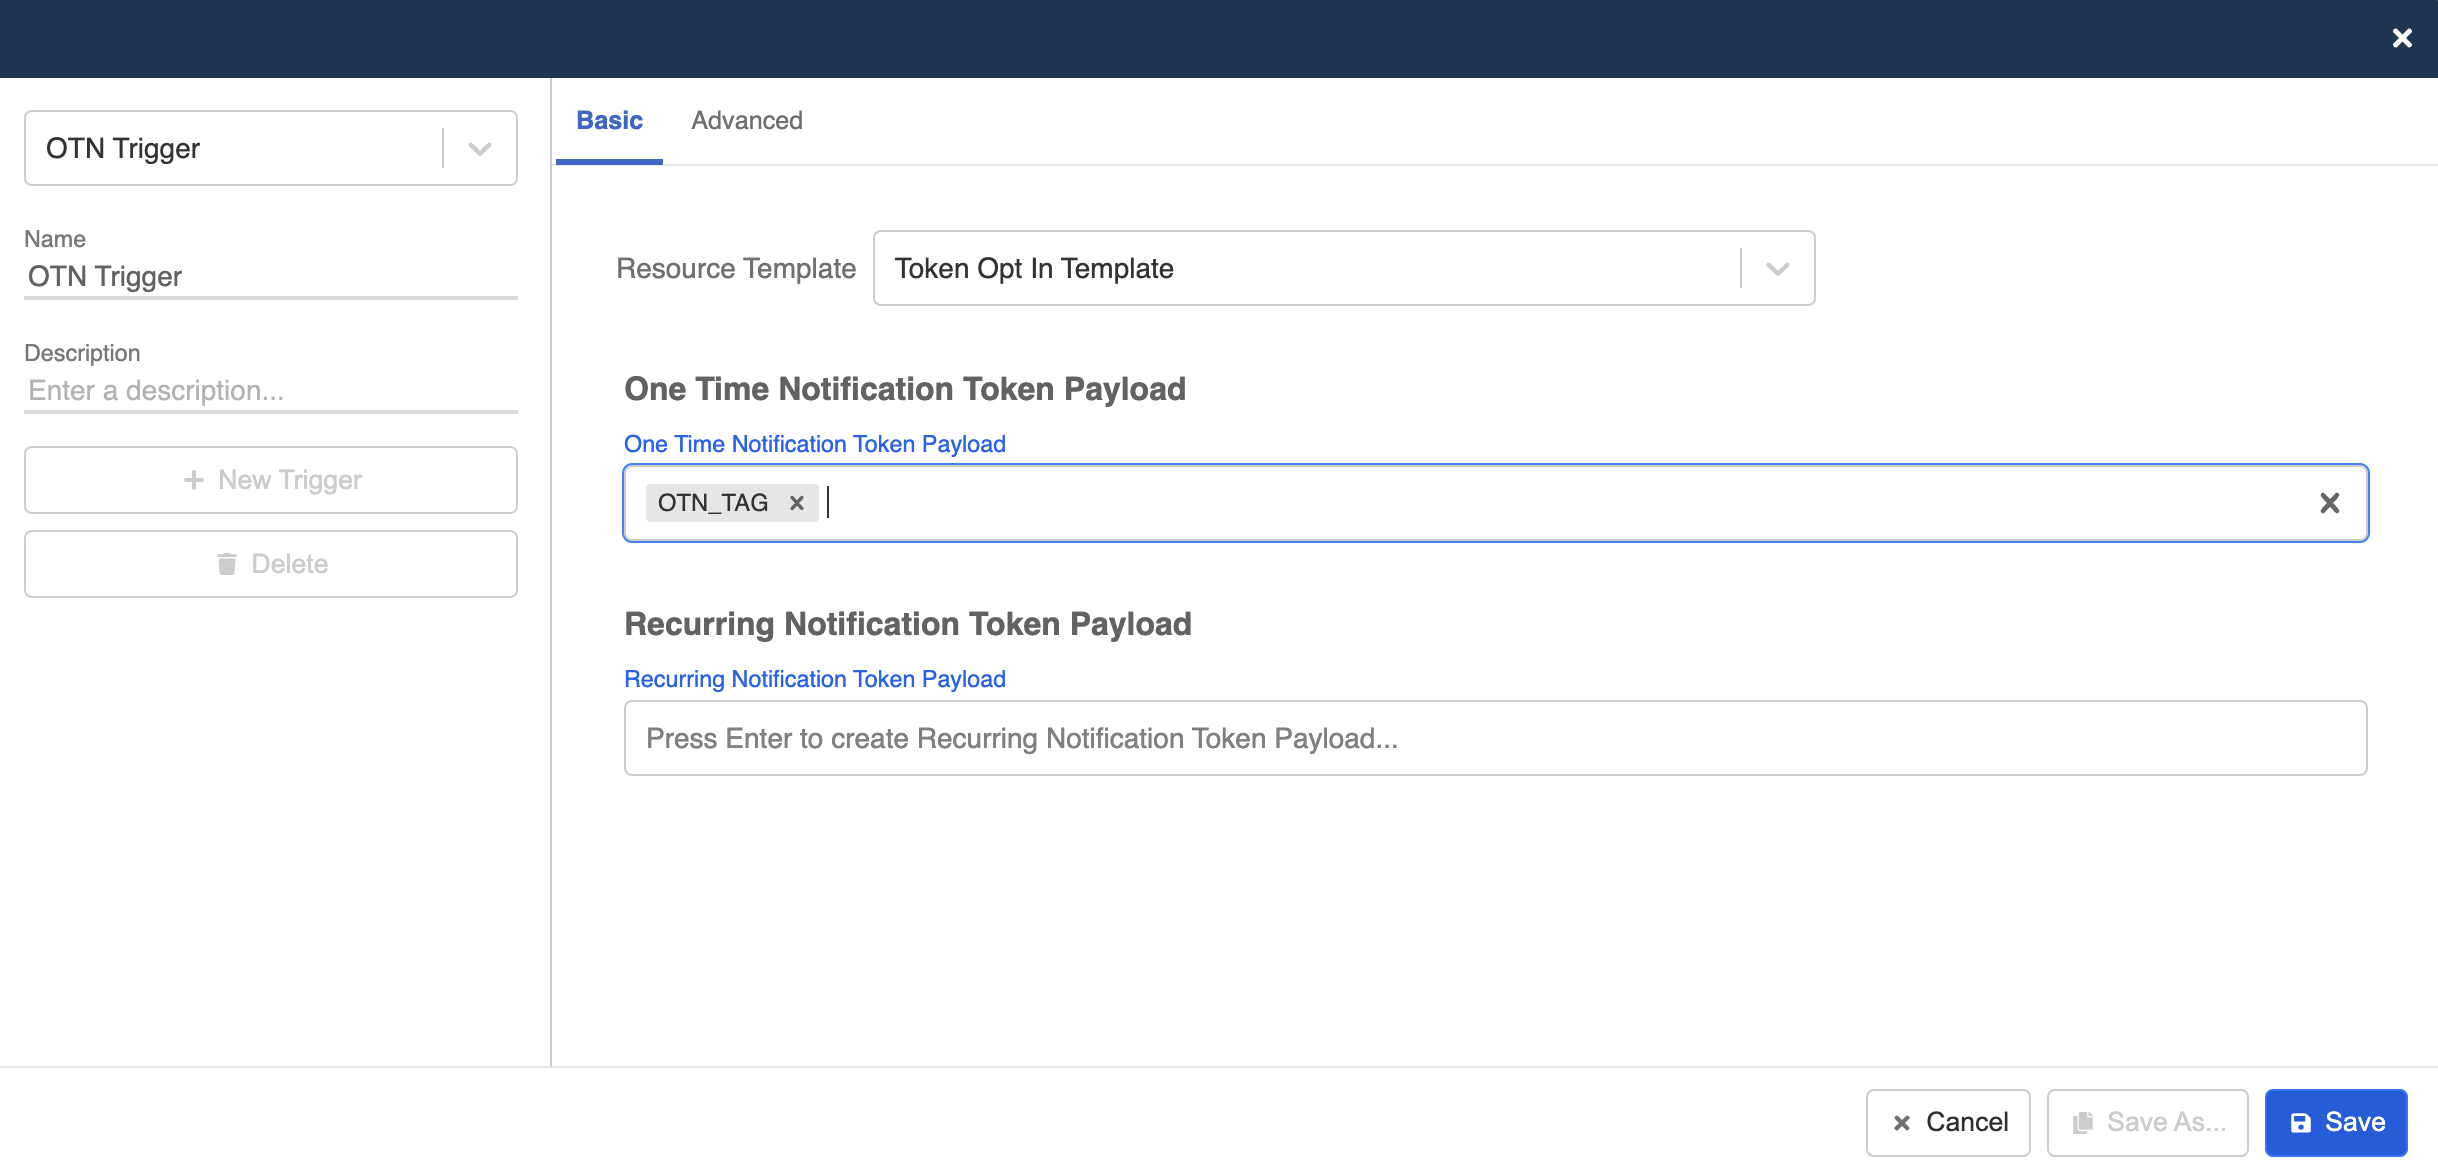
- Create a new trigger and select "Token Opt-in Template", enter the trigger that matches with the payload of the OTN button.
- Now create a new response. Open the platform tab and select "Add Platform".
- Select "Facebook" as the platform.
- Create a text response for users who have agreed to receive OTN from you.
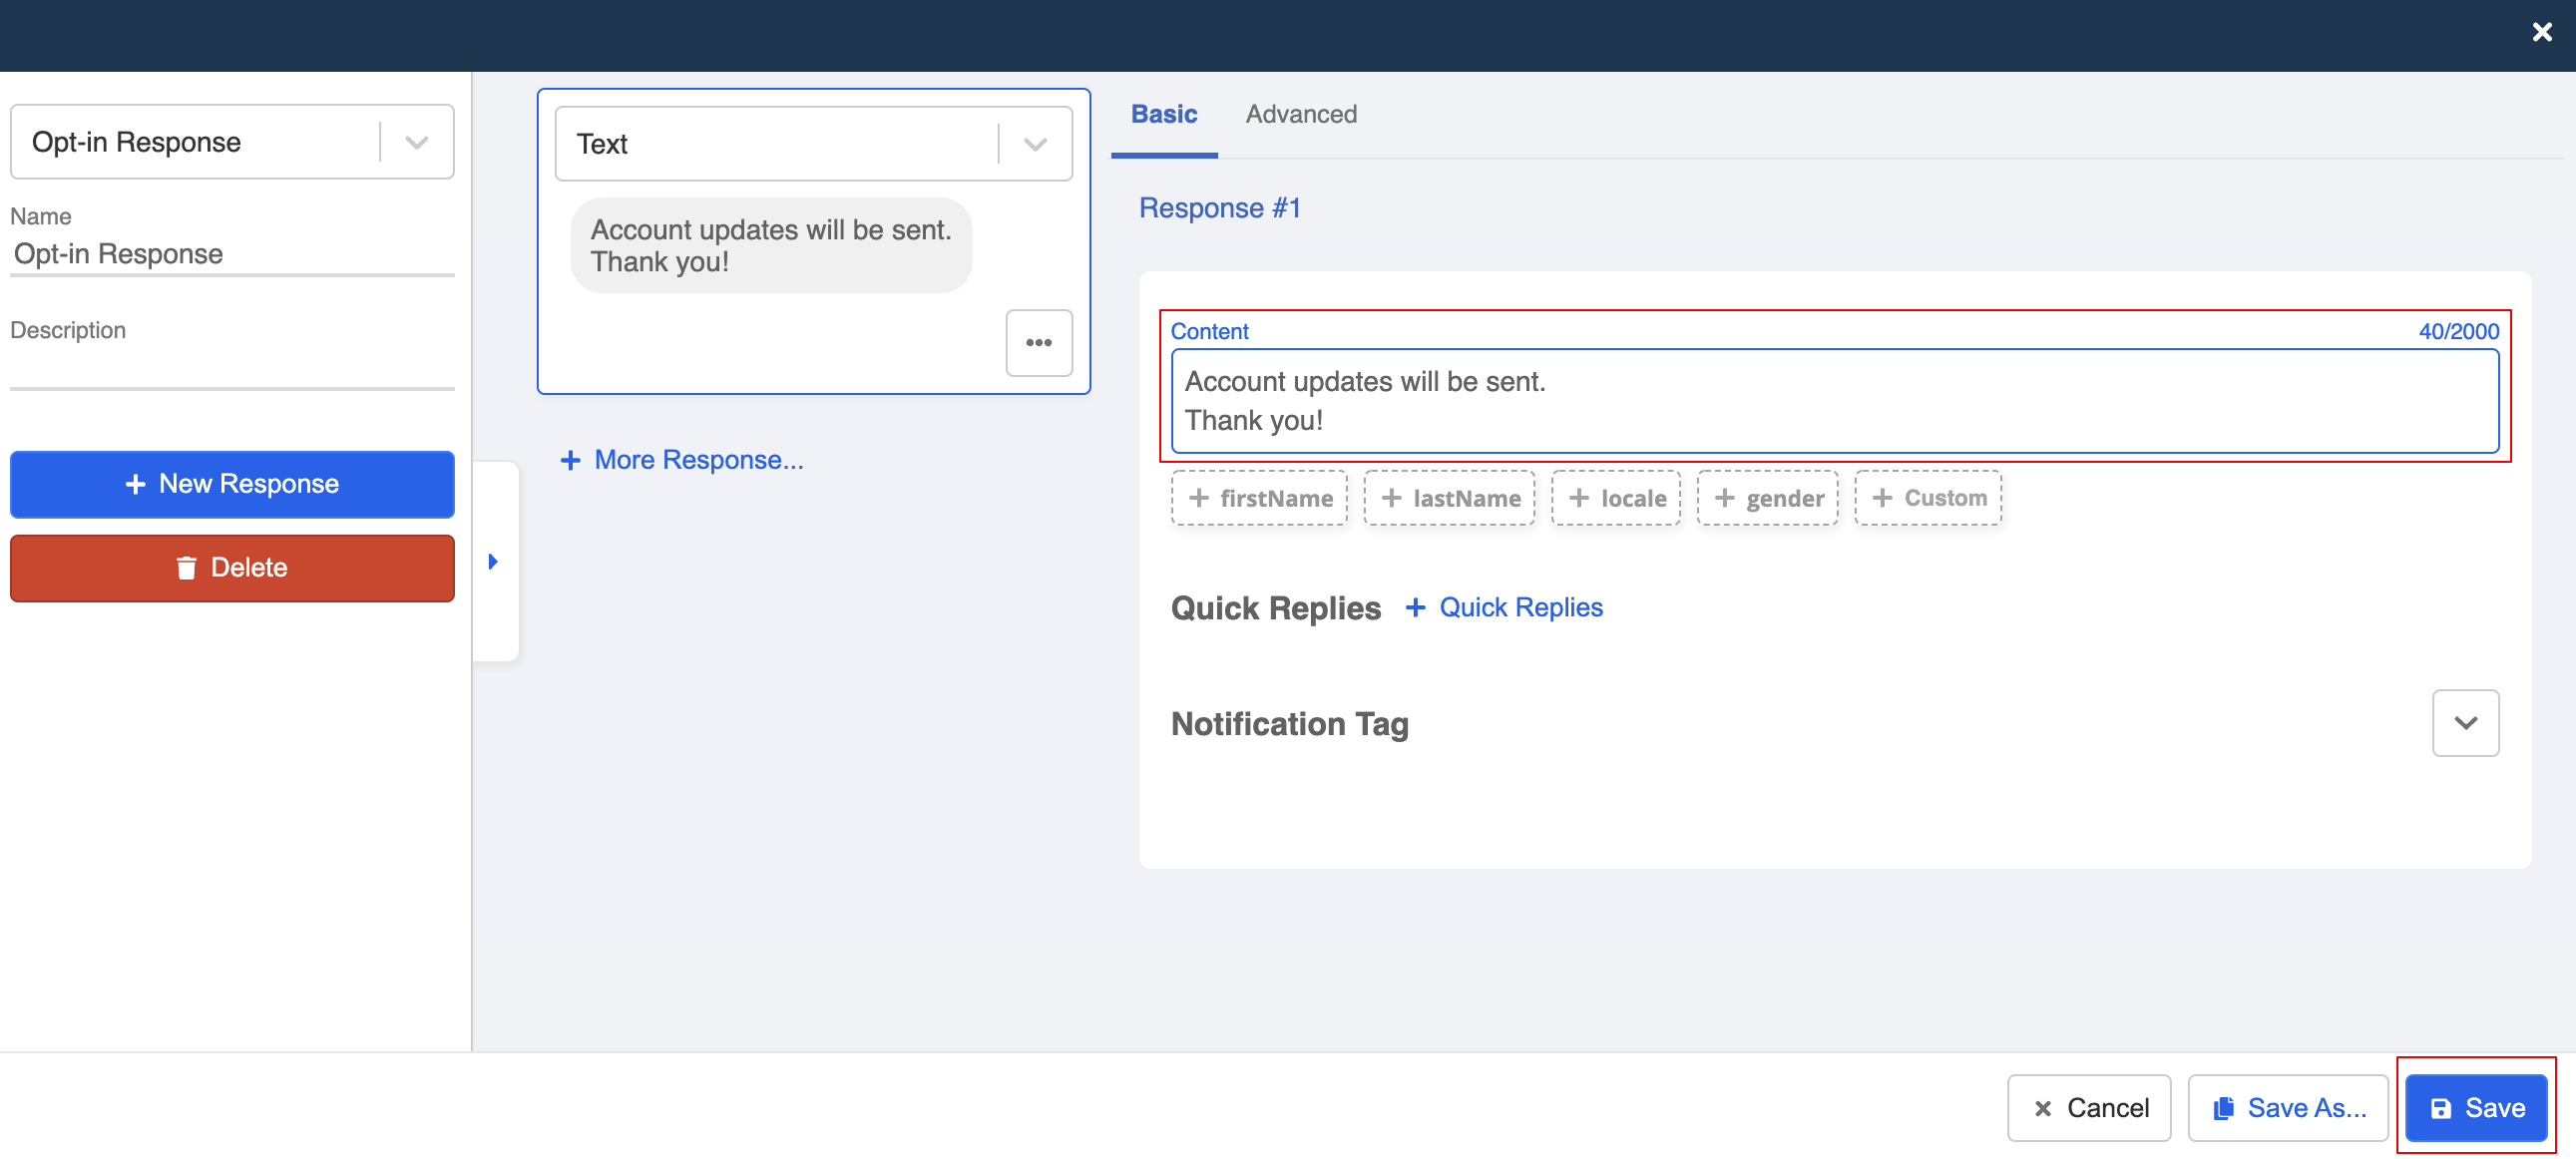
- Save the response and the General Node.
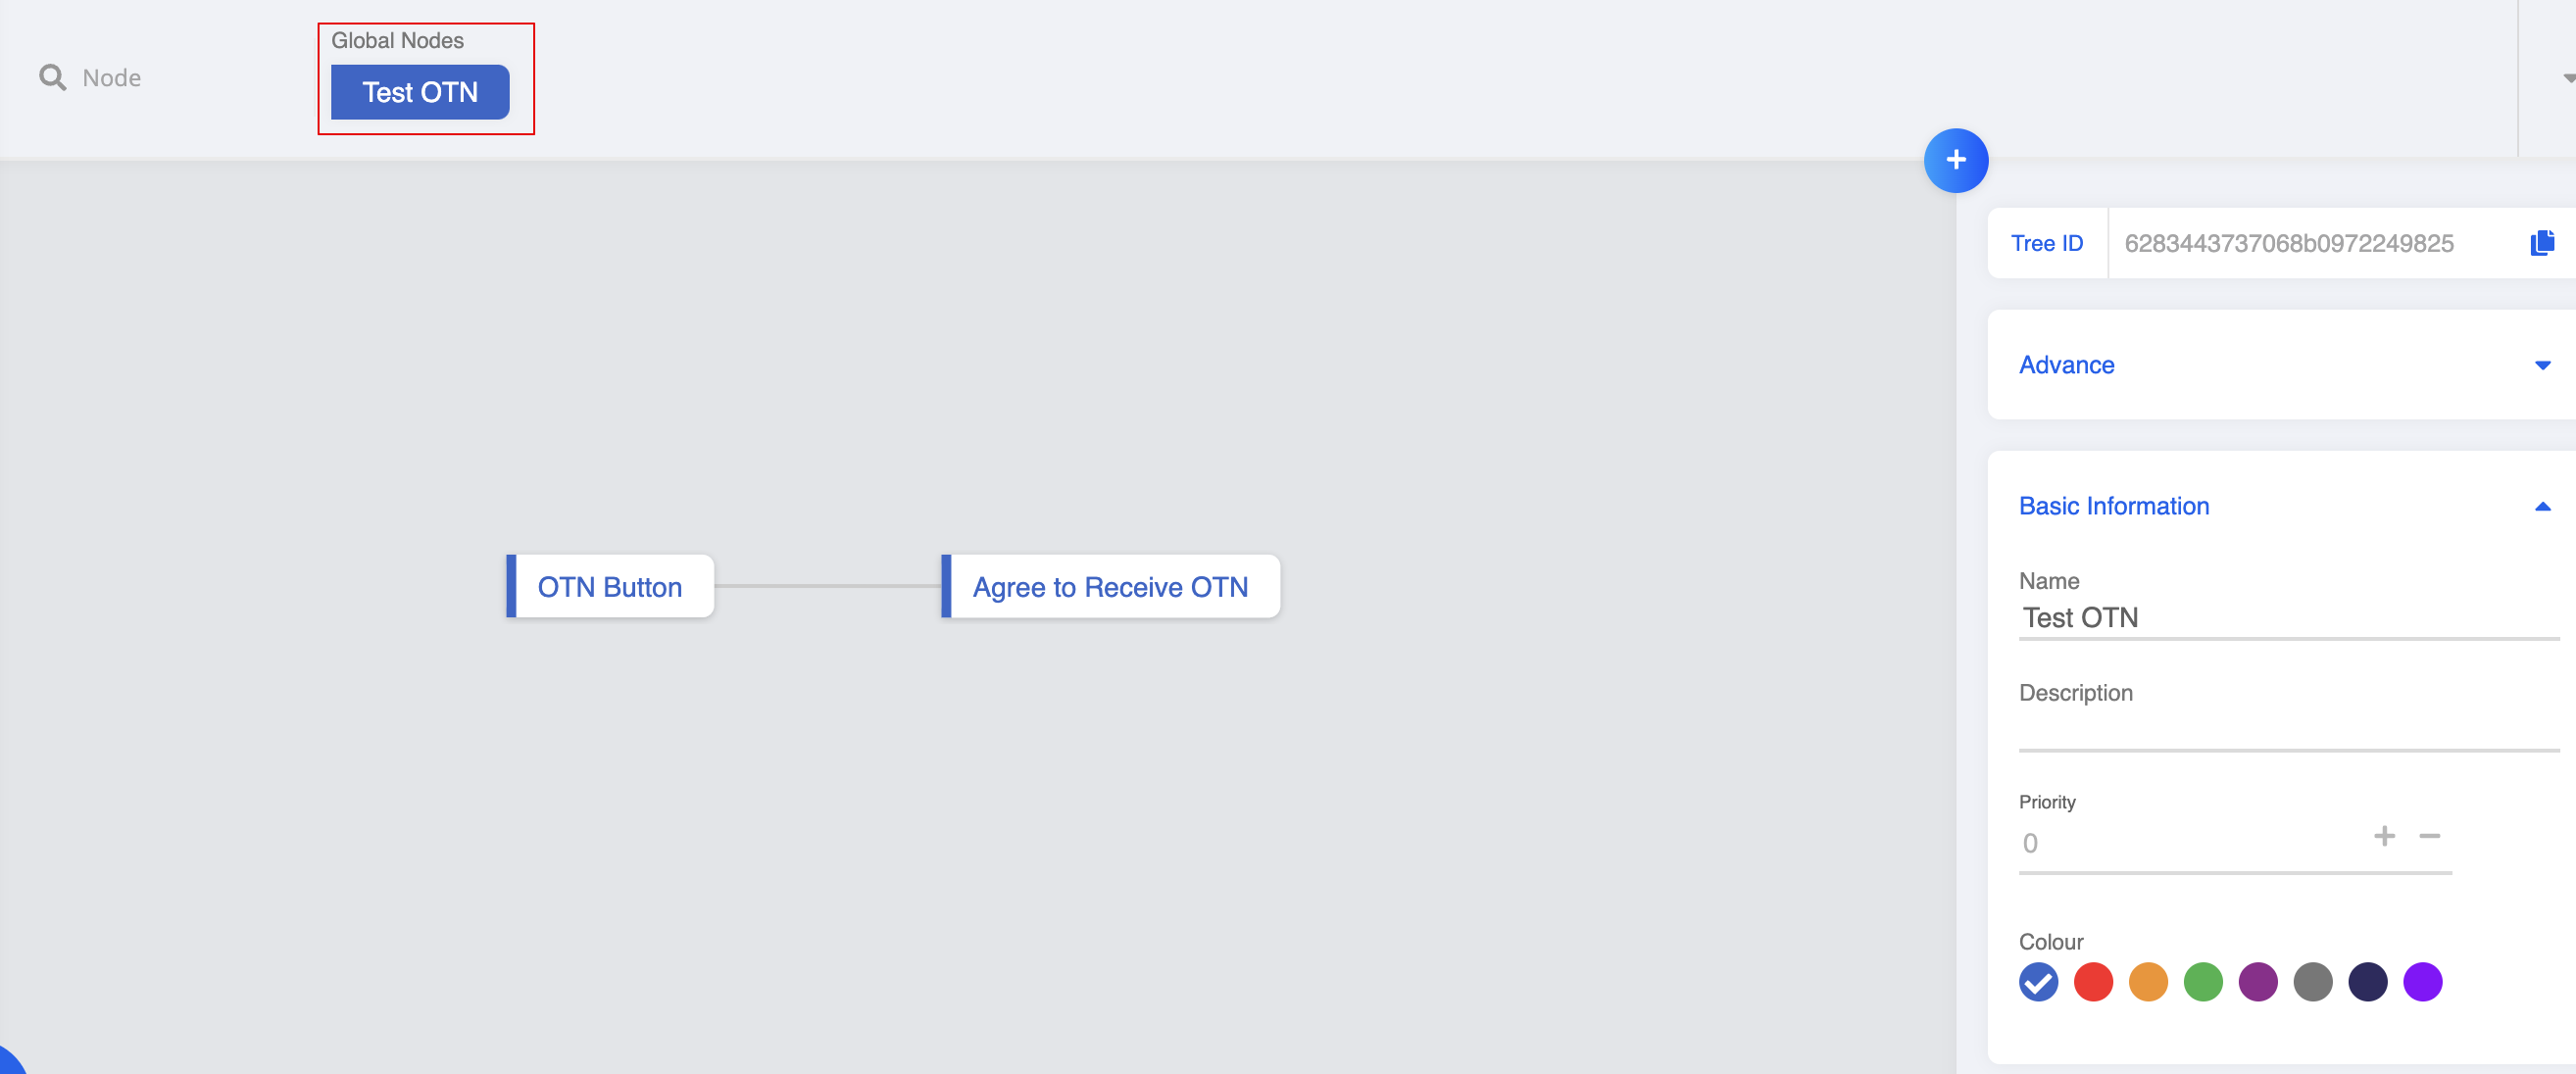
Create a Global Node
To let the users enter this flow, you will also need an entry point to the chatbot.
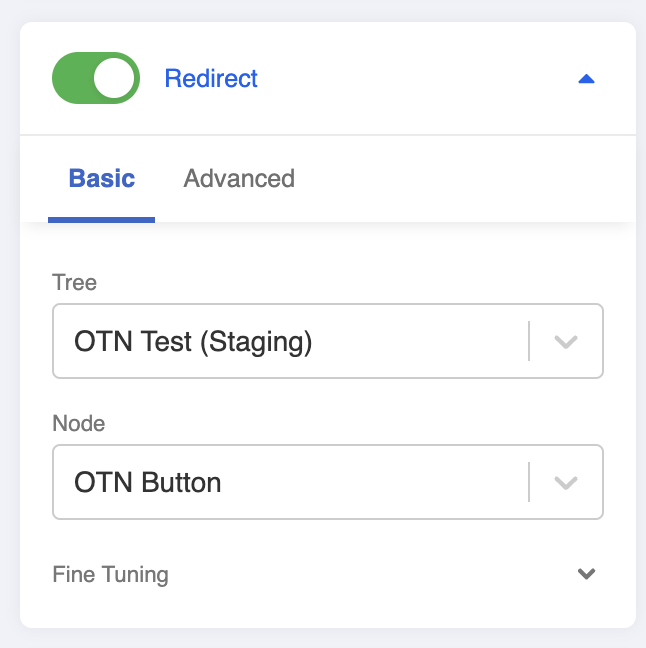
- Create a global node.
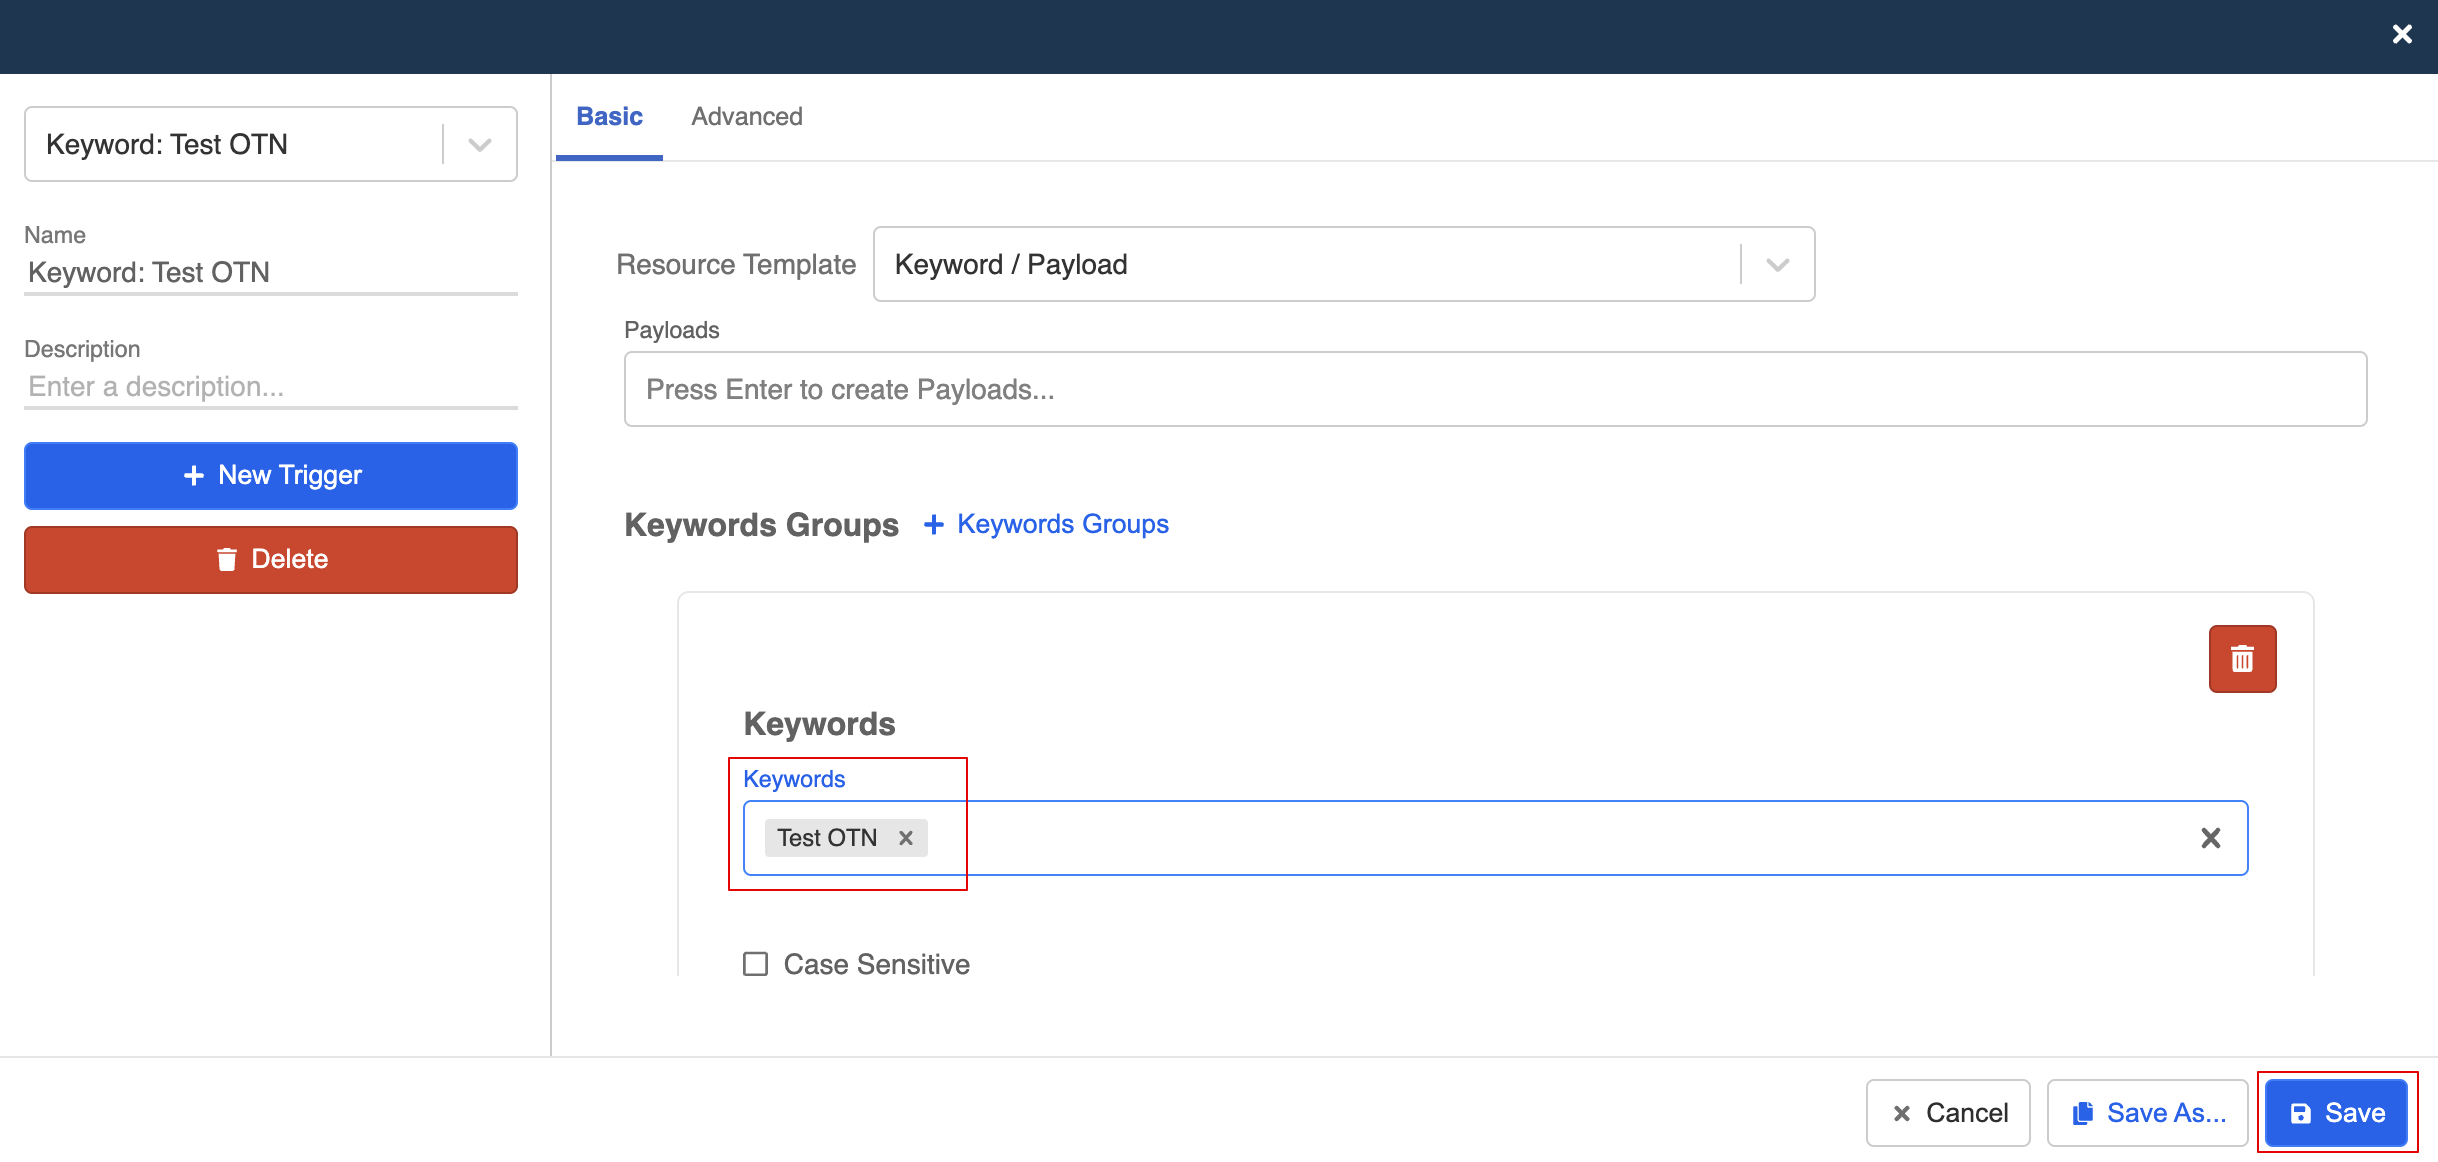
- Create a new trigger. Select "Keyword / Payload" from resource template, and select "+ Keywords Groups".
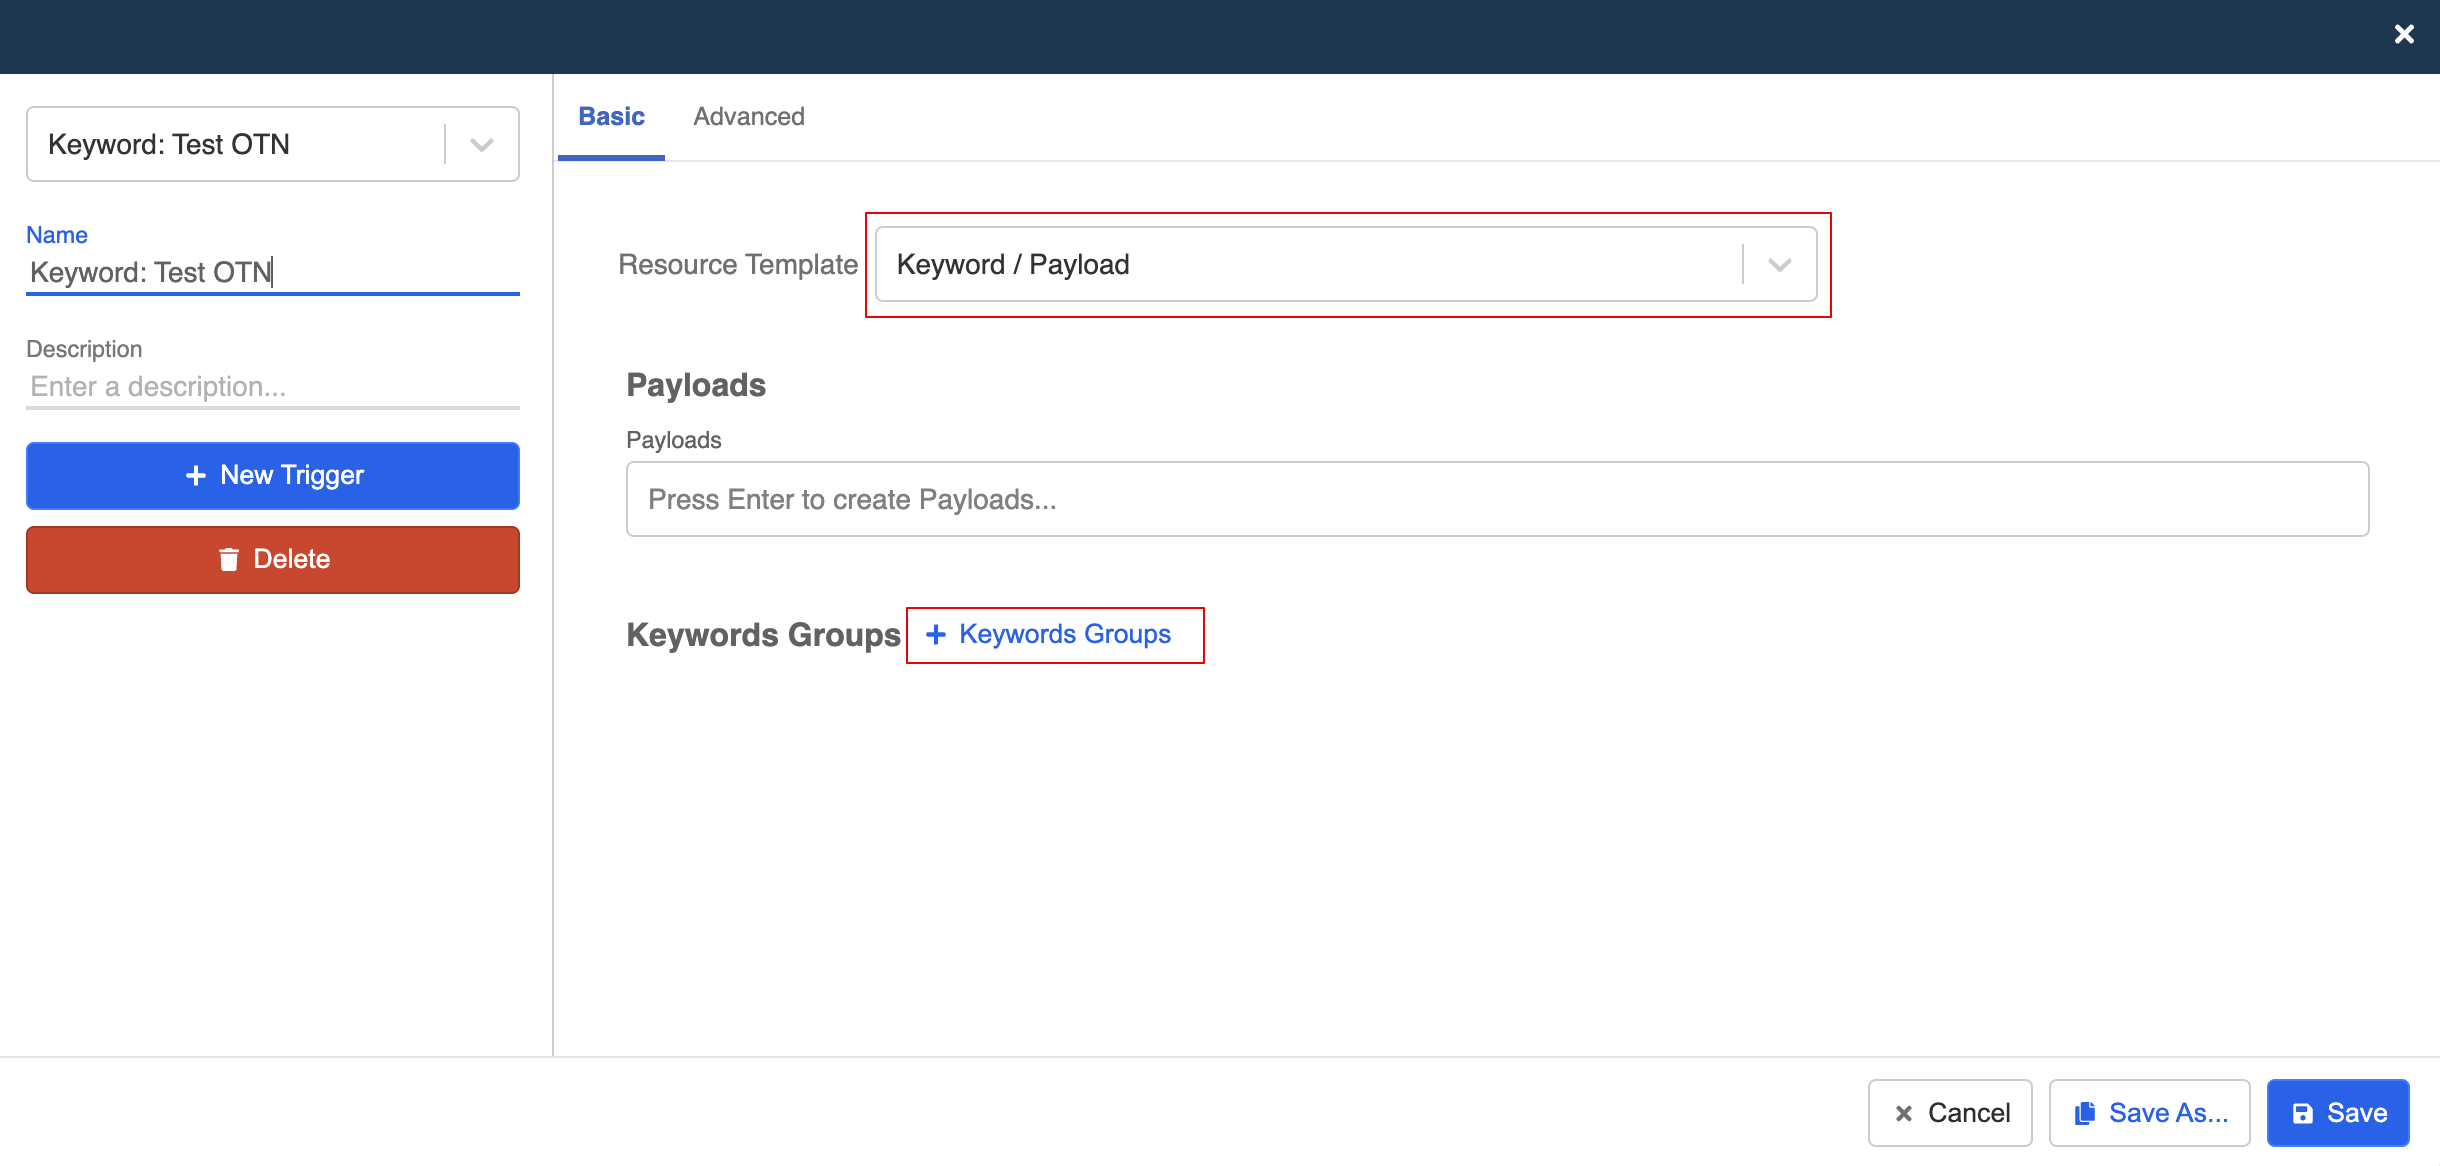
- Create a keyword to trigger the flow. Let's use "Test OTN" for this example. Finally, Save the trigger.
- Toggle on Redirect, and redirect to the node of OTN button.
OTN Broadcast
Once the users agreed to receive OTN message, businesses now have their consent and a one time token to send an OTN broadcast message.
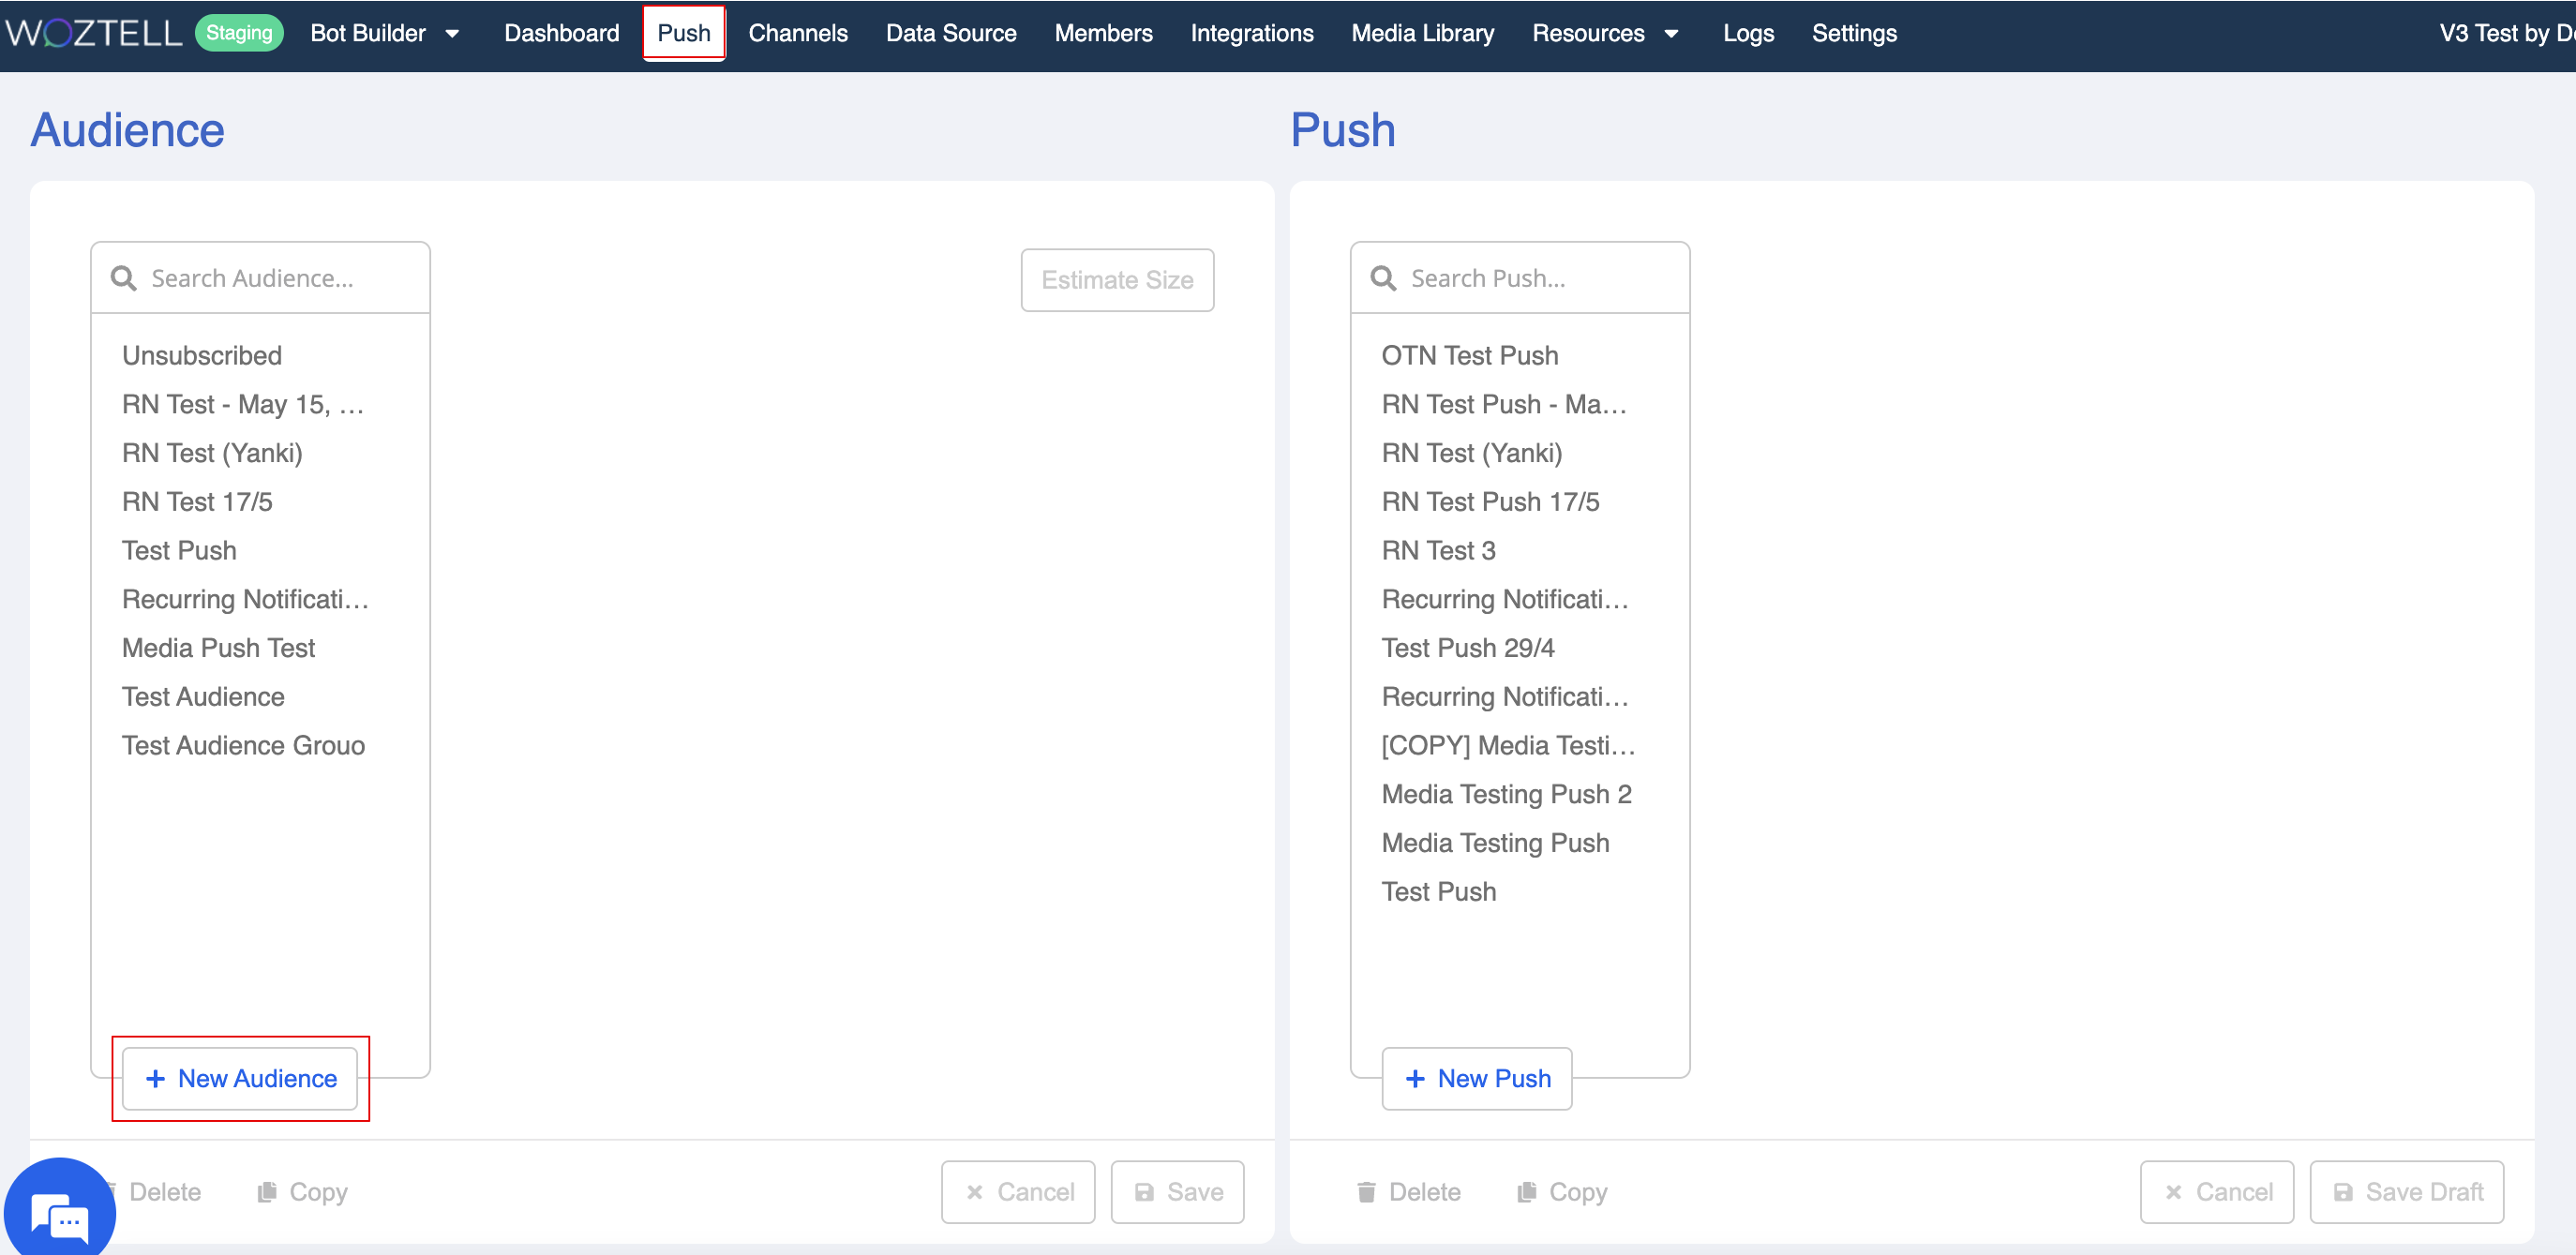
Create OTN Audience Group
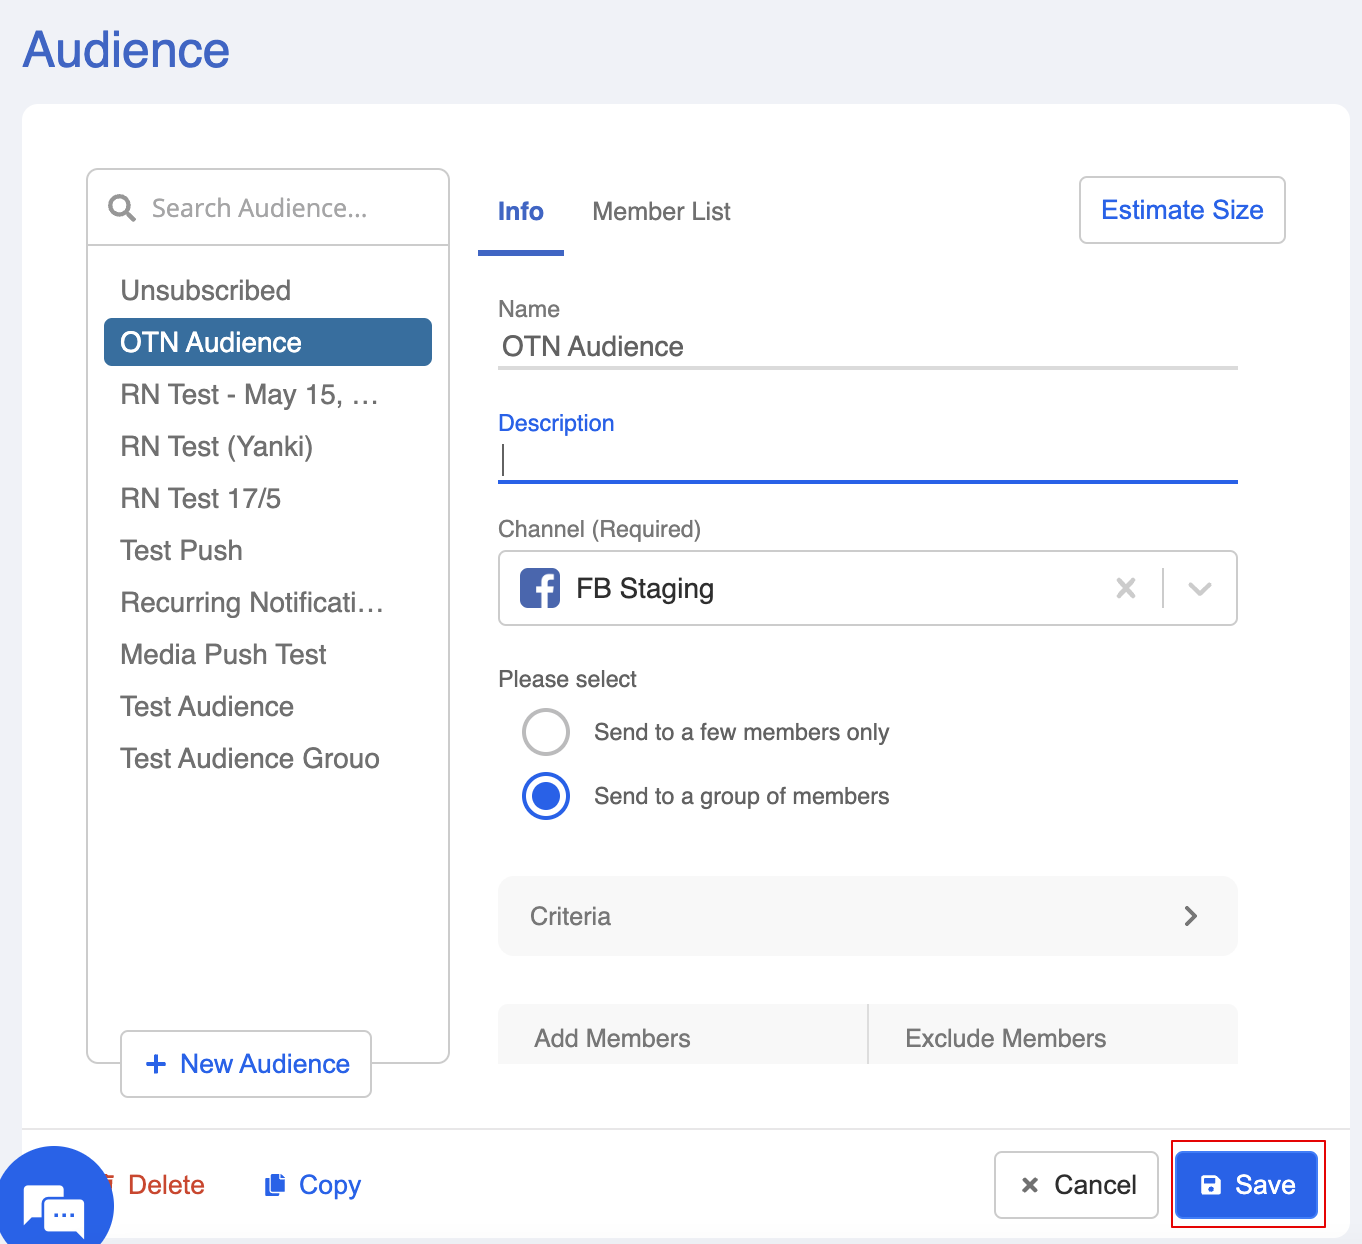
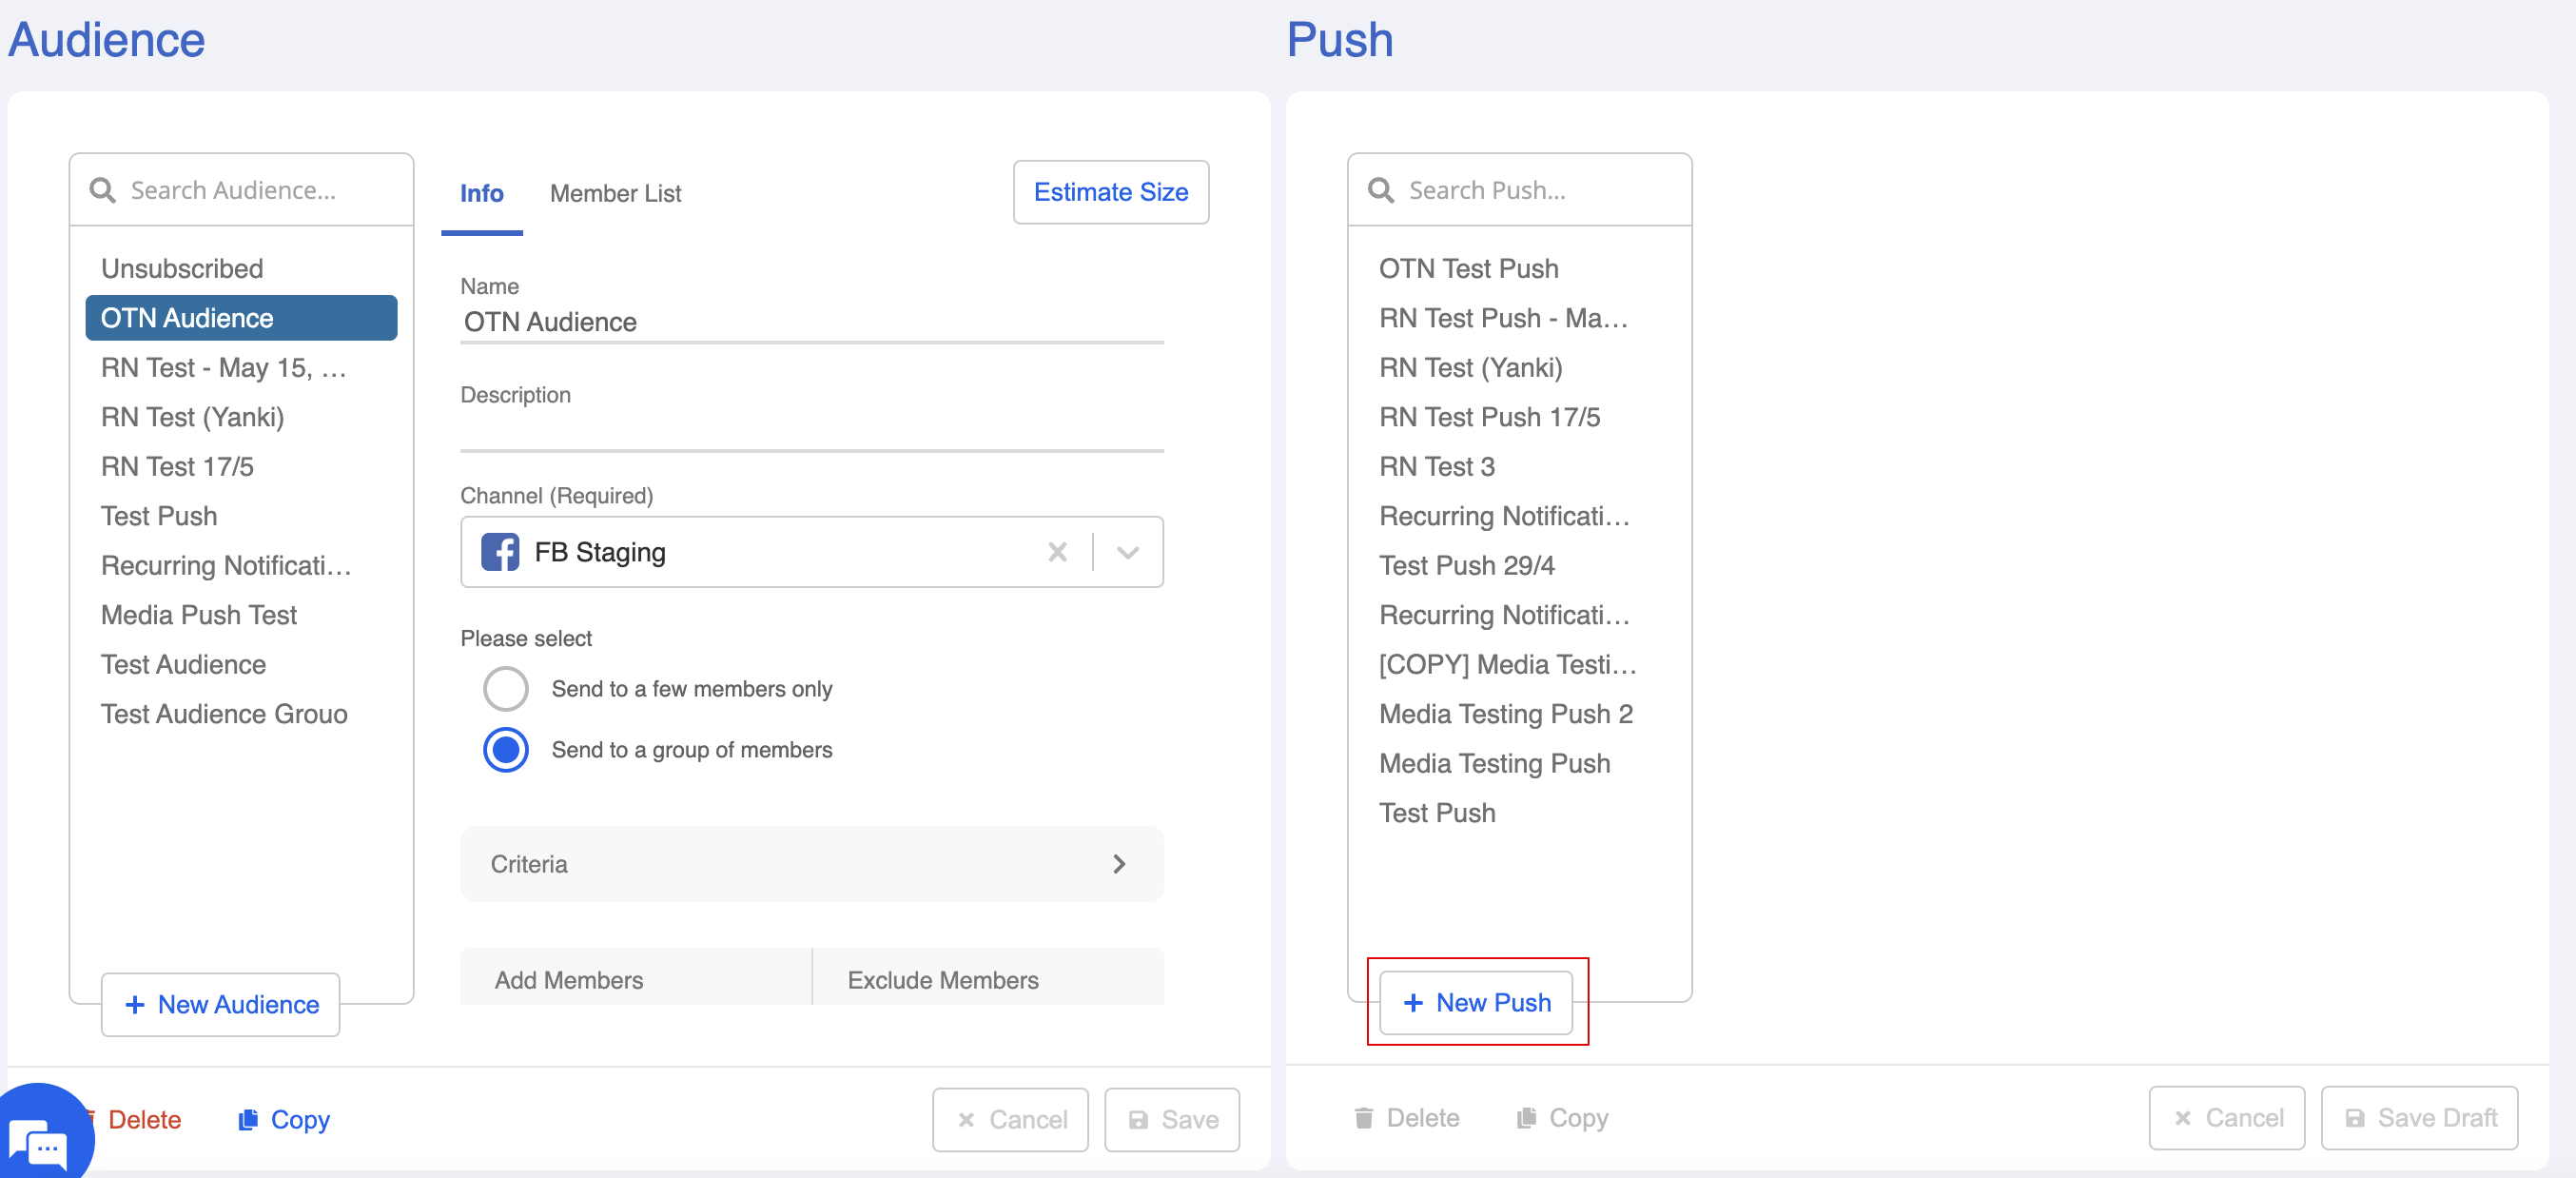
- Head to Broadcast. Select "+ New Audience" to create a new audience group.
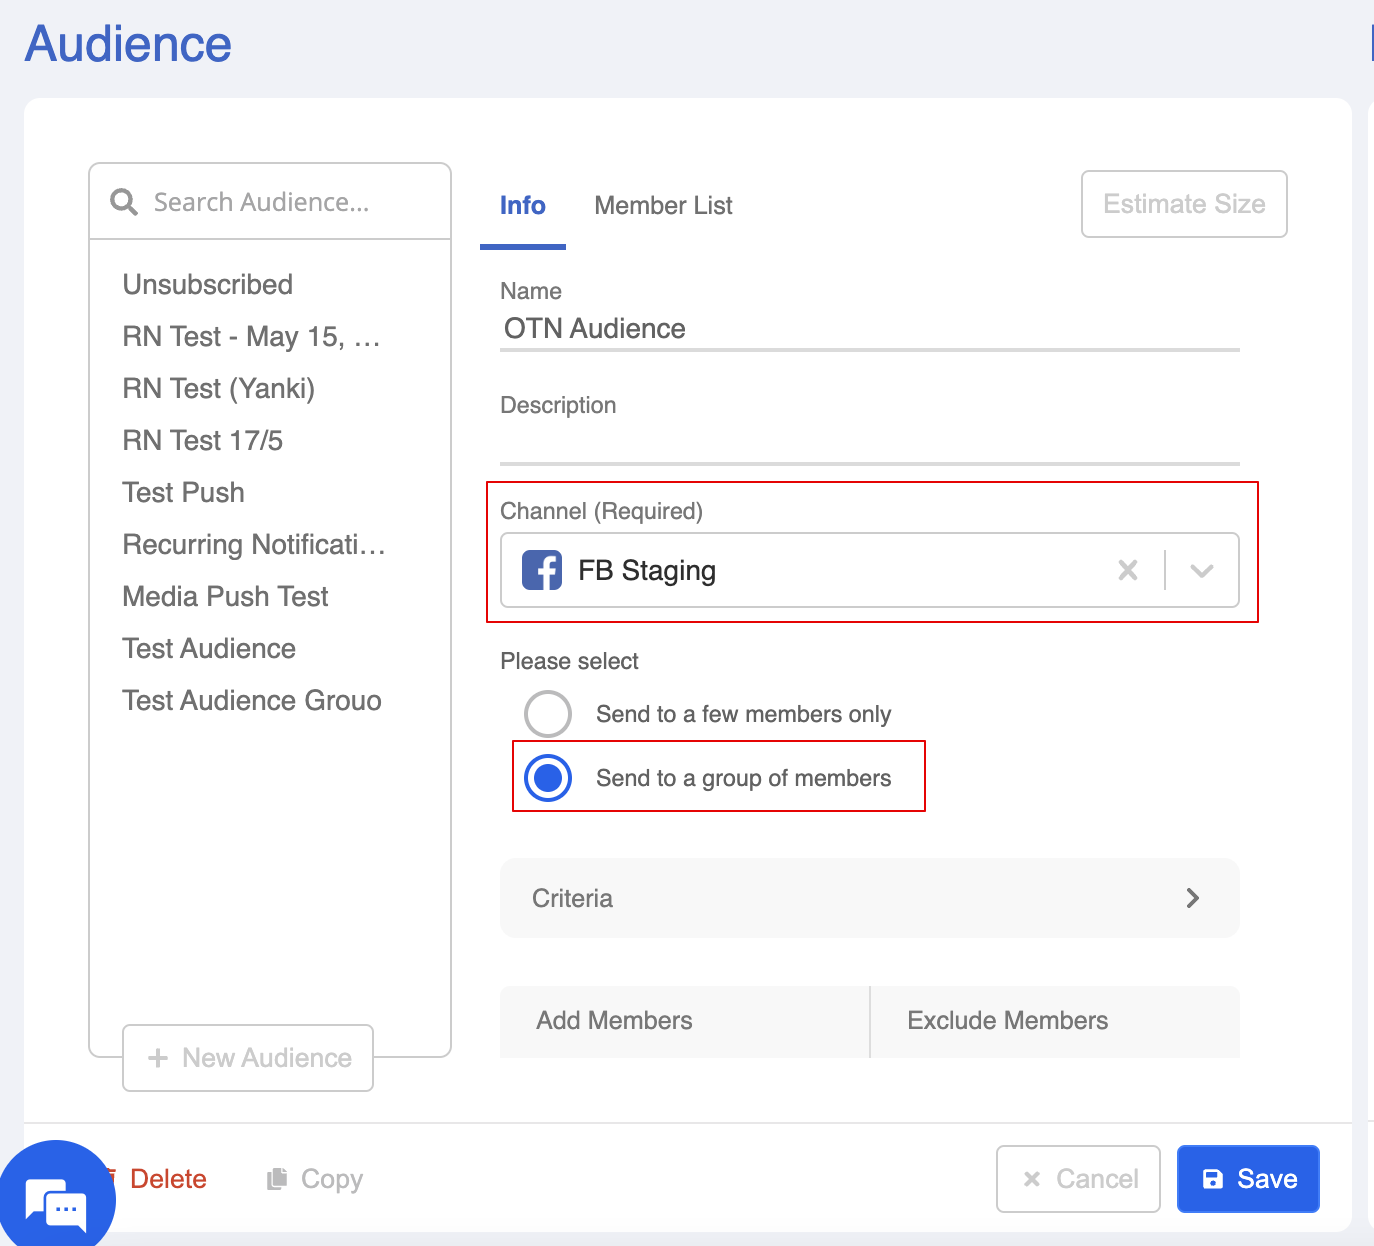
- Select the relevant Facebook channel, then select "Send to a group of members".
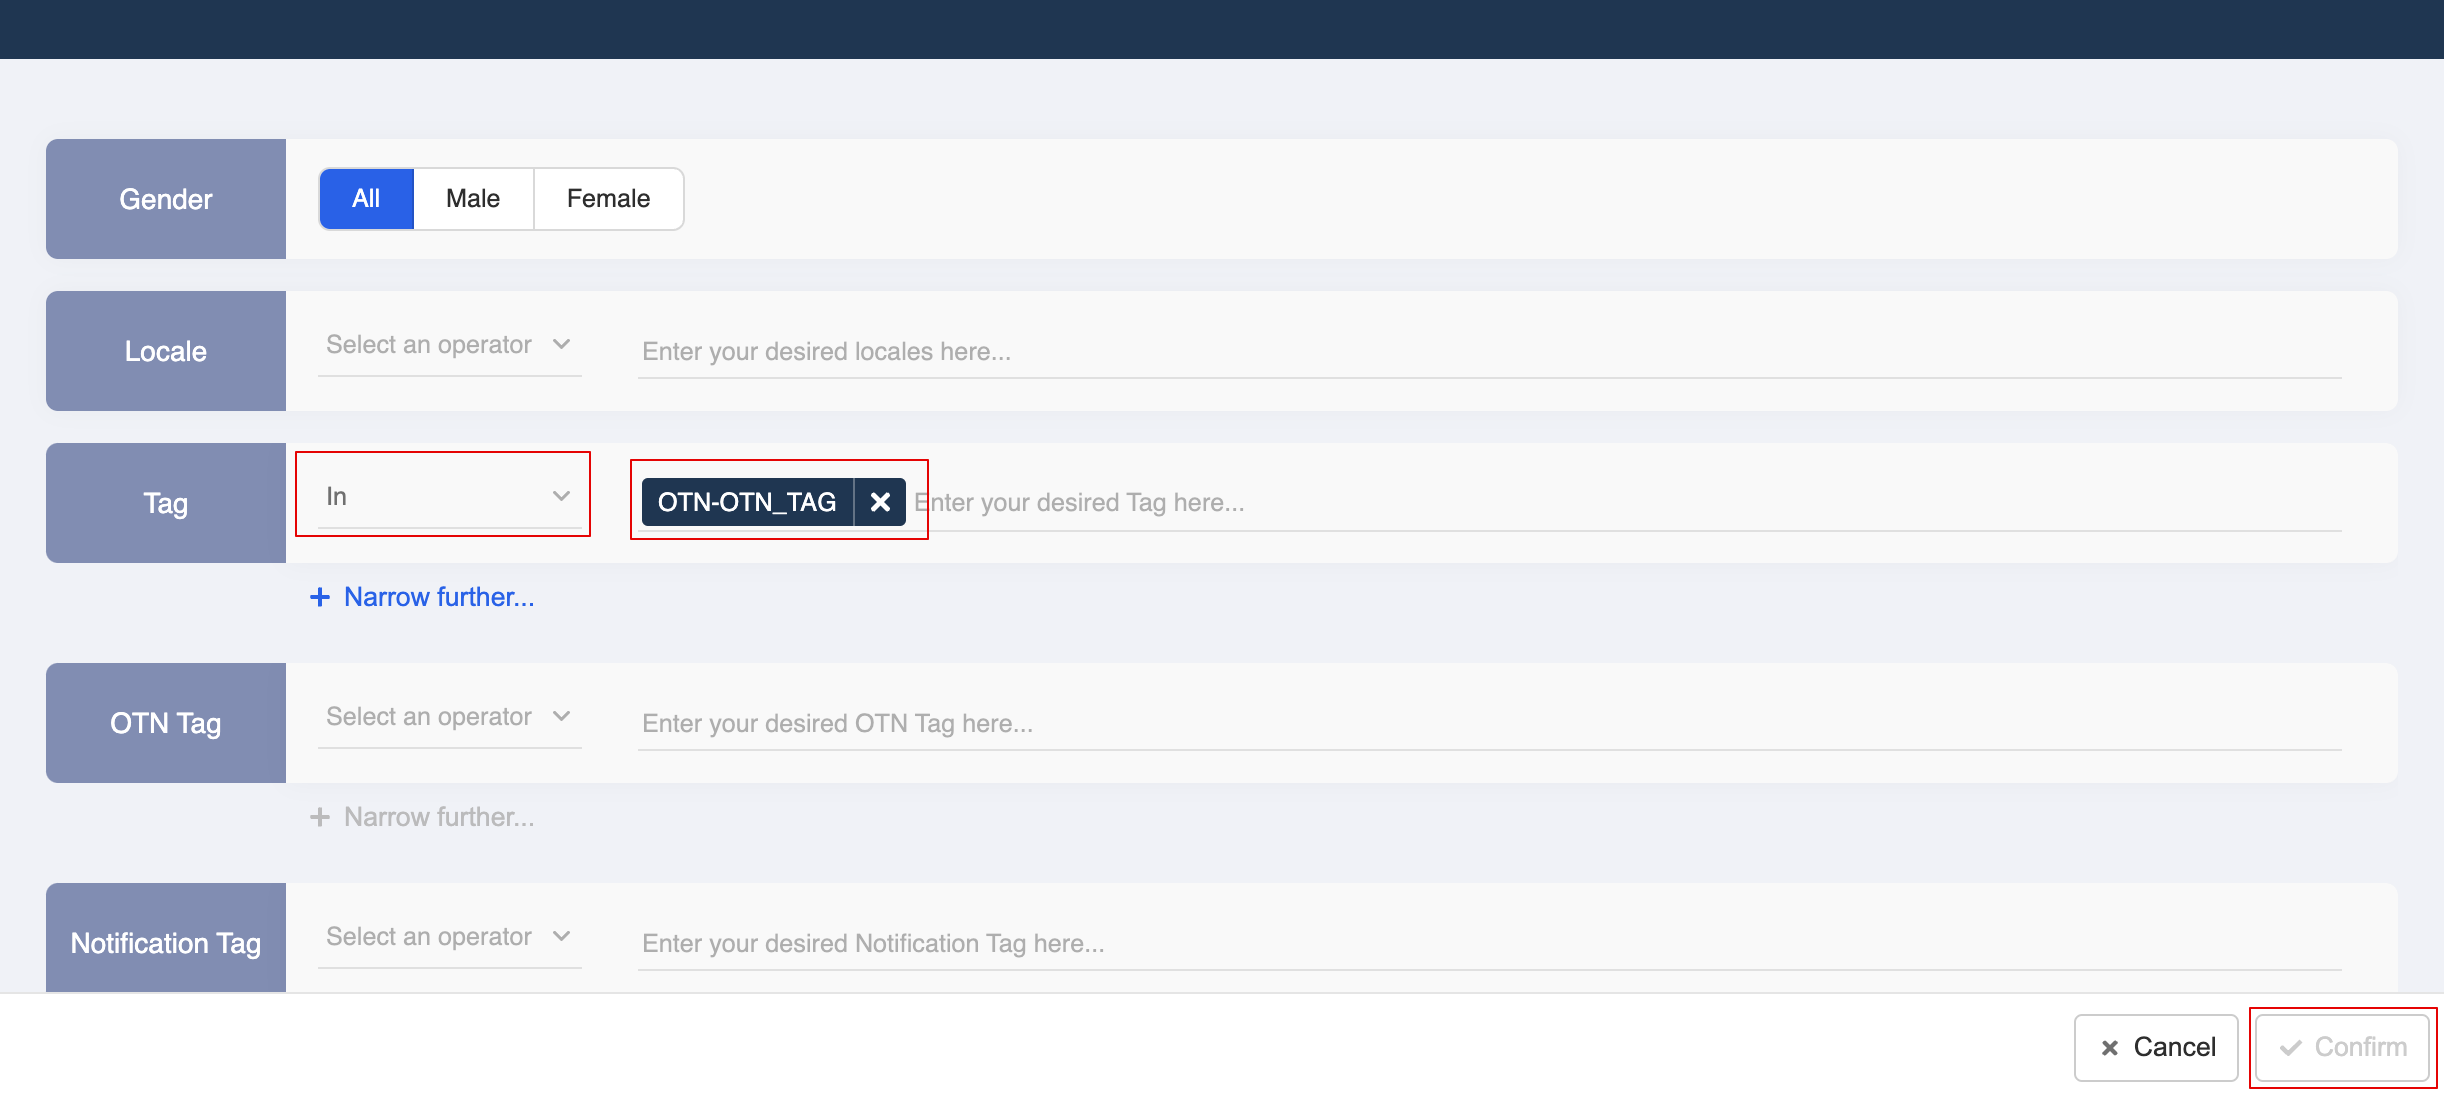
- Select "Criteria", you can filter out the OTN members here.
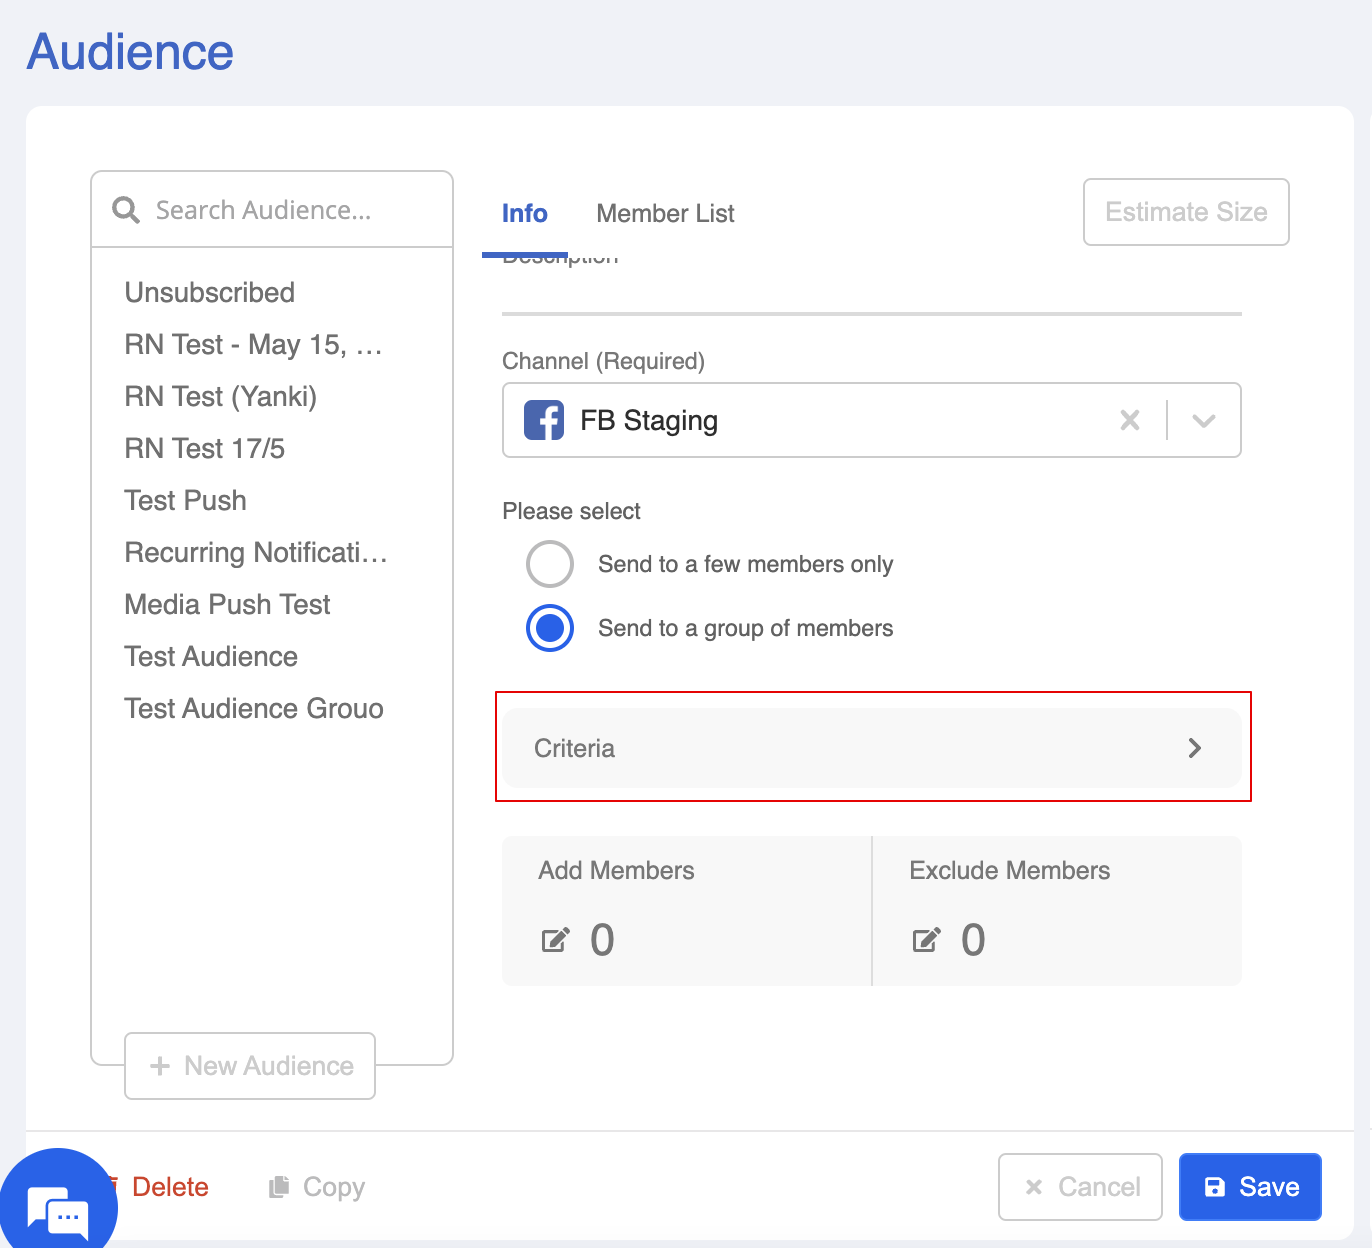
- Under Tag, select "In", and enter the OTN tag. The OTN tag is formed by a prefix
OTN-and the payload you have created for the OTN button.
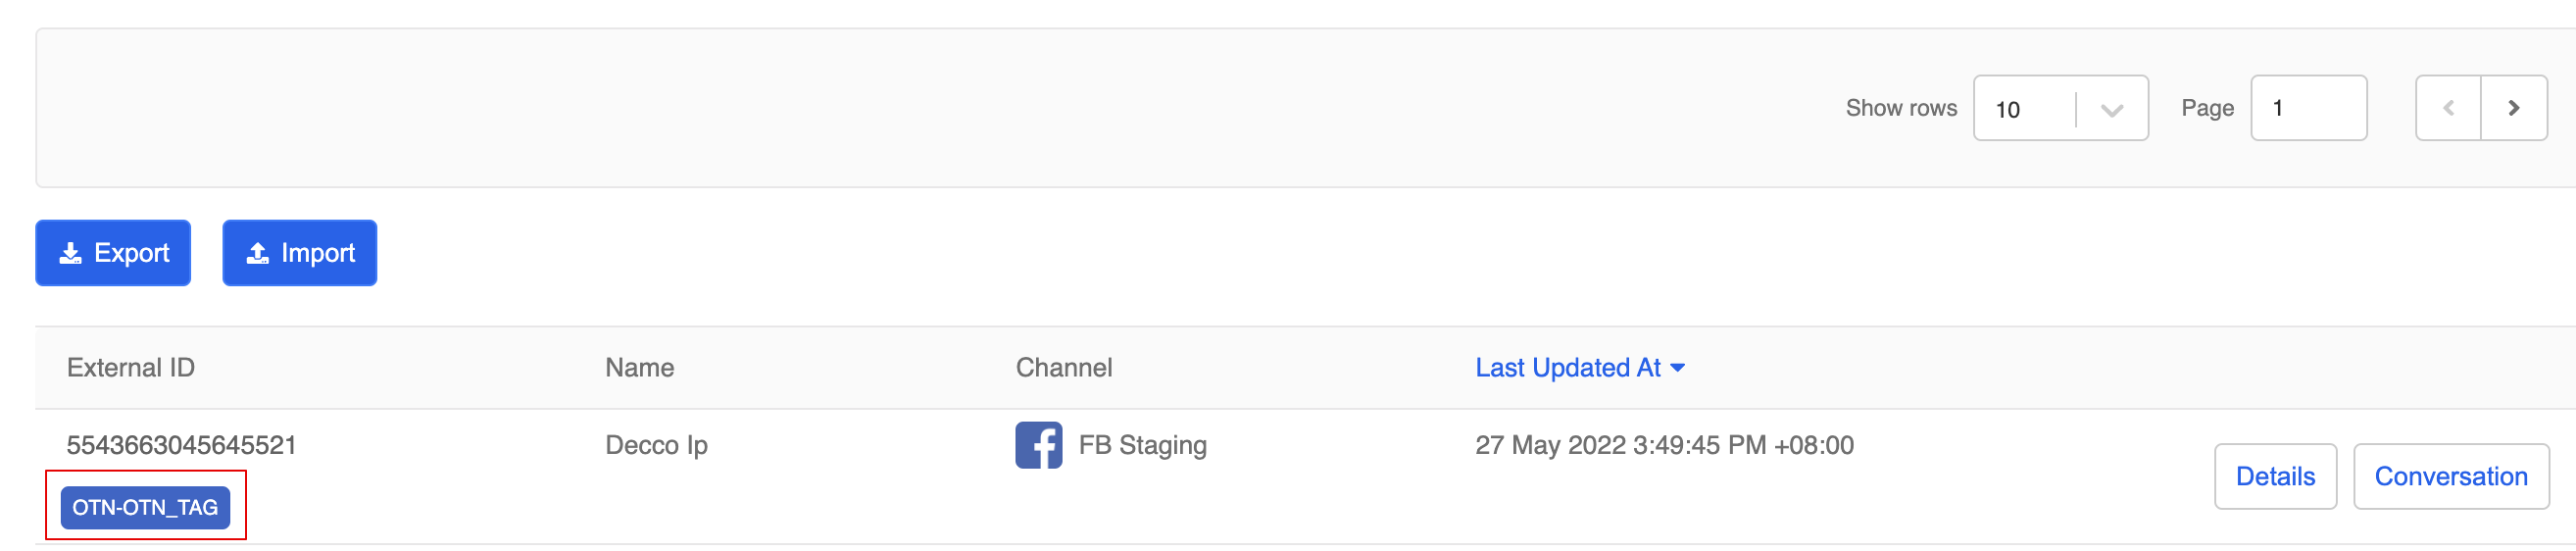
You can also find the OTN tag from the members who have agreed to receive OTN message.
- Finally, Save the audience group.
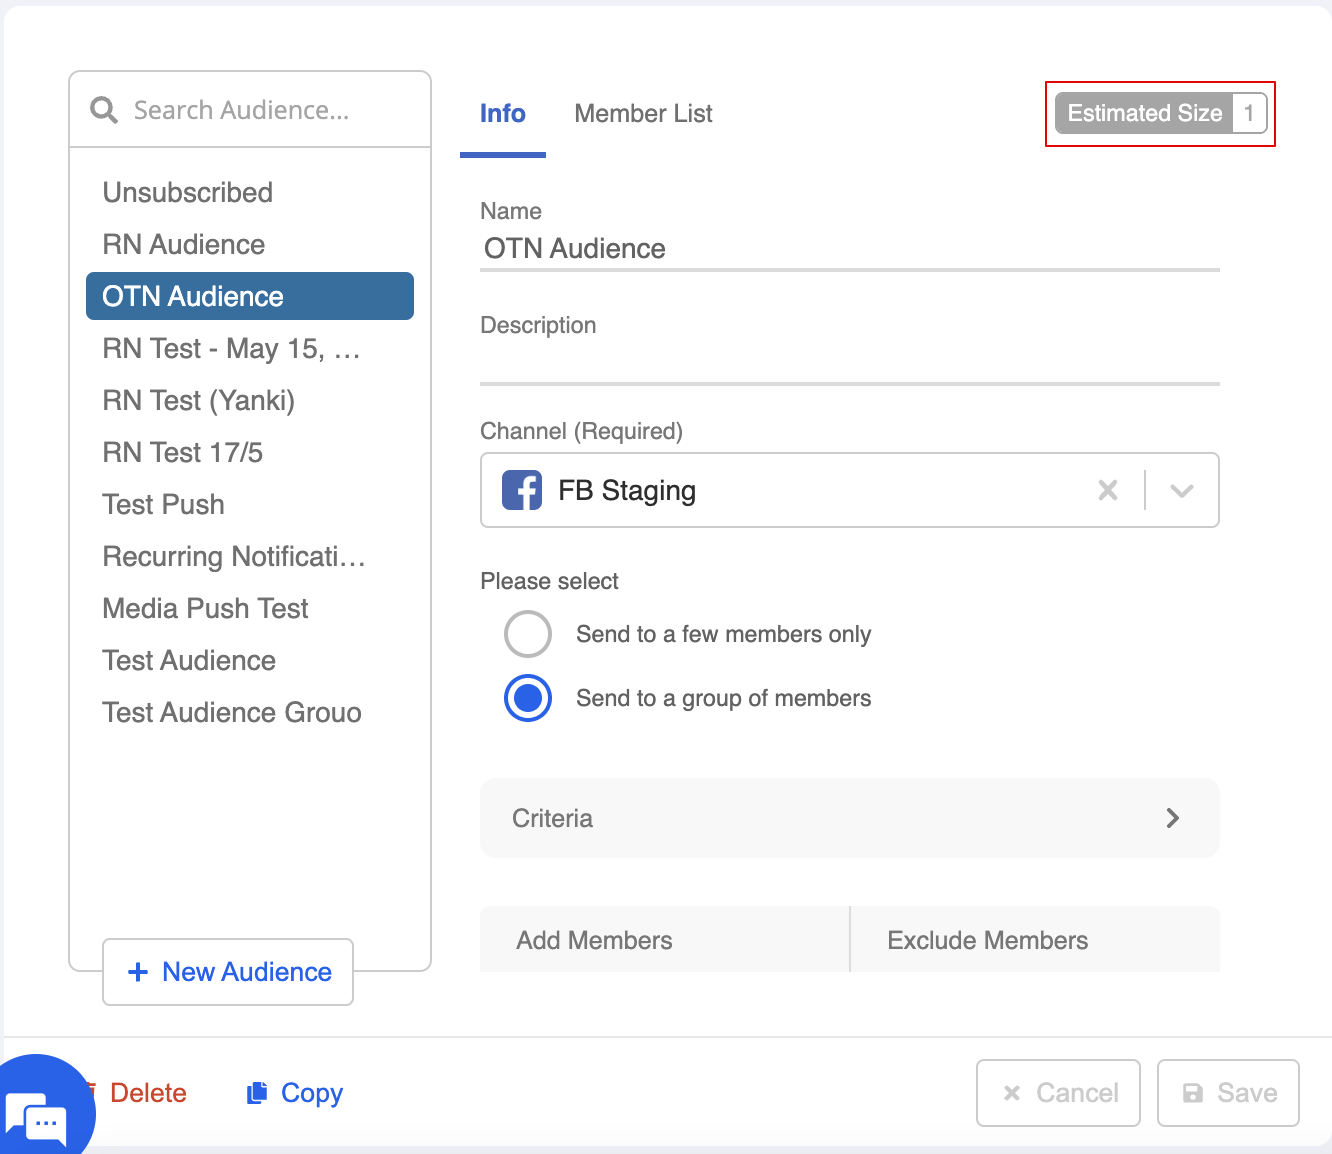
- You can click "Estimate Size" to view the audience count of this group.

Send the OTN Broadcast
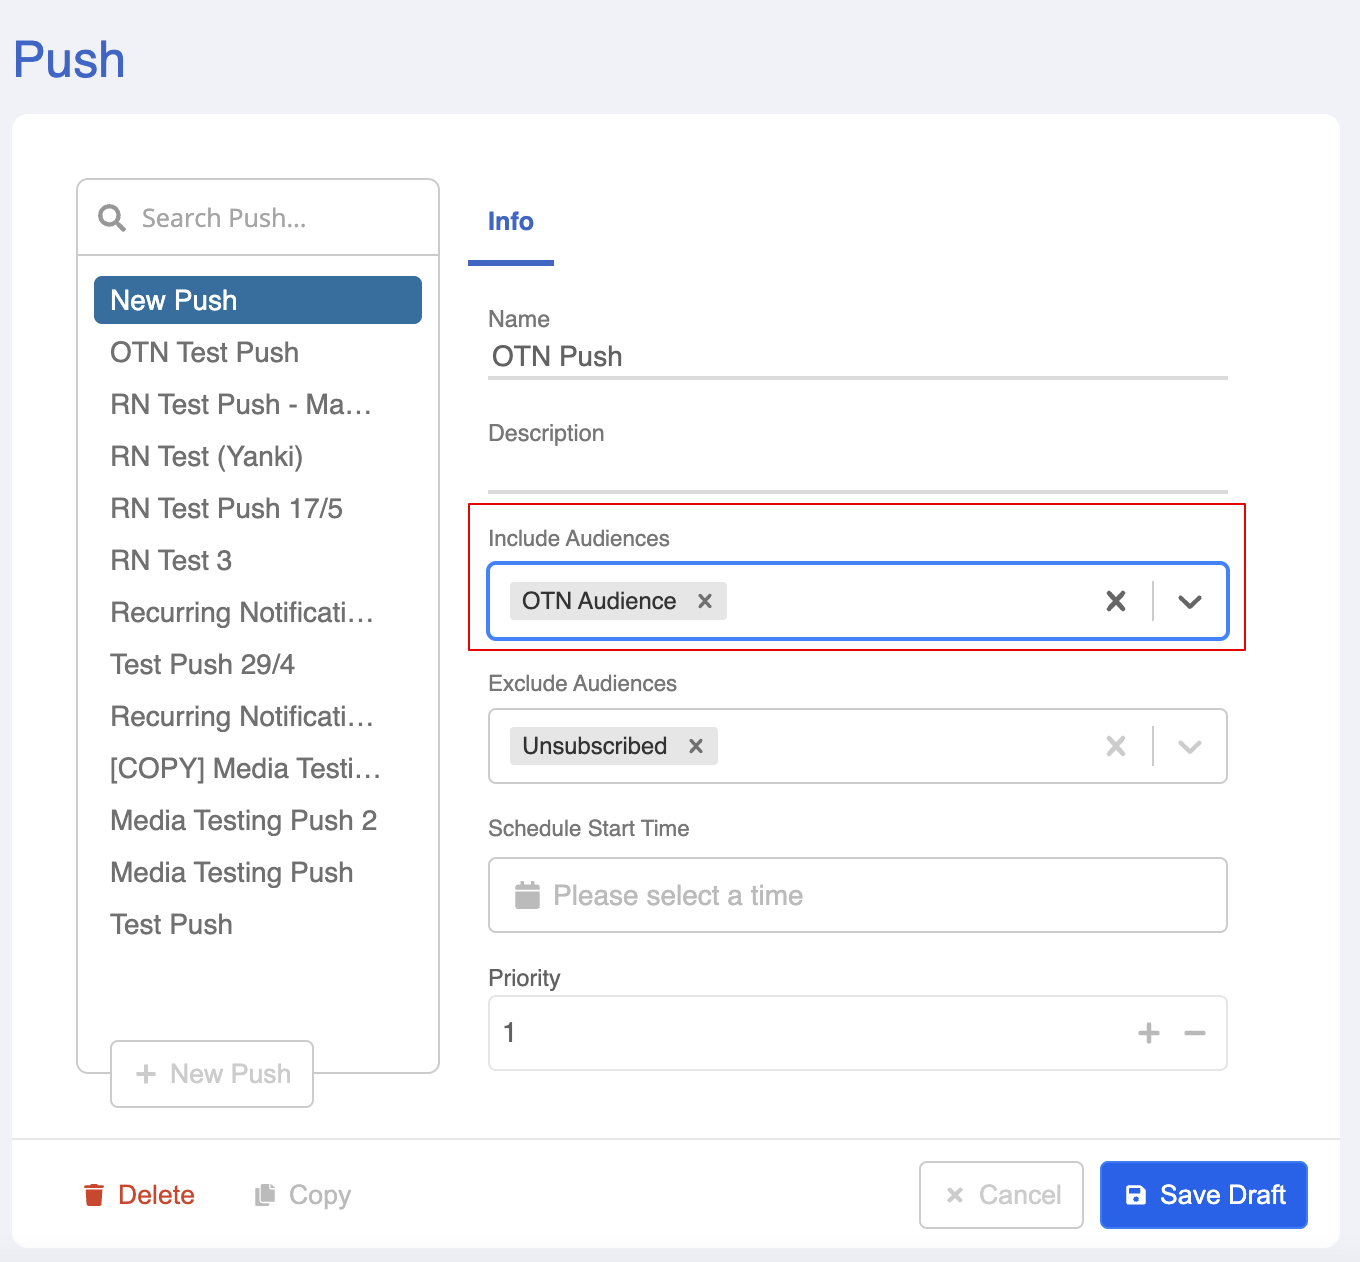
- Create a broadcast at the right side of the Broadcast Panel.
- Select the audience group you have just created.
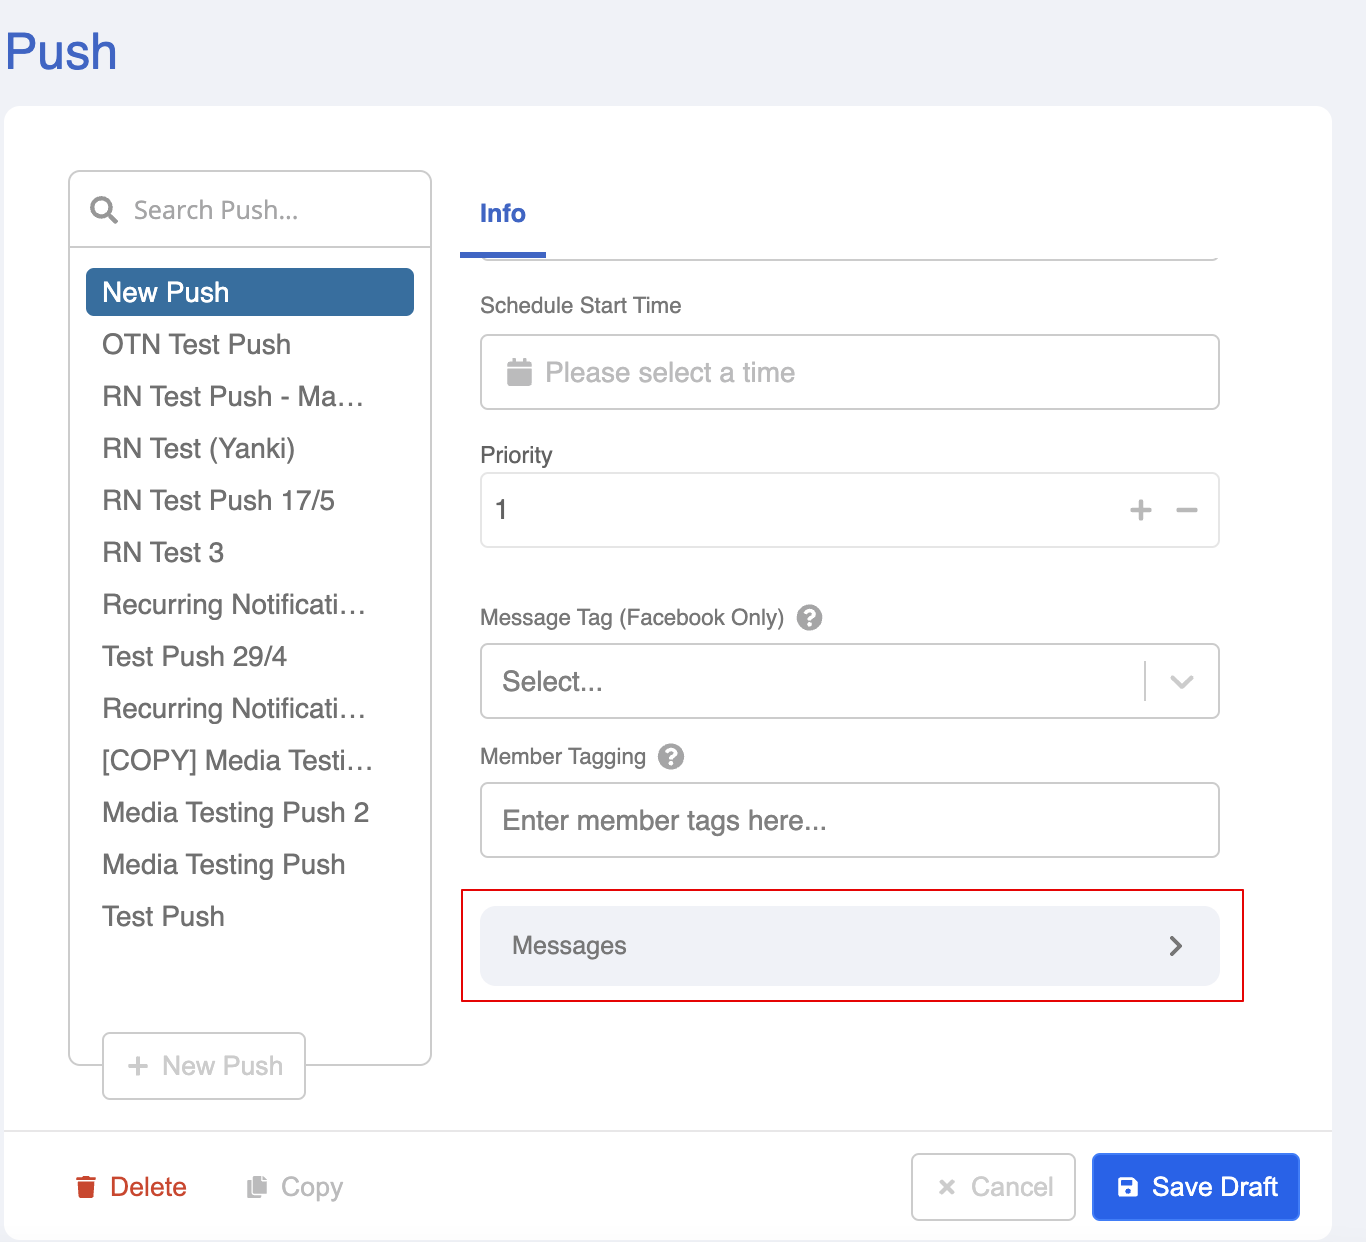
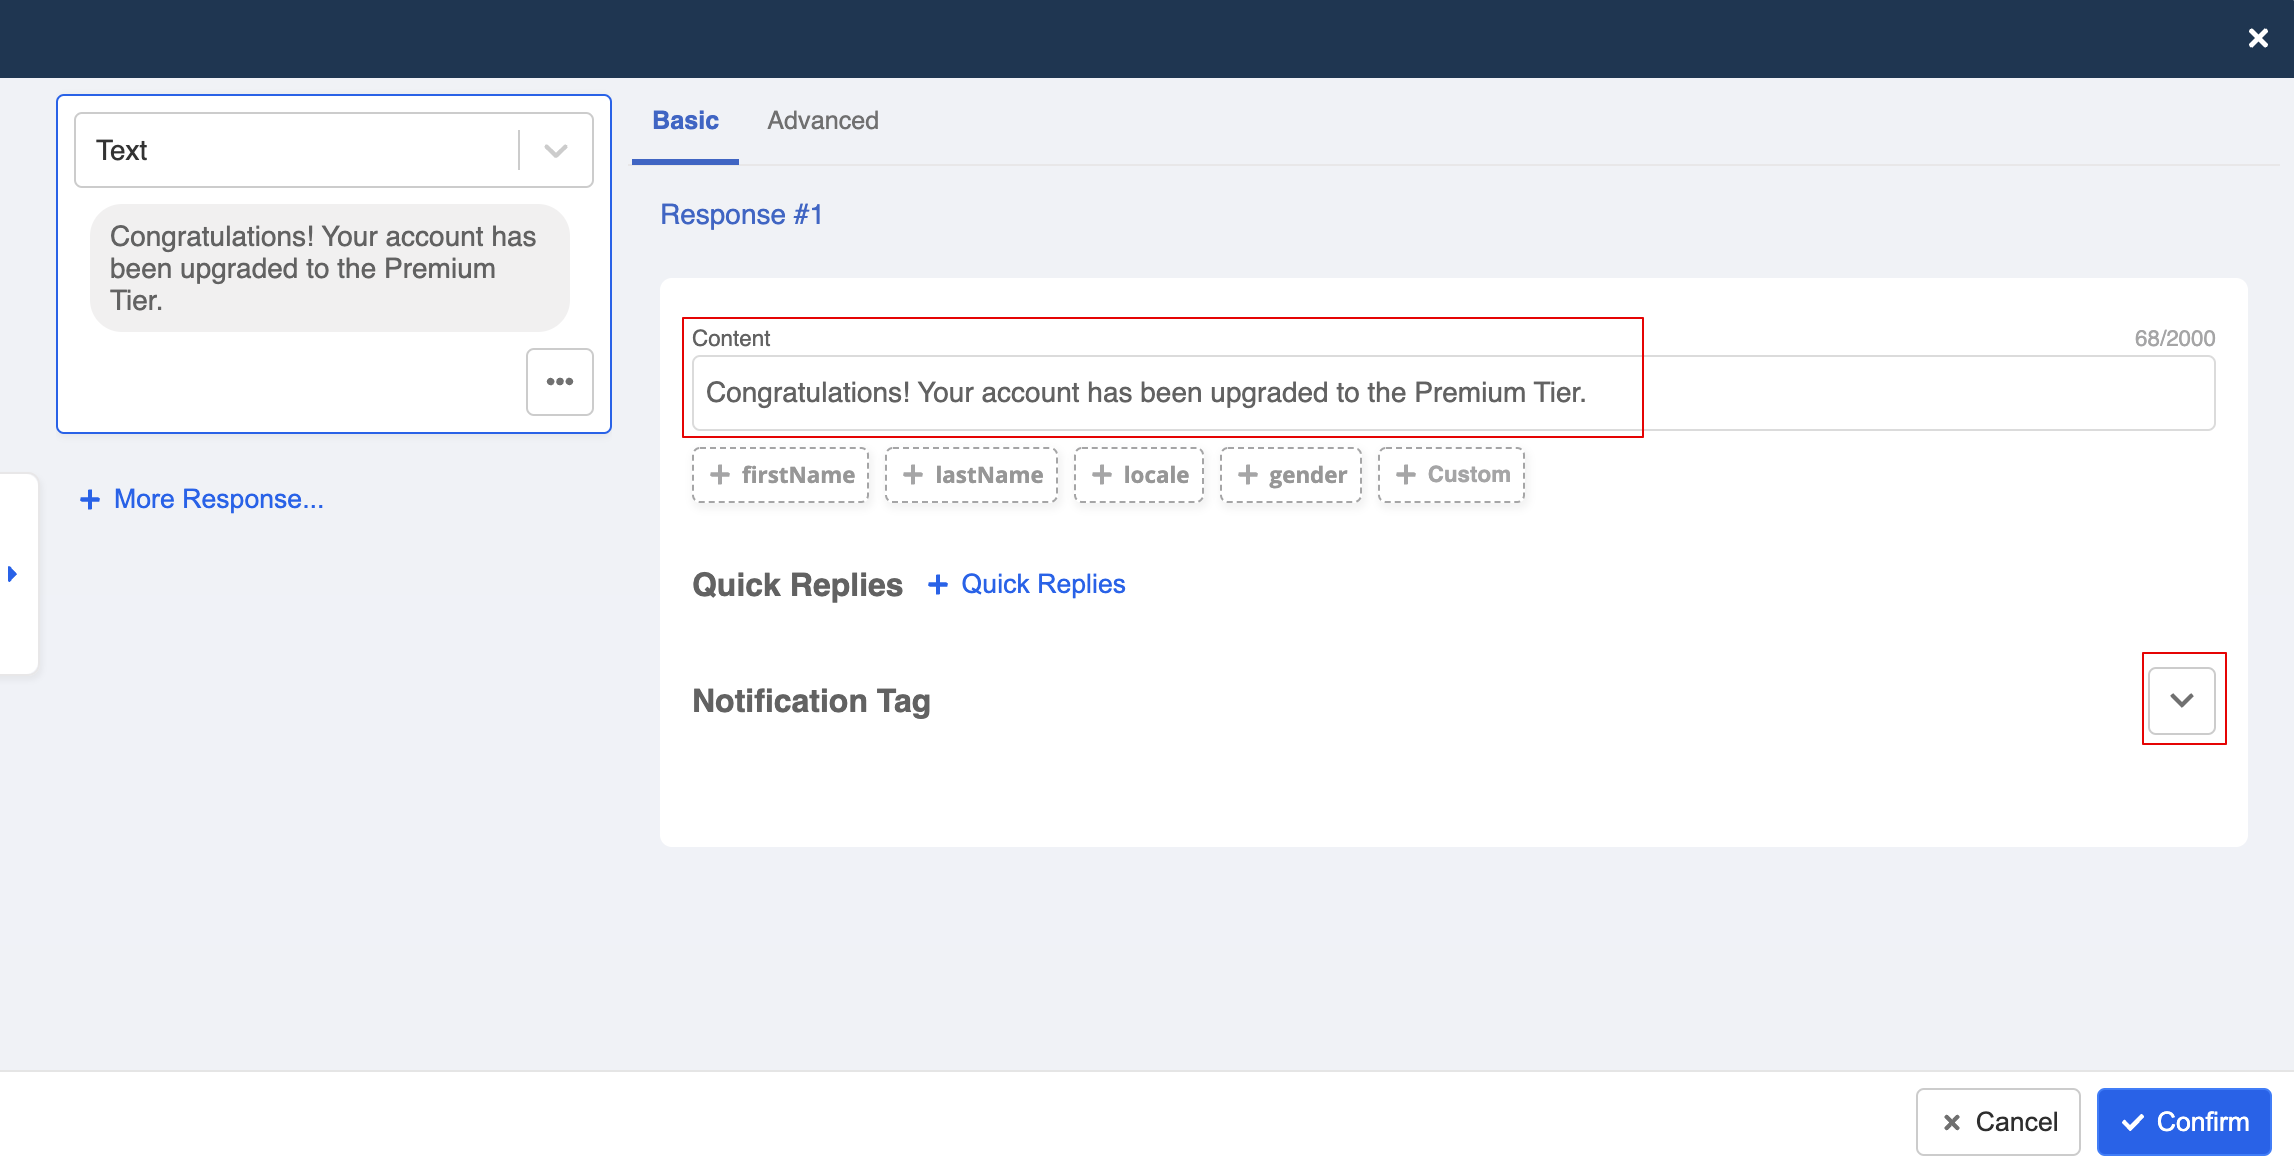
- Head to "Message" to formulate the content of the broadcast.
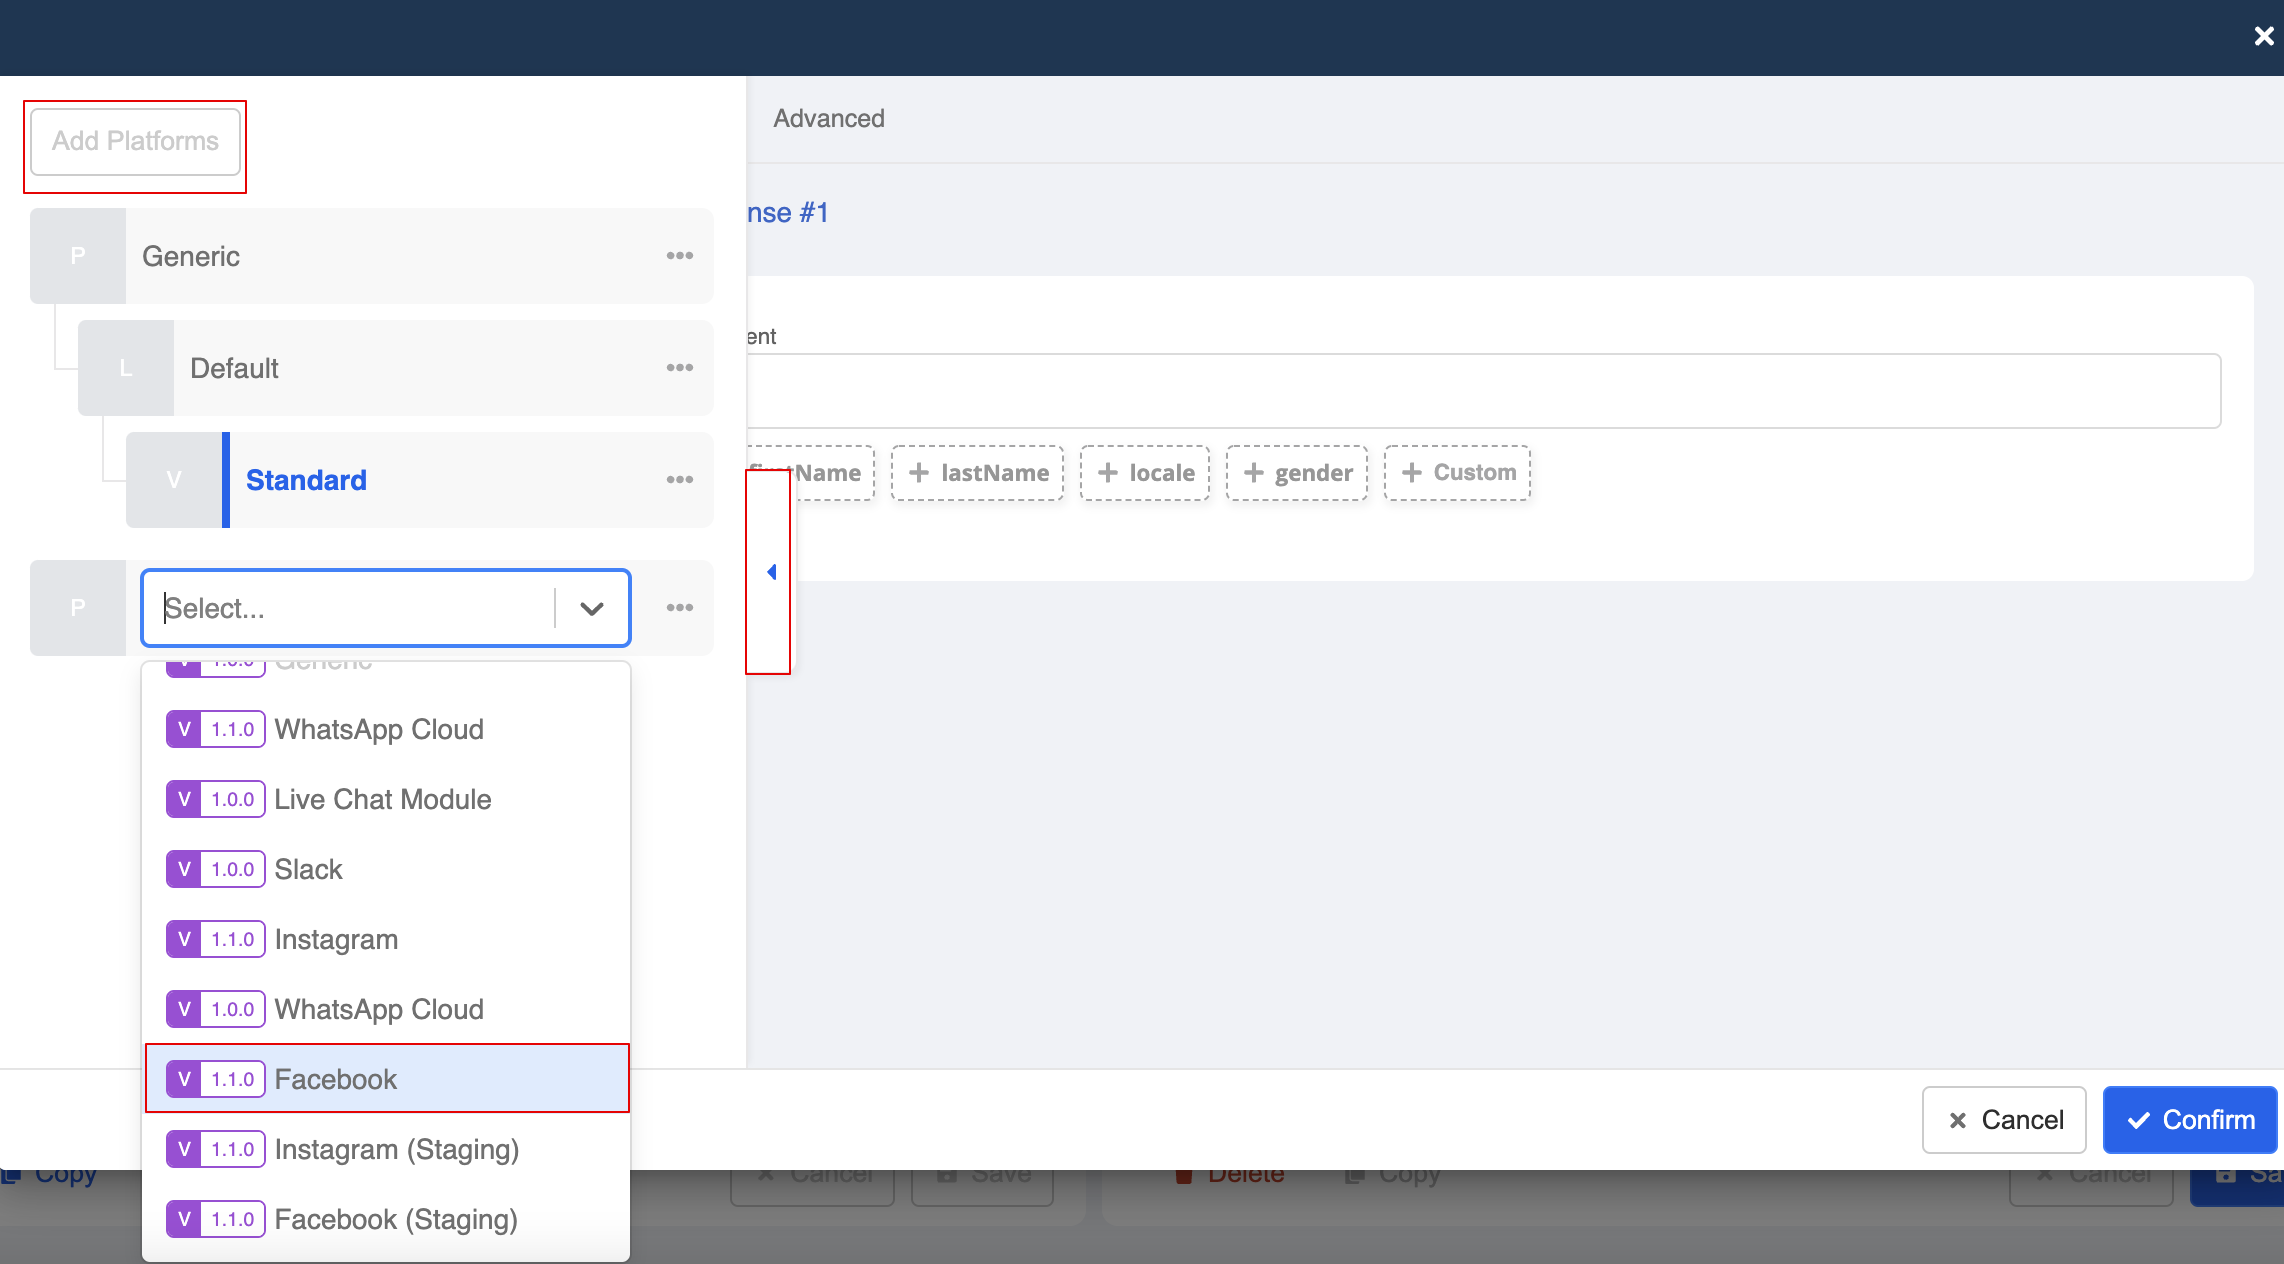
- Open the platform tab, and select "Add Platform". Choose the "Facebook" from the dropdown list.
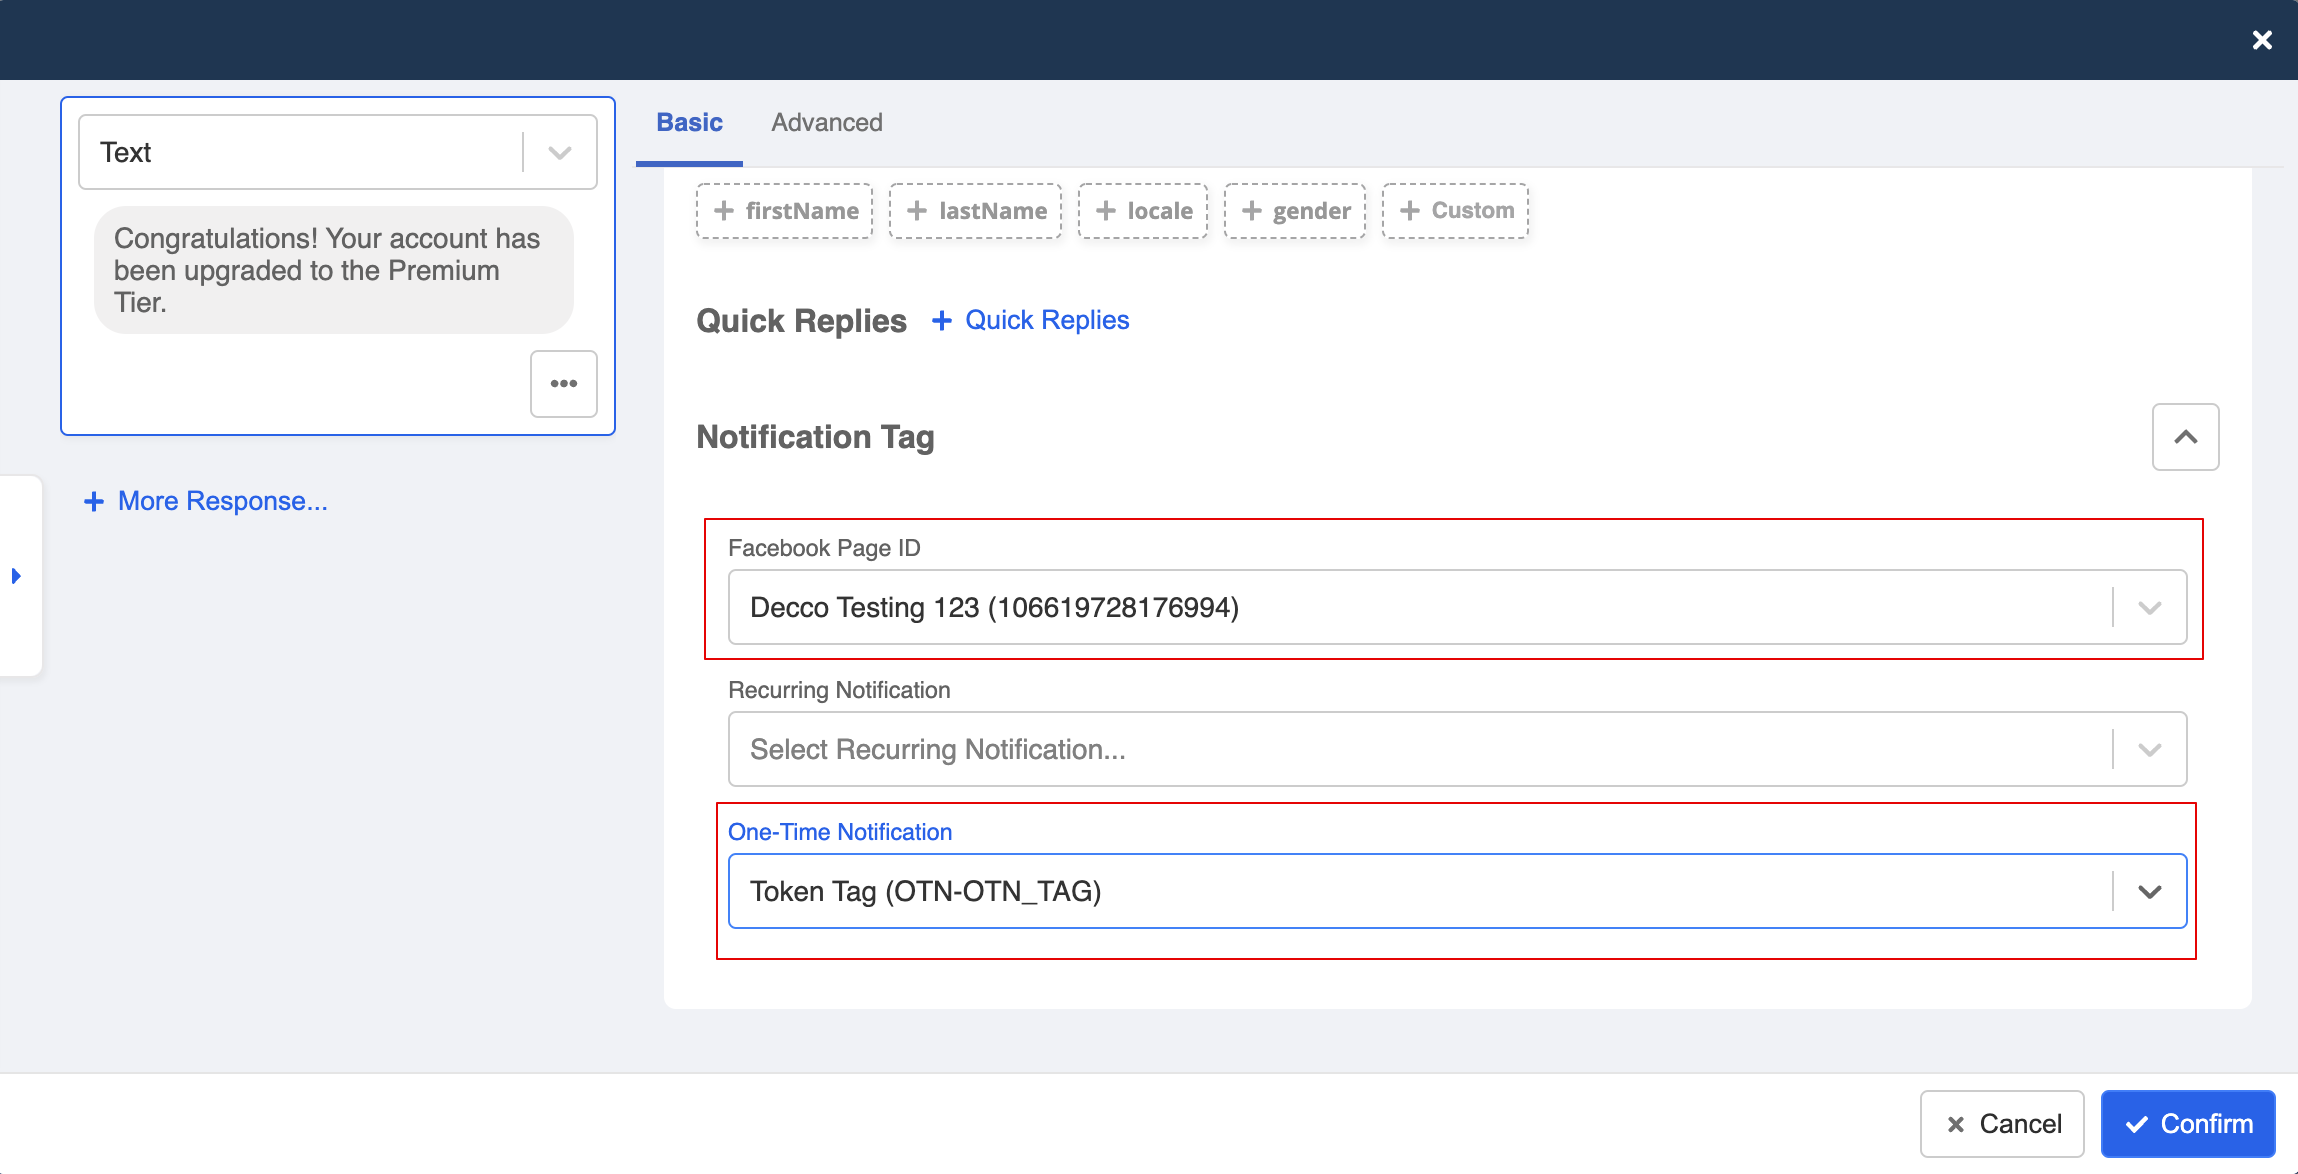
- Enter the text for the broadcast message. After that, click to expand the Notification Tag section.
- Select the corresponding Facebook Page ID and One-time Notification Tag.
- After saving the response modal, you can schedule the time to send the broadcast message.
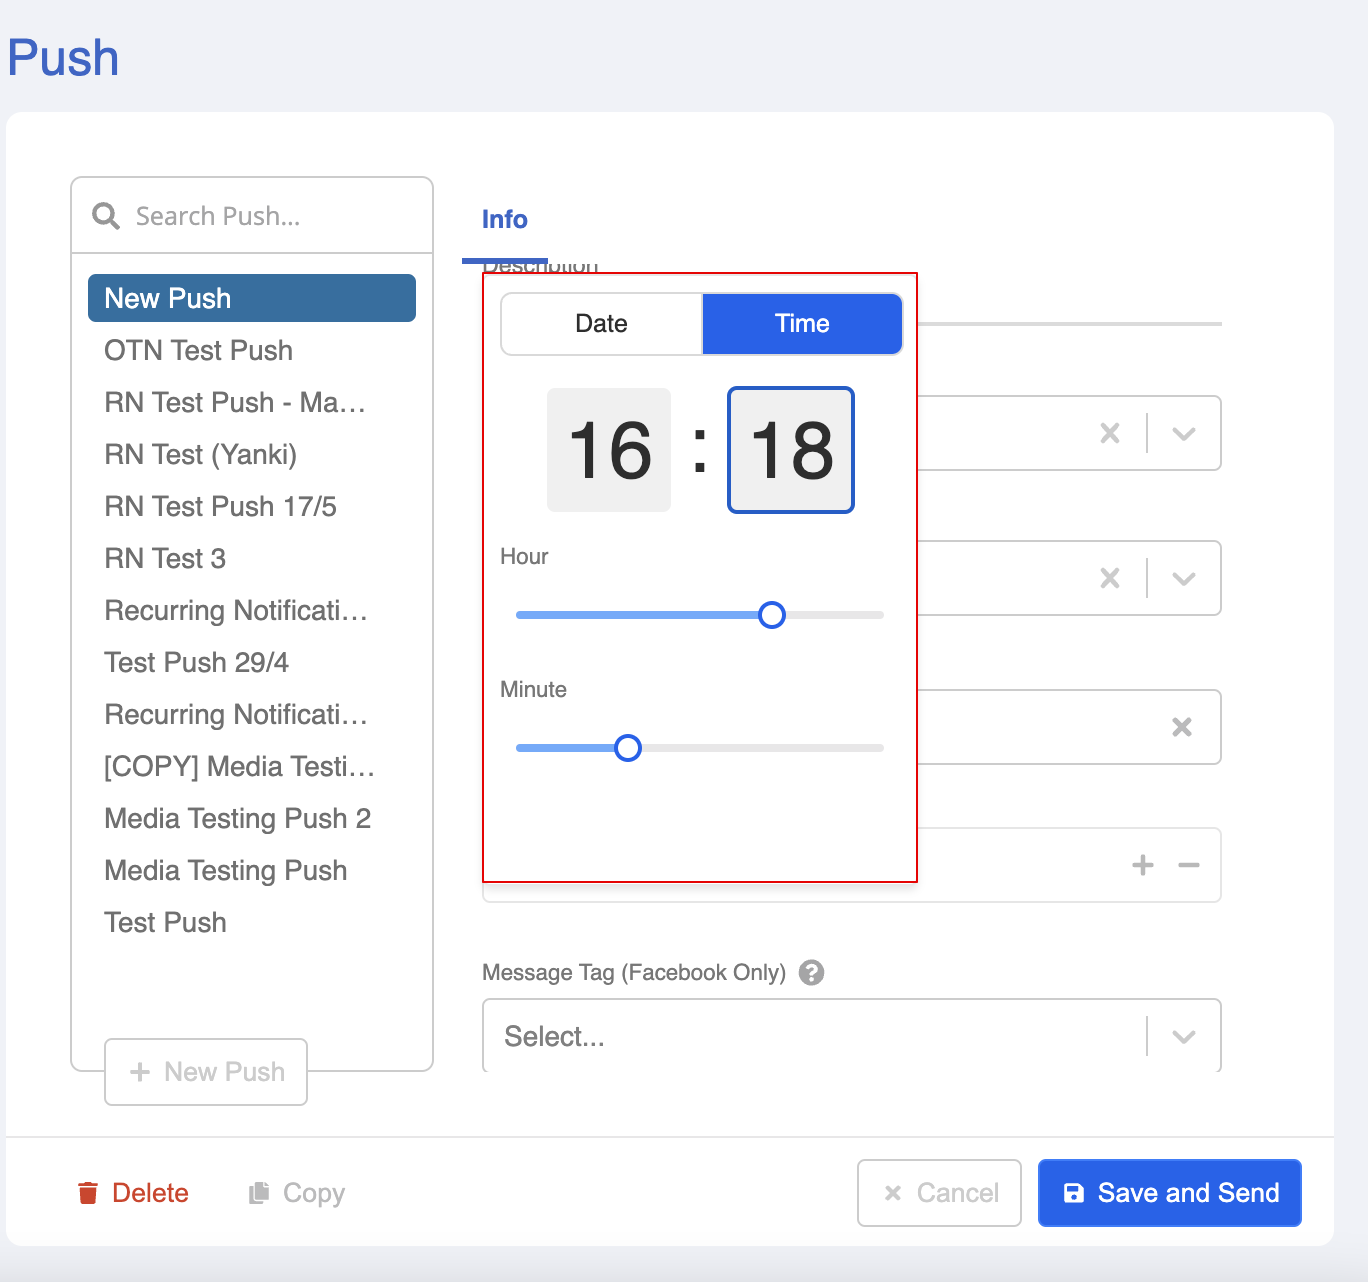
- Finally, click "Save and Send" to send out the broadcast.
